Harvest Right Freeze Dryer Manual: A Comprehensive Guide
This manual provides essential guidance for all Harvest Right freeze dryer owners, covering operation, maintenance, and troubleshooting for optimal performance.
It details everything from initial setup and the freeze-drying process to safety precautions and support contact information, ensuring long-lasting results.
Freeze drying, also known as lyophilization, is a dehydration process typically used to preserve perishable materials and make them more convenient for storage. This innovative technique works by freezing the material, then reducing the surrounding pressure to allow the frozen water in the material to sublimate directly from the solid phase to the gas phase.
Unlike conventional drying methods that utilize heat, freeze drying preserves the structure, flavor, and nutritional value of the food. It’s a remarkably effective method for long-term preservation, extending shelf life significantly. The Harvest Right freeze dryer brings this powerful technology directly into your home, empowering you to preserve garden harvests, prepare emergency food supplies, and enjoy the convenience of readily available, high-quality ingredients.
This process removes up to 98% of the moisture, inhibiting the growth of microorganisms and enzymatic activity that cause spoilage.
Why Choose a Harvest Right Freeze Dryer?
Harvest Right freeze dryers stand apart due to their user-friendly design and robust performance, bringing commercial-grade preservation capabilities to the home. Unlike other preservation methods, freeze drying retains up to 97% of the nutrients in your food, ensuring maximum nutritional value.
These dryers are remarkably versatile, capable of preserving a wide range of foods – from fruits and vegetables to meats and complete meals. They offer a significant advantage over canning or dehydrating, preserving both taste and texture.
Harvest Right prioritizes ease of use, with intuitive controls and automated cycles. Plus, their commitment to customer support, accessible at 1-800-700-5508, provides peace of mind. Investing in a Harvest Right means investing in long-term food security and quality.

Understanding the Benefits of Freeze-Dried Food
Freeze-dried food offers unparalleled advantages in terms of preservation, nutrition, and convenience, making it a superior choice for long-term storage. The process removes almost all moisture, inhibiting the growth of bacteria, mold, and yeast, resulting in an exceptionally long shelf life – often exceeding 25 years when properly stored.
Crucially, freeze drying preserves the original flavor, color, and texture of food far better than other methods like canning or dehydration. Retaining up to 97% of the original nutrients ensures a healthy and wholesome food supply.
Freeze-dried foods are lightweight and require no refrigeration, making them ideal for camping, emergency preparedness, and reducing food waste. They rehydrate quickly and easily, offering a convenient meal solution anytime, anywhere.

Unboxing and Initial Setup
Carefully unpack your Harvest Right freeze dryer and familiarize yourself with the major components before beginning the assembly process for optimal results.
Unpacking Your Freeze Dryer
Upon receiving your Harvest Right freeze dryer, carefully inspect the shipping container for any signs of damage during transit. If damage is apparent, document it immediately with photographs and contact both the carrier and Harvest Right support at 1-800-700-5508.
Once confirmed safe, open the container and remove all packing materials. A comprehensive inventory of components should be performed, verifying that all listed parts are present. Retain the original packaging materials for potential future transport or warranty claims.
Take note of any protective coverings on the freeze dryer itself and remove them gently. Be mindful of the weight of the unit and utilize appropriate lifting techniques to avoid injury. Proper unpacking sets the stage for a smooth assembly and years of successful freeze-drying!
Major Components Identification
Your Harvest Right freeze dryer consists of several key components working in harmony. The main unit houses the drum, shelves, and refrigeration system. A powerful vacuum pump is crucial for creating the necessary low-pressure environment.
The oil reservoir, integral to the vacuum pump’s function, requires regular monitoring. You’ll also find a moisture drain and filter, essential for removing condensation during operation. The control panel provides the interface for managing the freeze-drying cycles and customizing settings.
Additionally, there are various hoses and connectors for linking the components. Familiarizing yourself with each part’s location and function is vital for proper assembly, operation, and maintenance, ensuring optimal freeze-drying performance and longevity.
Freeze Dryer Assembly Instructions
Begin by carefully unpacking all components and verifying against the parts list. Position the main freeze dryer unit on a stable, level surface, ensuring adequate ventilation. Connect the vacuum pump to the designated port on the dryer, securing it firmly with the provided hardware;
Attach the oil reservoir to the vacuum pump, ensuring proper alignment and a tight seal. Connect the hoses between the dryer, pump, and moisture drain, again verifying secure connections.
Carefully insert the shelves into the drum, ensuring they slide smoothly into place. Finally, connect the power cord and double-check all connections before powering on. Refer to the detailed diagrams in this manual for visual guidance throughout the assembly process.

Operating Your Freeze Dryer
Successfully operating your Harvest Right requires understanding the main points of operation and the complete freeze-dry process for optimal results.
Main Points of Operation
Understanding the core operational aspects of your Harvest Right freeze dryer is crucial for achieving consistently high-quality results. The process begins with proper tray preparation, ensuring food is frozen solid before initiating the drying cycle. Accurate loading is vital; avoid overcrowding to allow for efficient sublimation.
The machine’s interface allows for cycle customization, but initially, utilizing pre-set programs for common food types is recommended. Monitoring the vacuum pressure is essential – a strong vacuum is key to effective freeze-drying. Pay close attention to the condensation build-up in the collector; regular checks prevent overflow.
Finally, familiarize yourself with the machine’s automatic features, such as defrost cycles, and understand how to interpret the display’s indicators. Consistent attention to these main points will maximize your freeze dryer’s performance and longevity, delivering perfectly preserved foods every time.
The Freeze Dry Process Explained

Freeze drying, or lyophilization, is a sophisticated dehydration method preserving food by removing water through sublimation. Initially, the food is frozen solid, then placed within the freeze dryer’s vacuum chamber. A powerful vacuum lowers the atmospheric pressure, causing the frozen water to transition directly from a solid (ice) to a gas, bypassing the liquid phase.
This process, driven by gentle heat, prevents cellular damage typically associated with conventional drying methods. The water vapor is then collected and frozen on the machine’s condenser. This leaves behind a remarkably well-preserved product, retaining its original flavor, nutrients, and structure.
The entire cycle consists of freezing, primary drying (water removal), and secondary drying (residual moisture elimination), resulting in a lightweight, shelf-stable food item ready for long-term storage.
How to Freeze Dry: A Step-by-Step Guide
Begin by preparing your food – slice, dice, or spread it evenly on freeze dryer trays. Ensure food is fully frozen before placing trays into the machine; pre-freezing enhances efficiency. Next, seal the freeze dryer and initiate the cycle via the control panel, selecting the appropriate preset or customizing settings.
The machine will automatically pull a vacuum and begin the freezing stage, followed by primary and secondary drying. Monitor the process through the display, noting cycle times which vary based on food type and quantity.
Once complete, vent the freeze dryer, remove the trays, and assess dryness. Properly freeze-dried food will be lightweight and brittle. Package immediately in airtight containers with oxygen absorbers for optimal preservation.
What Can Be Freeze Dried? (Food Compatibility)
The Harvest Right freeze dryer excels at preserving a vast array of foods, offering remarkable versatility. Fruits, vegetables, meats, dairy, and even complete meals are all suitable candidates for freeze-drying, extending their shelf life significantly. High-fat content foods, while possible, may require longer drying times and benefit from pre-treatment.
Certain items, like oily nuts or seeds, can become rancid more quickly post-drying, necessitating oxygen absorbers and airtight packaging. Foods with high sugar content may also require adjustments to settings.
Generally, almost anything edible can be freeze-dried, but experimentation and careful observation are key to achieving optimal results for each specific food type.
Using the “Customize” Settings
The “Customize” settings on your Harvest Right freeze dryer unlock advanced control over the freeze-drying process, allowing for tailored preservation of various food types. This feature enables adjustments to drying time, temperature, and vacuum levels, optimizing results beyond the pre-programmed cycles.
Experimentation is encouraged to fine-tune settings for specific foods, particularly those with unique moisture content or density. For example, denser items may benefit from extended drying times.
Carefully monitor the process when using custom settings, and consult online resources or Harvest Right support for guidance on optimal parameters for different food categories. Mastering customization maximizes the dryer’s potential.

Maintenance and Troubleshooting
Regular maintenance, including vacuum pump care and temperature checks, ensures optimal performance. Addressing issues like overheating or damage promptly guarantees longevity and safety.
Vacuum Pump Maintenance Schedule
Maintaining your vacuum pump is crucial for consistent freeze-drying performance. The oil should be checked before each use for contamination and level; top off as needed with the recommended Harvest Right vacuum pump oil.
A full oil change is recommended every 50-100 hours of operation, or at least every three months, even with infrequent use. This prevents buildup of moisture and debris that can reduce pump efficiency.
To change the oil, ensure the pump is off and cool. Drain the old oil completely, then refill to the appropriate level indicated on the sight glass. Dispose of used oil responsibly, following local regulations.
Regularly inspect the pump for any leaks or unusual noises. A well-maintained pump will significantly extend the life of your freeze dryer and ensure optimal vacuum levels for successful freeze-drying.
Vacuum Pump Runs Hot: Causes and Solutions
A warm vacuum pump during operation is normal, but excessive heat indicates a potential issue. Common causes include restricted airflow around the pump, contaminated oil, or prolonged operation at high temperatures.
Solutions: First, ensure the pump has adequate ventilation and isn’t blocked by obstructions. Check the oil level and condition; dirty or low oil significantly increases friction and heat. Perform an oil change if necessary, using only Harvest Right recommended oil.
If the pump continues to overheat, reduce the duration of continuous operation, allowing it to cool down periodically. Inspect for any leaks or unusual noises, which could indicate internal damage.
If overheating persists despite these measures, contact Harvest Right support at 1-800-700-5508 for further assistance.
Recommended Operating Temperatures
Maintaining appropriate operating temperatures is crucial for efficient freeze-drying and optimal food preservation. The ideal ambient temperature for your Harvest Right freeze dryer is between 60°F (15°C) and 80°F (27°C). Operating outside this range can affect cycle times and potentially impact the quality of your freeze-dried goods.
Lower temperatures may extend freeze-drying cycles, while excessively high temperatures can strain the system and reduce its lifespan. Ensure the machine is placed in a well-ventilated area, away from direct sunlight or heat sources.

Monitor the pump’s temperature as described in the troubleshooting section; overheating indicates a problem. Consistent adherence to these temperature guidelines will maximize performance and ensure the longevity of your Harvest Right appliance.
Safety Information & Precautions
Prioritizing safety is paramount when operating your Harvest Right freeze dryer. Always disconnect the unit from the power source before performing any maintenance or cleaning procedures. Never attempt to disassemble or repair the vacuum pump yourself; contact qualified technicians for assistance.
Exercise caution when handling the stainless steel trays as they can become hot during operation. Avoid placing flammable materials near the freeze dryer. Ensure adequate ventilation to prevent the buildup of any potentially harmful vapors.
Always supervise the freeze-drying process and never leave the machine unattended for extended periods. Refer to the full manual for detailed safety guidelines and heed all warning labels affixed to the unit.
Never Operate if Damaged: Identifying Issues
Operating a damaged freeze dryer poses significant safety risks and can lead to further complications. Before each use, thoroughly inspect the unit for any visible signs of damage, including cracks in the chamber, dents in the housing, or frayed power cords.
Pay close attention to the vacuum pump, checking for leaks, unusual noises, or excessive heat. If you notice any of these issues, immediately discontinue use. Also, inspect the door seal for proper closure; a compromised seal will affect the freeze-drying process.
Do not attempt to operate the freeze dryer if any components are missing or malfunctioning. Contact Harvest Right support for assistance and repairs before resuming operation.
Be Careful About What You Put In: Material Restrictions
Protecting your Harvest Right freeze dryer requires careful consideration of the materials placed inside. Avoid freeze-drying anything containing flammable or explosive substances, as this presents a serious safety hazard. Liquids, unless properly frozen beforehand, can damage the vacuum pump and other internal components.
Certain materials, like metals, may react negatively during the freeze-drying process, potentially compromising the food quality or damaging the machine. Always ensure items are appropriately prepared and packaged for freeze-drying, using food-grade containers and materials.
Never introduce corrosive substances into the freeze dryer chamber. Refer to the comprehensive list of compatible and incompatible materials in the full manual for detailed guidance.

Storage and Packaging
Proper packaging and storage are crucial for maintaining the quality and extending the shelf life of your freeze-dried foods, ensuring long-term preservation.
Packaging and Storing Freeze-Dried Foods
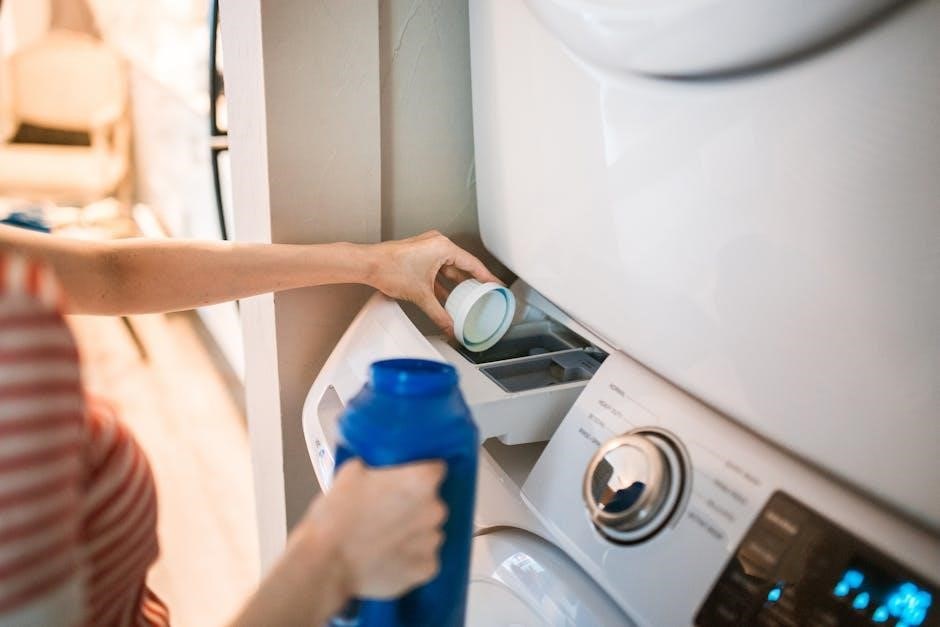
Successfully packaging freeze-dried foods is vital for preserving their quality and extending their impressive shelf life. Oxygen is the enemy, so minimizing exposure is paramount. Mylar bags, specifically designed for long-term food storage, are highly recommended due to their excellent barrier properties against oxygen, moisture, and light.

Before sealing, consider adding oxygen absorbers to the bags; these small packets consume any residual oxygen, further enhancing preservation. Heat sealing the Mylar bags creates an airtight environment, crucial for preventing spoilage. Properly labeled containers, stored in a cool, dark, and dry location, will maximize the longevity of your freeze-dried goods.
Avoid storing near sources of heat or humidity. While freeze-dried foods are remarkably stable, following these guidelines ensures they remain delicious and nutritious for years to come, providing a reliable food supply whenever needed.
Optimizing Shelf Life of Freeze-Dried Goods
Maximizing the shelf life of your freeze-dried foods hinges on meticulous packaging and storage practices. The key is to create an environment that completely excludes oxygen, moisture, and light – the primary culprits of degradation. Utilizing high-quality Mylar bags, coupled with oxygen absorbers, is a foundational step towards long-term preservation.
Ensure bags are heat-sealed correctly, verifying a complete airtight closure. Store these sealed packages in a consistently cool, dark, and dry environment, ideally between 60-80°F (15-27°C). Avoid fluctuating temperatures and humidity levels, as these can compromise the seal and introduce moisture.
Properly labeled and dated containers further aid in organization and tracking. When stored correctly, freeze-dried foods can maintain their quality for up to 25 years or more, offering exceptional long-term food security.

Returns and Support
Harvest Right offers a clear returns policy and dedicated support to ensure customer satisfaction with their freeze dryers and related accessories.
For assistance, contact them directly at 1-800-700-5508.
Returns Policy and Procedures
Harvest Right strives for complete customer satisfaction with every freeze dryer purchase. Should you encounter any issues or be dissatisfied with your product, please review the following return procedures. All return requests must be initiated within a reasonable timeframe from the original purchase date, and are subject to assessment by Harvest Right’s customer support team.
To begin a return, contact Harvest Right support at 1-800-700-5508 to obtain a Return Merchandise Authorization (RMA) number. Products must be returned in their original packaging, with all included accessories, and in resalable condition. Customers are generally responsible for return shipping costs, unless the return is due to a defect in materials or workmanship.
Refunds will be issued upon receipt and inspection of the returned product. Certain restrictions may apply to customized or used items. Please note that shipping and handling fees are typically non-refundable. Detailed information regarding the full return policy can be found on the Harvest Right website, ensuring a transparent and efficient process for all customers.
Contacting Harvest Right Support (1-800-700-5508)
Harvest Right is dedicated to providing exceptional customer support throughout your freeze-drying journey. For any questions, concerns, or assistance with your freeze dryer, our knowledgeable support team is readily available. The quickest and most direct way to reach us is by calling our toll-free number: 1-800-700-5508.
Our support representatives can assist with troubleshooting, operational guidance, maintenance schedules, and understanding the various features of your Harvest Right appliance. We are committed to resolving your inquiries efficiently and effectively.
Beyond phone support, you can also find valuable resources, including FAQs, instructional videos, and detailed manuals, on the official Harvest Right website. We strive to empower our customers with the knowledge and tools needed to maximize their freeze-drying experience. Don’t hesitate to reach out – we’re here to help!