NHS Frozen Shoulder Exercise PDFs Overview
Explore NHS‑issued PDF guides detailing frozen shoulder rehab. They outline stages, recommended stretches, and progression plans. Downloadable from NHS sites, these resources help patients track exercises, set goals, and coordinate care with physiotherapists. Use them to stay on track!!!.
1.1 How to Access NHS PDF Resources
To locate the official NHS frozen‑shoulder exercise PDFs, begin at the national NHS website. Use the search bar and type “frozen shoulder exercise PDF” or “capsular stretch guide”. The results will list downloadable documents from trusted NHS trusts such as NHS Ayrshire & Arran, NHS Greater Glasgow, and NHS England. Click the link that matches your region; the PDF will open in the browser, and you can save it to your device or print it for home use.
Many trusts also host the files on their local physiotherapy portals. Log in with your NHS number or patient portal credentials, navigate to the “Health & Wellbeing” section, and select “Exercise & Rehabilitation”. A sub‑menu will display “Frozen Shoulder” resources. Download the PDF titled “Frozen Shoulder Exercise Programme” and keep it in a folder labeled “Rehab”.
If you are unable to find a PDF online, contact your GP or local physiotherapy clinic. They can email you a copy or provide a QR code that links directly to the NHS resource. Always verify the document’s publication date; the most recent versions incorporate updated guidelines from the British Association of Sports and Exercise Physiologists.
Additionally, the NHS Digital portal offers an interactive tool where you can input your symptoms and receive a personalized exercise list. After logging in, select “Self‑Assessment” under the “Musculoskeletal” category. The tool will generate a PDF that includes the same exercises but tailored to your pain level and mobility. Save this file to your device or share it via email with your physiotherapist. Remember to keep the PDF updated; if you notice new exercises or modifications, replace the old file to maintain consistency with current NHS recommendations.
Patients should also keep a log of pain levels and range of motion after each session. Recording these metrics helps physiotherapists adjust the program and ensures that exercises remain safe and effective throughout recovery. Follow guidance close

Exercise Levels and Stages
Level 1: Active movement exercises control. Level 2: Strengthening drills build shoulder support. Level 3: Capsular stretches restore range. Follow NHS PDF safety!!!! now!! today!.
Use the PDF’s step‑by‑step illustrations to ensure right form and avoid pain now.

2.1 Painful Stage (Level 1)
During the painful stage, the NHS PDF recommends gentle, pain‑free movements that do not provoke stiffness. The focus is on maintaining joint mobility without over‑stretching. Patients are advised to perform active shoulder flexion and abduction within a comfortable arc, typically 0° to 90°, holding each position for 5–10 seconds. Repetitions should be limited to 10–15, and the exercise should be repeated 3–4 times daily. The NHS guidance stresses the importance of avoiding any movement that causes sharp pain; if discomfort arises, the range should be reduced immediately. A common exercise is the pendulum swing: the patient leans forward, allowing the affected arm to dangle, then gently swings it in small circles, first clockwise, then counter‑clockwise, for 10–15 seconds each direction. This passive motion promotes blood flow and reduces adhesions. Another recommended activity is the “shoulder adduction stretch”: placing the arm across the chest, the non‑affected arm pulls the elbow toward the midline, holding for 5–10 seconds, repeated 10 times. These exercises are designed to keep the capsule supple while protecting the inflamed tissues. The NHS PDF also advises patients to keep the shoulder in a neutral position during daily tasks, using pillows or cushions to support the arm and prevent compensatory movements. Consistency is key; patients should aim for a routine that includes these gentle motions at least three times a day, gradually increasing duration as pain subsides. The PDF emphasizes that progression to the next stage should only occur once the pain has reduced to a tolerable level, typically below 3 on a 0–10 pain scale. Monitoring pain levels before and after each session helps determine readiness for stronger exercises. By strictly following these Level 1 guidelines, patients can prevent the shoulder from becoming locked and set the foundation for subsequent strengthening and stretching phases. The PDF also highlights the importance of communication with a physiotherapist, who can adjust the program based on individual response and ensure safe progression. Always consult your healthcare provider before starting or modifying any exercise routine.
2.2 Stiff Stage (Level 2)
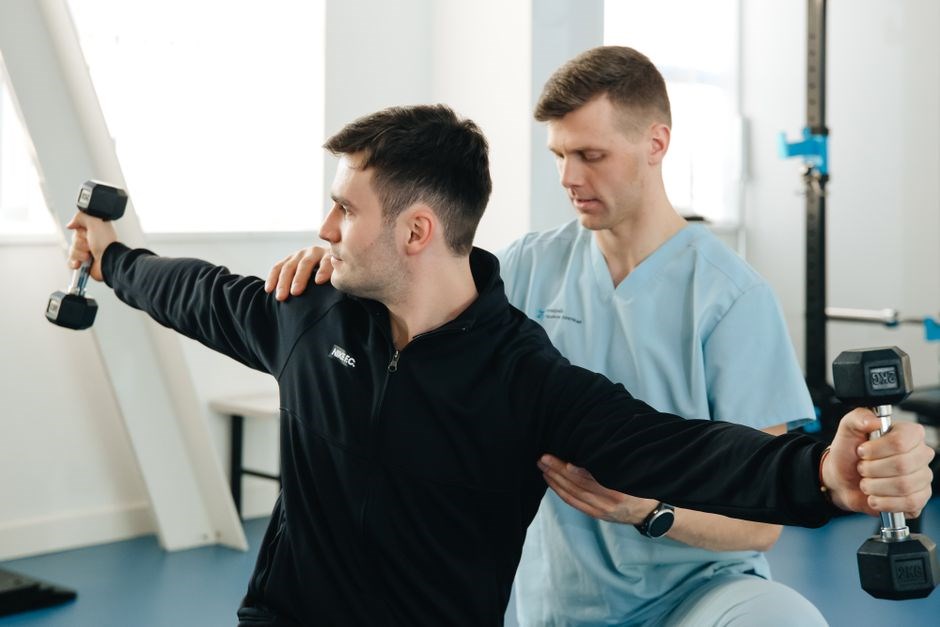
In the stiff stage, NHS PDFs emphasize gentle, pain‑tolerant movements that preserve joint mobility without provoking inflammation. Patients are instructed to perform active shoulder abduction and external rotation using a light resistance band, keeping the elbow flexed at 90° and the shoulder in a neutral position. Each repetition should be held for 5–10 seconds, repeated 10–15 times, with a rest of 30–60 seconds between sets. The wall push‑up is another key exercise: standing a few feet from a wall, placing both hands flat, slowly lowering the body until the elbows form a 90° angle, then pushing back up. This movement should be completed 10–12 times, 2–3 sets, and is designed to strengthen the deltoid and rotator cuff while keeping the joint load low. Capsular stretches such as the cross‑body stretch are introduced: the patient pulls the affected arm across the chest with the opposite hand, holding for 15–20 seconds, repeating 8–10 times. The PDF stresses that any stretch should not exceed mild discomfort; sharp pain signals the range must be reduced. Daily practice is recommended, with gradual increases in hold time and repetitions as pain subsides. Pain monitoring on a 0–10 scale before and after each session ensures the level remains below 3 for safe progression. Consistency, correct form, and communication with a physiotherapist are emphasized to avoid re‑injury. By following these Level 2 protocols, patients can restore range of motion, build strength, and prepare for the recovery stage. Progression to Level 3 should only occur when the patient can perform 10–15 wall push‑ups without pain and hold the cross‑body stretch for 30 seconds comfortably. This structured approach reduces chronic stiffness and supports a smooth transition to full function.

2.3 Recovery Stage (Level 3)
Once pain and stiffness subside, NHS PDFs guide patients into a recovery phase that focuses on restoring full strength, endurance, and functional use of the shoulder. The recommended routine incorporates progressive resistance exercises: use a light dumbbell or resistance band for shoulder flexion, abduction, and external rotation, performing 3 sets of 12–15 reps with a 2‑second concentric and eccentric phase. The wall‑push‑up is advanced to a 3‑foot distance, allowing a deeper range of motion; patients should aim for 15–20 repetitions, 3 sets, while maintaining a neutral wrist and elbow angle. Functional drills, such as the “shoulder‑bridge” or “scapular retraction” are added to improve thoracic mobility and scapular stability; these are performed 2–3 times daily, holding each position for 10–15 seconds. Dynamic stretches, including the “arm‑circular” motion, are introduced to enhance proprioception: patients rotate the arm in a full circle, 10 times clockwise and counter‑clockwise, 2–3 sets. The PDF stresses the importance of maintaining a pain score below 3 on a 0–10 scale; any sharp discomfort should prompt a reduction in load or a pause. Progress is tracked via a simple log, noting range, strength, and functional tasks such as reaching overhead or carrying light objects. By the end of Level 3, patients should achieve near‑normal active range, be able to perform daily activities without pain, and have a clear plan for maintenance exercises. This structured progression minimizes the risk of recurrence and supports a return to normal activity levels. Patients should review progress with therapist to the plan and avoid setbacksnow.

Common NHS-Guided Exercises
These NHS PDFs list three staples: shoulder adduction stretch, pendulum swings, and wall push‑ups. Perform 10–15 reps, 3 sets, hold 5–10 s. They target pain relief, mobility, and strength, guiding patients safely back to daily life. Follow the PDF schedule for results today! Stay consistent.
3.1 Shoulder Adduction Stretch
Place the affected arm across your chest, using the healthy arm to gently pull it further toward the opposite shoulder. Hold the stretch for 5–10 seconds, feeling a mild tension but no pain. Repeat this motion 10 times, resting briefly between sets. Perform the exercise twice daily, ideally in the morning and evening, to maintain joint mobility without overstressing the capsule. Gradually increase hold time as comfort allows, but never force the arm beyond a gentle stretch. Experience pain, stop. This simple yet effective stretch helps loosen the joint capsule, improve range of motion, and reduce stiffness associated with frozen shoulder. Consistency is key; incorporate the adduction stretch into your routine alongside other NHS‑recommended exercises for optimal recovery.
Remember to keep the arm elevated when resting, and avoid lifting heavy objects that could strain the shoulder. Gentle range‑of‑motion activities, such as slow arm circles, can complement the stretch without causing discomfort. Keep a log of your daily exercises, noting any changes in pain or mobility; this helps you and your clinician adjust the plan as needed. Stay patient—progress may be gradual, but consistency and adherence to the prescribed routine will lead to improved function over time.
Finally, ensure you maintain good posture throughout the day; slouching can worsen stiffness. If you notice any sudden increase in pain or swelling, seek medical advice promptly.
3.2 Pendulum Exercise

Stand with the unaffected arm supported on a stable surface, such as a table or chair. Gently lean forward, allowing the affected arm to hang freely. Begin the pendulum motion by letting the arm swing in a small circle, first clockwise, then counter‑clockwise. Keep the movement gentle, using the body’s momentum rather than muscle effort. Perform 10–15 gentle circles in each direction, repeating the sequence twice daily. This exercise promotes joint lubrication, reduces stiffness, and encourages passive range of motion without stressing the inflamed capsule. Ensure the elbow remains slightly bent to protect the joint. If pain arises, stop immediately and consult a physiotherapist. Consistency, coupled with the NHS‑recommended progression plan, will aid in restoring mobility and diminishing discomfort over time. Patients often find the pendulum exercise soothing, as the gentle rocking motion can reduce muscle tension around the shoulder girdle. It is advisable to perform the exercise in a quiet environment, focusing on slow, controlled movements. Over time, the frequency of circles can be increased slightly, but never beyond the comfort threshold. Documenting each session in a simple log helps track progress and identify patterns that may require adjustment by a healthcare professional. Remember to keep the head upright and avoid tilting the torso, which could alter the pendulum’s path. The exercise can be integrated into a daily routine, such as during a break at work or before bedtime, to reinforce consistency. By combining pendulum swings with other NHS‑guided stretches, patients can create a comprehensive rehabilitation program that addresses both flexibility and strength. It is also recommended to monitor any swelling or redness that may appear after the exercise, as these could indicate an inflammatory flare. If such signs occur, reduce the intensity or pause the routine until symptoms subside. Additionally, pairing pendulum swings with gentle shoulder elevation exercises can further enhance joint mobility. Patients should always listen to their bodies, respecting pain signals, and seek professional guidance if uncertainty arises. Monitor swelling or redness after injections, and pause or reduce intensity if inflammation flares, ensuring safe progressionStay
3.3 Wall Push-Ups
Stand facing a wall, feet hip‑width apart. Place both hands flat on the wall at shoulder height, wider than shoulder‑width. Keep the body straight, core engaged, and shoulders relaxed. Slowly bend the elbows, lowering the chest toward the wall while maintaining a pace. The movement should feel gentle; avoid any sharp pain. Hold the lowered position for a brief moment, then press back to the starting position, extending the arms fully. Perform 10–15 repetitions, gradually increasing to 20 as comfort allows. This exercise strengthens the anterior deltoid, pectoral, and rotator cuff muscles without excessive joint loading. It also encourages scapular stability and improves shoulder joint proprioception. NHS guidelines recommend integrating wall push‑ups into a daily routine, ideally after a warm‑up such as pendulum swings or gentle shoulder circles. If discomfort arises, reduce the depth or stop. Consistency, combined with proper form, can help restore strength and reduce stiffness over time. Patients should monitor for any swelling or increased pain post‑exercise and report such changes to their physiotherapist. The wall push‑up is a low‑impact alternative to floor push‑ups, making it suitable for the painful and stiff stages of frozen shoulder rehabilitation. By gradually increasing repetitions and maintaining a slow tempo, individuals can safely progress through the stages outlined in NHS frozen shoulder exercise PDFs, fostering a smoother recovery trajectory. !!!!!!!!!!

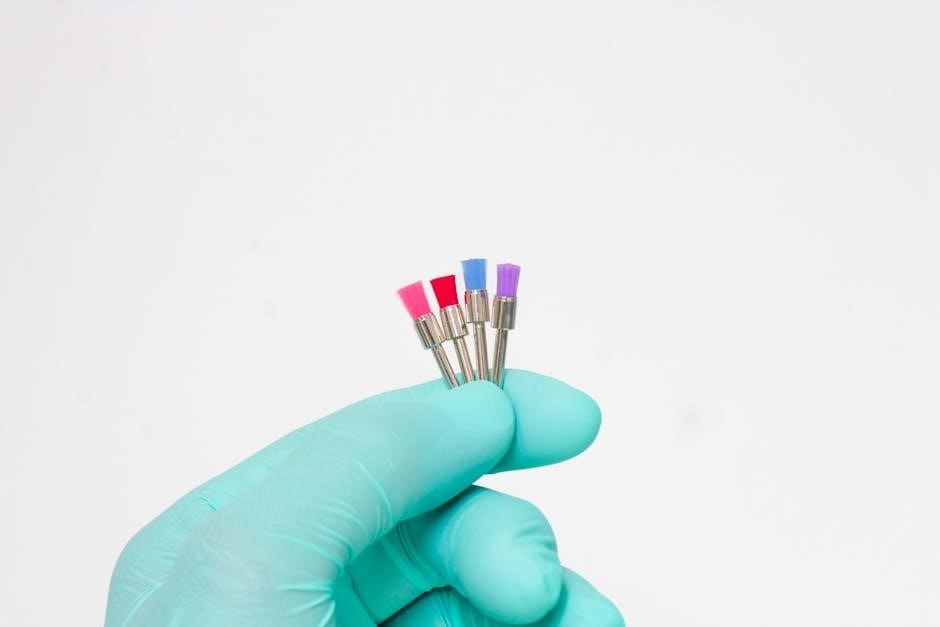
Post-Injection Exercise Protocols
After steroid injection, begin gentle pendulum swings, then progress to passive stretches. NHS PDF advises 10–15 reps, 3 sets daily. Avoid pain, keep range safe. Gradual increase to active motions over 4–6 weeks. Follow NHS PDF schedule, consult physio if stiffness persists. Yields progress!!!
4.1 Early Mobilization
Immediately after injection, NHS guidelines recommend light pendulum movements to encourage joint fluid circulation without stressing the capsule. The patient should sit upright, gently lean forward, and allow the affected arm to swing in a small arc for 10–15 seconds, repeating 10 times. This passive motion helps maintain mobility while the steroid reduces inflammation.

Following pendulums, passive shoulder adduction is advised. With the non‑affected arm, pull the affected arm across the chest, holding the stretch for 5–10 seconds, 10 repetitions. This stretch targets the posterior capsule, easing stiffness while protecting the joint from excessive force.
Patients should avoid active overhead movements for the first 48–72 hours. Instead, focus on gentle wrist flexion and extension to keep the limb functional. The NHS PDF stresses that early mobilization should be pain‑controlled; if any movement causes sharp pain, the patient must stop and consult their physiotherapist.
Daily routine: morning pendulums, mid‑day adduction, evening wrist flexion. Record pain levels on a 0–10 scale to monitor progress. Consistency over the first week sets the foundation for later strengthening and stretching phases outlined in subsequent NHS PDF sections. Adhering to this protocol maximizes recovery speed and reduces the risk of prolonged immobility. Maintain a simple log of pain level and range of motion each day; this data helps therapists adjust the plan for recovery.
Immediately after injection, NHS guidelines recommend light pendulum movements to encourage joint fluid circulation without stressing the capsule. The patient should sit upright, gently lean forward, and allow the affected arm to swing in a small arc for 10–15 seconds, repeating 10 times. This passive motion helps maintain mobility while the steroid reduces inflammation.
4.2 Long-Term Stretching Schedule
After the acute phase, NHS PDFs suggest a structured routine to regain motion and prevent stiffness. The plan spans 4–6 weeks per block, with gradual stretch intensity and hold time. Perform exercises at least five days weekly, keeping movements pain‑controlled and holding 30–60 seconds, 3–5 reps. Include gentle wrist rotations for flexibility.
Shoulder adduction: pull the arm across the chest with the healthy hand until a mild stretch. Hold 30 seconds, repeat 4 times; Add a light band for tension.
Pendulum swings: lean forward and let the arm swing gently. Perform 10 swings, pause, repeat 3 sets. After 3 weeks, add 5‑minute wrist flexion to keep forearm mobility.
Wall push‑ups: stand at arm’s length, elbows at 90°, push until a stretch in the shoulder. Hold 30 seconds, repeat 3 times. Increase hold to 45 seconds after 4 weeks.
Cross‑body reach: pull the arm across the body, deepen the stretch. Hold 30 seconds, repeat 4 times. After 5 weeks, add a small ball for proprioceptiondaily.
Patients record pain scores, stretch duration, and perceived improvement daily. This log helps physiotherapists tailor the next block. Consistency, gradual progression, and adherence to pain thresholds are key to long‑term recovery as outlined in NHS frozen shoulder exercise PDFs. Daily logs enable therapists to adjust intensity, track pain fluctuations, and identify plateau moments, ensuring the program evolves with healing trajectory soon.

Monitoring Progress and Referral
Track pain, range, and daily logs. Use NHS checklists to decide if physiotherapy continues or specialist referral is needed. Consistent updates help clinicians adjust exercise intensity and ensure timely intervention. Monitor progress weekly. and adjust
5.1 Self-Assessment Checklist
Use this concise, NHS‑approved self‑assessment tool to monitor frozen shoulder recovery. Record daily pain (0‑10), range of motion, functional limitations, and exercise adherence. Update weekly and share with your physiotherapist to tailor the next stage of care.
- Daily Pain Score: Rate shoulder discomfort from 0 (no pain) to 10 (worst pain). Note any triggers.
- Active Range of Motion: Measure forward flexion, abduction, and internal/external rotation in degrees. Compare to baseline and target values.
- Functional Tasks: List activities that are difficult (e.g., reaching overhead, brushing hair). Record effort level.
- Exercise Completion: Log each prescribed exercise, sets, reps, and any modifications. Highlight missed sessions.
- Adverse Events: Note swelling, stiffness spikes, or new symptoms that may indicate flare‑ups.
- Progress Notes: Add comments on mood, confidence, and perceived improvement.
Review the checklist with your clinician at each appointment. If pain remains >7/10, ROM <60°, or functional tasks are still limited after 6 weeks, consider referral to a specialist or additional imaging. Consistent tracking empowers both patient and provider to make evidence‑based decisions and accelerate recovery. Remember to hydrate and rest adequately to support joint healing. Sleep!! well.