Welcome to the Sharper Image Drone Instruction Manual! This guide provides essential information to help you safely and effectively operate your drone. Designed for all skill levels, this manual covers features, setup, and troubleshooting to ensure a seamless flying experience. Please read carefully to maximize your enjoyment and understanding of the device.
Overview of the Sharper Image Drone
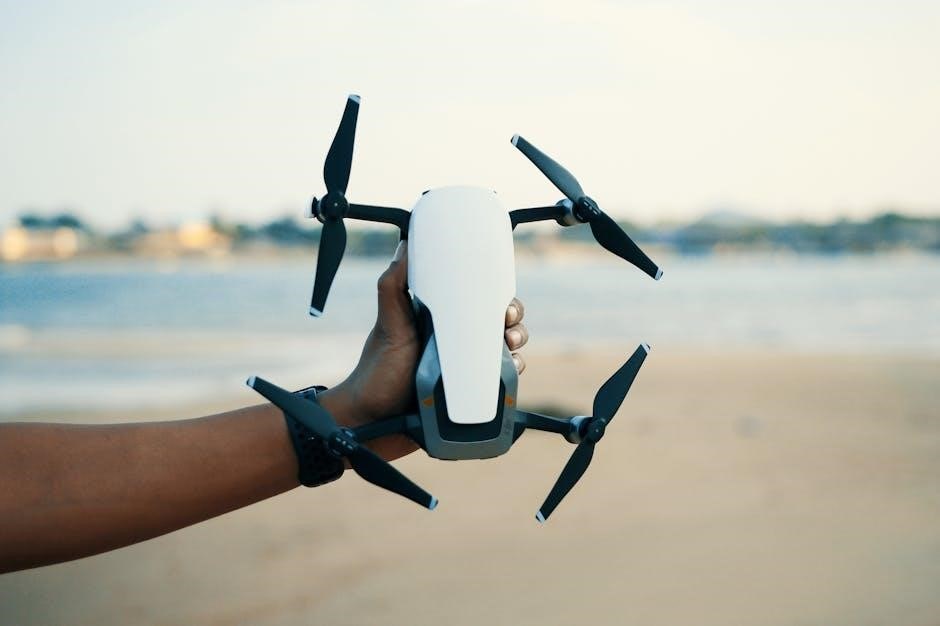
The Sharper Image Drone is a versatile, user-friendly device designed for both indoor and outdoor use. Equipped with a built-in gyroscope for stability and LED directional lights, it offers a 164-foot flight range and HD video capabilities. This nano quadcopter is suitable for all skill levels, delivering smooth flights and easy controls. Its compact design and advanced features make it an excellent choice for capturing memorable moments from the sky.
Importance of Reading the Manual
Reading the manual is crucial for safe and effective operation of the Sharper Image Drone. It provides essential instructions for setup, usage, and maintenance, ensuring optimal performance and longevity. Understanding safety guidelines and troubleshooting tips helps prevent accidents and resolves common issues. Keep this guide handy for future reference to fully enjoy your drone experience and maintain its functionality over time.

Features of the Sharper Image Drone
The Sharper Image Drone offers indoor/outdoor versatility, a built-in gyroscope for stability, LED directional lights, and a 164-ft. flight range, ensuring smooth and enjoyable flights.
Indoor and Outdoor Usage
The Sharper Image Drone is designed for both indoor and outdoor flights, offering versatility for various environments. Its compact size and stable design make it suitable for flying at home or in open spaces. The drone performs smoothly in different settings, ensuring an enjoyable experience regardless of location. This adaptability makes it a great choice for users seeking flexibility in their flying adventures.
Built-in Gyroscope for Stability
The Sharper Image Drone features a built-in gyroscope, enhancing flight stability and control. This advanced technology ensures smooth and steady movements, making it easier for users of all skill levels to operate. The gyroscope automatically adjusts to maintain balance, providing a more enjoyable and precise flying experience. It’s a key feature that contributes to the drone’s overall performance and maneuverability in various conditions.
LED Directional Lights
The Sharper Image Drone is equipped with LED directional lights, enhancing visibility and orientation during flight. These lights not only improve safety but also add a sleek, modern aesthetic to the drone. They illuminate the direction of movement, making it easier to control the drone, especially in low-light conditions or when performing aerial stunts. The LED lights contribute to a more dynamic and enjoyable flying experience while ensuring better navigation and awareness.
Flight Range and Camera Capabilities

The Sharper Image Drone offers an impressive 164-foot flight range, allowing for extended exploration and photography. Equipped with a high-definition camera, it captures crisp photos and videos, which can be stored on an SD card or transferred via USB. This feature-rich drone is perfect for enthusiasts seeking to document their adventures with clarity and precision, making it an ideal choice for both casual and professional use.
Safety Precautions and Warnings
Adhere to all safety guidelines to ensure safe operation. Avoid collisions with obstacles and people. Do not fly near airports or in bad weather conditions. Keep the drone out of reach of children and avoid flying in restricted areas. Always follow local regulations and manufacturer instructions.
General Safety Guidelines
Always follow safety guidelines to ensure safe and responsible operation of your Sharper Image Drone. Keep the drone away from children and pets. Avoid flying near people, animals, or sensitive objects. Do not operate the drone in extreme weather conditions such as heavy rain or strong winds. Ensure the area is clear of obstacles before flying. Follow all local regulations and safety standards.
Operating Environment Considerations
Ensure the drone is operated in a safe and suitable environment. Avoid flying near obstacles, power lines, or tall structures. Choose open, spacious areas for optimal performance. Always maintain a clear line of sight with the drone. Be aware of wind conditions, as strong gusts may affect stability. Follow local regulations and ensure compliance with aviation guidelines in your area. Proper environment selection enhances both safety and flight quality.
Unboxing and Parts List
Inside the box, you’ll find the Sharper Image Drone, remote control, USB-C charging cable, and instruction manual. All components are included for a complete setup experience.
Components Included in the Package
Your Sharper Image Drone package includes the drone unit, a remote control, a USB-C charging cable, and this instruction manual. Additionally, the drone features a built-in rechargeable battery and an SD card slot for storage. Ensure all components are present before proceeding with setup. These items provide everything needed for a complete and enjoyable flying experience.
Understanding the Drone’s Anatomy
The Sharper Image Drone features a sleek design with a power button on top and LED directional lights on the front for easy navigation. The charging port is located on the bottom, and the remote control includes joysticks for precise movement. Familiarizing yourself with these components ensures smooth operation and enhances your flying experience. Proper understanding of the drone’s anatomy is key to safe and effective use.
Charging the Drone
Charge your Sharper Image Drone using the included USB-C cable. Plug the cable into the drone’s charging port and connect to a power source. Allow 1-2 hours for full charge. The LED lights will indicate charging status. Ensure the battery is fully charged before first use to optimize performance and longevity.
First-Time Charging Instructions
Before first use, charge the drone for 1-2 hours using the USB-C cable. Connect the cable to the drone’s port and a power source. LED lights will indicate charging status—steady for charging, off when fully charged. Ensure the battery is fully charged to optimize performance and longevity. Avoid overcharging to maintain battery health and ensure safe operation.
Using the USB-C Charging Cable
To charge the Sharper Image Drone, insert the USB-C end into the drone’s charging port and connect the other end to a compatible power source. Ensure the port is clean and free of debris for proper connection. The LED lights will indicate charging progress. Use only the provided cable to maintain compatibility and safety. Avoid using damaged cables to prevent potential issues during charging.
Pairing the Drone with the Remote Control
Turn on the drone and ensure the remote is off. Locate the pairing button on the drone or remote, press and hold until lights flash, confirming connection.
Syncing the Drone and Remote
Ensure both the drone and remote are turned off. Locate the pairing button on the remote and press and hold it until the LED lights begin to flash. Turn on the drone and wait for the lights to blink, indicating pairing mode. Once both devices are in pairing mode, they should automatically connect. If the connection is successful, the LED lights will stop blinking and remain solid. If pairing fails, restart the process or reset the drone and remote by pressing and holding the reset button for a few seconds. Ensure both devices are fully charged before attempting to pair again.
Calibrating the Drone for Flight
Place the drone on a flat, stable surface. Turn on the drone and remote. Press and hold the power button until the LED lights flash. Rotate the drone 360 degrees slowly to initialize the gyroscope. Once the lights stop blinking, the calibration is complete. Ensure the drone is upright and avoid moving it during this process. Calibration ensures stable flight performance and proper orientation.
Pre-Flight Checks
Ensure the battery is fully charged, propellers are secure, and the remote control is functioning properly. Check for any damage or loose parts before each flight.
Powering On the Drone
Locate the power button on the top of the drone. Press and hold it for 1-2 seconds until the LED lights illuminate. Ensure the remote control is turned off before powering on the drone. Once powered on, the drone is ready for syncing with the remote control. Always follow this sequence to avoid connectivity issues.
Checking the Remote Control Functionality
After powering on the drone, turn on the remote control. Ensure all joysticks and buttons respond correctly. Test the throttle, direction, and stunt buttons to confirm proper functionality. Verify the LED indicators on the remote align with the drone’s status. If any issues arise, refer to the troubleshooting section for resolution. Proper remote functionality is crucial for safe and precise flight control.
Flying the Sharper Image Drone
The LED lights provide clear direction and visibility, enhancing flight experiences both day and night, while indicating drone orientation and status for safe operations.
Basic Flight Controls and Movements
Mastering the Sharper Image Drone’s controls begins with the remote. Pushing the left joystick up increases throttle, while moving it left or right adjusts yaw. The right joystick controls pitch (forward/backward) and roll (side-to-side). Press the power button on the drone until LED lights activate. Ensure the remote is off, then sync by pressing the drone’s stunt button. Practice in an open area to get comfortable with movements and responsiveness.
Using the Stunt Button for Tricks
To perform tricks, locate the stunt button on your remote. Press and hold it to activate stunt mode. The drone will beep, signaling it’s ready. Use the joysticks to execute flips, spins, and other maneuvers. Start at a safe altitude to avoid collisions. Practice tricks in open spaces to master control and precision. The stunt button enhances your flying experience with exciting aerial moves.
Troubleshooting Common Issues
Common issues include connection problems or flight instability. Restart the drone and remote, ensure proper pairing, and check for software updates. Consult the manual for detailed solutions.
Resolving Connection Problems
To resolve connection issues, ensure the drone and remote are properly paired. Turn both off, then restart the drone by pressing and holding the power button until LEDs flash. Re-sync by pressing the pairing button on the remote and drone simultaneously. Ensure no other devices interfere with the 2.4GHz frequency. If issues persist, restart both devices and repeat the pairing process. Consult the manual for additional troubleshooting steps.
Addressing Flight Stability Concerns
If your drone experiences instability, ensure the built-in gyroscope is calibrated. Perform calibration by placing the drone on a flat surface, turning it on, and following the manual’s calibration steps. Check for software updates and ensure the drone is operated in ideal environmental conditions. Avoid flying in strong winds or near obstacles. If issues persist, reset the drone by power-cycling it and retry the calibration process.

Maintenance and Storage
Regularly clean the drone with a soft cloth and store it in a dry, cool place. Avoid exposure to extreme temperatures and moisture. Keep out of reach of children and ensure all components are secure before storage. Proper maintenance ensures optimal performance and extends the drone’s lifespan.
Cleaning the Drone
To maintain your drone’s performance, clean it regularly with a soft, dry cloth. Gently wipe the exterior, paying attention to vents and LED lights. Avoid using harsh chemicals or water, as they may damage electronic components. For stubborn dirt, dampen the cloth slightly but ensure the drone is dry before storage. Regular cleaning prevents debris buildup and ensures smooth operation. Always power off the drone before cleaning.

Proper Storage Techniques
Store your drone in a cool, dry place away from direct sunlight and moisture. Use the original packaging or a protective case to prevent damage. Remove the battery and store it separately in a cool, dry environment. Avoid leaving the drone in extreme temperatures or humid conditions. Regularly check stored components for dust or damage. Proper storage ensures longevity and optimal performance when you’re ready to fly again.
Final Tips for Enjoying Your Drone
To maximize your drone experience, practice in open spaces and avoid extreme weather conditions. Regularly clean the device to maintain performance. Explore all features gradually and refer to this manual for any questions. Always follow safety guidelines and local regulations. Happy flying and enjoy capturing stunning moments with your Sharper Image Drone!
Resources for Further Assistance
For additional support, visit the official Sharper Image website to download the latest manuals or contact customer support. Online forums and tutorials offer valuable tips and tricks. Ensure to use authorized retailers for genuine parts and accessories. Stay updated with firmware upgrades to optimize your drone’s performance and enjoy a hassle-free flying experience.


About the author