Manual shifting in automatic transmissions allows drivers to switch gears using paddle shifters or the gearshift, enhancing control and efficiency without a clutch pedal.
1.1 Overview of Manual Shifting in Automatic Transmissions
Manual shifting in automatic transmissions allows drivers to switch gears using paddle shifters or the gearshift, enhancing control and efficiency without a clutch pedal. This feature, often called “manual mode” or “manumatic,” lets drivers override the automatic system, providing more driver engagement. Unlike traditional manual transmissions, these systems use electronics or hydraulic actuators to handle clutch operation. They offer the convenience of an automatic transmission while allowing drivers to manually select gears for better performance in specific driving conditions, such as hills or sporty driving.
1.2 Types of Manual Shifting Modes: Paddle Shifters and Manual Mode
Modern automatic transmissions offer two primary manual shifting modes: paddle shifters and manual mode. Paddle shifters, located on the steering wheel, allow drivers to upshift or downshift with quick finger movements, enhancing sporty driving experiences. Manual mode, accessed via the gearshift, enables sequential gear changes without automatic intervention. Both modes provide greater driver control, enabling precise gear selection for optimal performance in various driving scenarios, such as spirited driving or navigating steep terrain, while maintaining the convenience of an automatic transmission.

Benefits of Manually Shifting an Automatic Transmission
Manually shifting enhances driver engagement, improves fuel efficiency in specific conditions, and offers safety benefits by providing better control over gear changes.
2.1 Enhanced Driver Control and Driving Experience
Manual shifting in automatic transmissions grants drivers greater control, allowing precise gear selection for improved responsiveness. This feature is particularly beneficial during performance driving or navigating steep terrain, where maintaining the optimal gear ensures stability and power delivery. By engaging manual mode, drivers experience an immersive connection with the vehicle, enhancing the overall driving experience. Additionally, manual shifting reduces unwanted gear changes, providing a smoother and more predictable ride. This capability bridges the gap between automatic convenience and manual precision, catering to those who appreciate both ease and engagement behind the wheel.
2.2 Improved Fuel Efficiency in Specific Driving Conditions
Manual shifting in automatic transmissions can enhance fuel efficiency in certain scenarios, such as hilly or mountainous terrain, where maintaining a specific gear reduces unnecessary shifts. By manually selecting lower gears when climbing uphill, drivers can maintain optimal engine power and reduce fuel consumption. Similarly, when descending, staying in a lower gear helps control speed without constant braking, further improving efficiency. This feature is particularly useful for drivers who frequently tow heavy loads or navigate uneven landscapes, as it allows for more precise control over power delivery and fuel usage.
2.3 Safety Benefits in Certain Situations
Manual shifting in automatic transmissions offers safety advantages in specific scenarios. For instance, when driving downhill, manually downshifting helps maintain control of vehicle speed, reducing reliance on brakes and minimizing wear. In emergencies, such as sudden uphill climbs, manual shifting ensures the engine stays in the optimal power range, preventing stalling. Additionally, in low-traction conditions like snow or ice, manually selecting a lower gear can improve stability and reduce wheelspin, enhancing overall safety and driver confidence.
How to Manually Shift an Automatic Transmission
Manual shifting involves using paddle shifters or the gearshift lever to switch gears, allowing drivers to control speed and torque without a clutch pedal.
3.1 Step-by-Step Guide to Using the Gearshift Lever
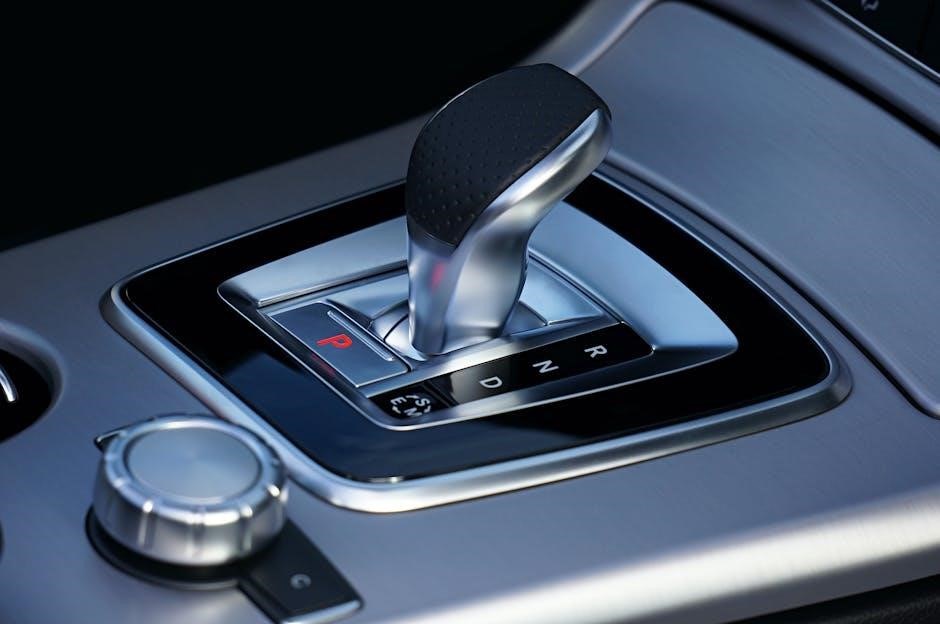
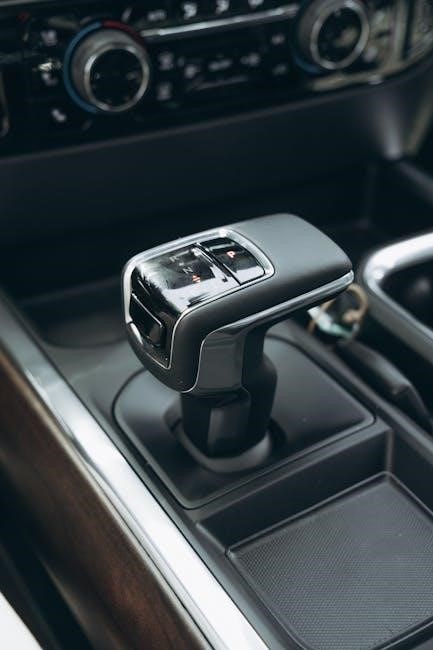
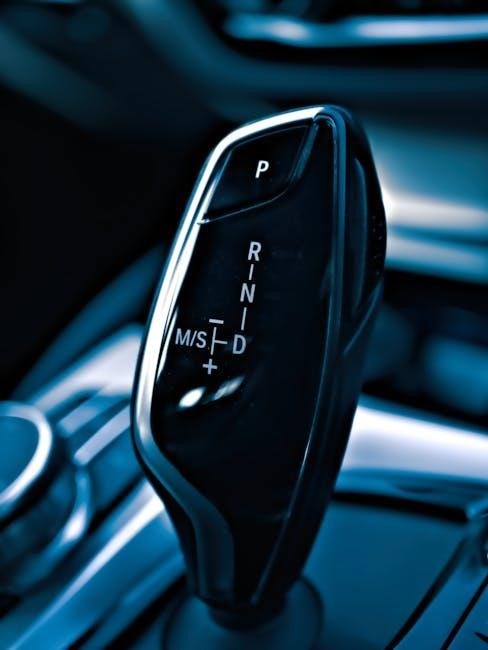
To manually shift using the gearshift lever, start by moving the lever into the manual mode, often labeled as “M” or located to the side of the “D” position. Push the lever forward to upshift or pull it back to downshift. Always ensure the vehicle is moving at an appropriate speed for the selected gear. Use the tachometer or road conditions to determine optimal shift points. For specific instructions, consult your vehicle’s owner’s manual, as procedures may vary. This method provides greater control over speed and torque.
3.2 Understanding Paddle Shifters and Their Operation
Paddle shifters are mounted on the steering wheel, allowing drivers to manually shift gears without using a clutch pedal. To upshift, pull the right paddle marked with a “+” sign. To downshift, pull the left paddle marked with a “-” sign. This system provides quick, intuitive control, ideal for performance driving. Paddle shifters are connected to the transmission electronically, automating clutch engagement. They enhance driving engagement while maintaining the convenience of an automatic transmission. Operation may vary slightly by manufacturer, so consult your vehicle’s manual for specific details.
Common Misconceptions About Manual Shifting
Many believe manual shifting in automatics causes damage or boosts efficiency, but these are myths—proper use enhances control without harming the transmission or improving fuel economy.
4.1 Can You Damage the Transmission by Manual Shifting?
Manual shifting in an automatic transmission does not inherently damage the transmission if done correctly. However, improper techniques, such as shifting at high RPMs without proper control, can strain the system. Modern transmissions are designed to handle manual shifts, but excessive or abrupt shifting may lead to wear over time. It’s essential to follow the manufacturer’s guidelines and avoid shifting patterns that put unnecessary stress on the gearbox. Proper use enhances driving experience without risking transmission health.
4.2 Is Manual Shifting More Efficient Than Full Automatic Mode?
Manual shifting can be more efficient in specific conditions, such as driving uphill or towing, by maintaining optimal gears. However, in normal driving, modern automatic transmissions often match or exceed manual efficiency due to advanced algorithms. Overriding the system unnecessarily may reduce efficiency, as automatic modes are optimized for fuel economy. Manual shifting is beneficial when human intuition surpasses the transmission’s logic, but in most cases, full automatic mode remains equally or more efficient. Proper use depends on driving conditions and driver expertise.
When to Use Manual Shifting
Manual shifting is ideal for hilly terrain, towing heavy loads, or performance driving, where precise control and efficiency are crucial, enhancing driving dynamics and safety.
5.1 Driving in Hilly or Mountainous Terrain
Manual shifting is highly beneficial when driving in hilly or mountainous regions. It allows you to maintain better control over speed and engine braking, especially on steep descents. By downshifting before entering a downhill, you can reduce reliance on brakes and prevent overheating. This feature is particularly useful for towing or hauling heavy loads, as it helps maintain stability and prevents excessive wear on the transmission. Manual mode ensures smoother power delivery, avoiding abrupt shifts that could disrupt traction on uneven terrain, thus enhancing both safety and performance.
5.2 Towing or Hauling Heavy Loads
Manual shifting is highly advantageous when towing or hauling heavy loads. It allows for precise control over engine speed and torque delivery, reducing the risk of transmission overheating. By manually downshifting before climbing steep inclines, you can maintain optimal power output and prevent the transmission from constantly hunting for the right gear. This feature is especially useful for large trailers or heavy payloads, as it ensures smoother acceleration and better stability. Manual mode helps maintain consistent power delivery, which is critical for towing safely and efficiently.
5.3 Performance Driving and Sport Modes
Manual shifting in automatic transmissions shines during performance driving or when sport modes are activated. It allows drivers to control gear changes precisely, ensuring the engine stays within its power band for maximum acceleration. Paddle shifters or the gearshift lever enable quick, intuitive shifts, enhancing the driving experience. This feature is particularly useful in corners or during aggressive driving, where maintaining optimal RPMs can make a significant difference. Manual mode fosters a closer connection between the driver and the vehicle, delivering a more engaging and responsive drive compared to full automatic operation.
Troubleshooting Common Issues
Identify issues like delayed or harsh shifts by checking transmission fluid levels, solenoid function, and clutch pack engagement. Consult a mechanic if problems persist.
6.1 Transmission Not Responding to Manual Shifts
If the transmission doesn’t respond to manual shifts, check the solenoid wires for disconnections or damage. Faulty clutch packs or valve body issues may also be the cause. Ensure transmission fluid levels are adequate, as low levels can impair operation. If shifting remains unresponsive, consult a professional to diagnose and repair internal components like sensors or actuators. Always refer to the vehicle’s manual for specific troubleshooting steps.
6.2 Harsh or Abrupt Shifts During Manual Operation
Harsh or abrupt shifts during manual operation can result from low transmission fluid levels, faulty solenoids, or worn clutch packs. A malfunctioning torque converter or valve body issues may also cause jerky shifts. Ensure fluid levels are correct and check for sensor or actuator faults. If persistent, consult a mechanic to inspect internal components like clutch packs or the valve body. Addressing these issues promptly prevents further transmission damage and ensures smoother gear transitions during manual shifting.