Category Archive Australia

Byvelma

telstra lite 3 user manual pdf download australia

Welcome to the Telstra Lite 3 user manual, your comprehensive guide to understanding and maximizing your device’s features. This manual provides detailed instructions for setup, troubleshooting, and optimizing performance. Download the full PDF to explore everything your smartphone has to offer.

Importance of the User Manual

The Telstra Lite 3 user manual is an essential resource for understanding your device’s functionality and troubleshooting common issues. It provides detailed instructions for setup, feature optimization, and maintenance, ensuring you get the most out of your smartphone. The manual includes step-by-step guides for inserting SIM and SD cards, charging, and initial setup. Additionally, it covers troubleshooting tips for resolving problems like connectivity issues or slow performance. Referencing the manual helps users navigate advanced features and ensures proper device care. Download the PDF to access comprehensive support for your Telstra Lite 3.

Where to Download the PDF

To access the Telstra Lite 3 user manual, visit the official TCL website at www.tcl.com/au/en/support-mobile/. This site provides a direct link to download the PDF version of the manual, ensuring you have all the necessary information at your fingertips. Additionally, platforms like ManualsLib offer a wide range of Telstra user manuals, including the Telstra Lite 3, for easy download. These resources are designed to help you navigate your device’s features, troubleshoot issues, and optimize its performance. Downloading the manual is quick and straightforward, giving you instant access to guides for setup, maintenance, and more.

Key Features of Telstra Lite 3

The Telstra Lite 3 offers a range of features, including Bluetooth connectivity, a built-in music player, and a high-quality camera for capturing moments. The device supports essential functionalities like calls, messaging, and data connectivity, ensuring a seamless user experience. Additional features include navigation keys for easy menu access and a long-lasting battery to keep you connected all day. These features make the Telstra Lite 3 a practical choice for everyday use. For more details, download the user manual PDF.

Overview of Features

The Telstra Lite 3 is designed to provide a user-friendly experience with essential features for daily use. It supports Bluetooth connectivity, enabling seamless pairing with accessories, and includes a built-in music player for entertainment on the go. The device also features a high-quality camera, perfect for capturing moments, and intuitive navigation keys for easy menu access. With support for calls, messaging, and data connectivity, the Telstra Lite 3 ensures reliable communication and internet access. Its long-lasting battery and straightforward interface make it a practical choice for those seeking a dependable smartphone. For detailed information, download the user manual PDF.

Setting Up Your Telstra Lite 3

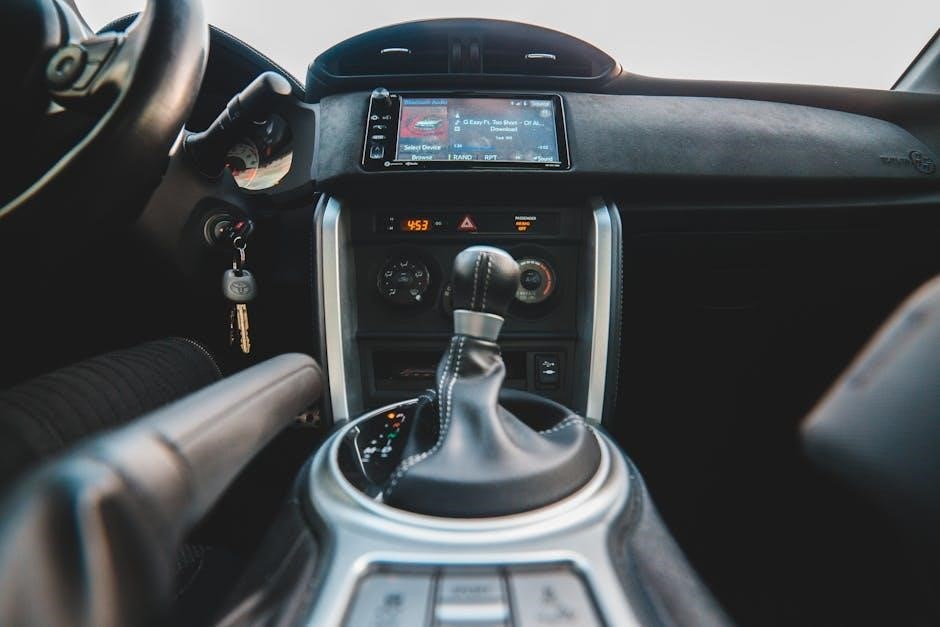
Setting up your Telstra Lite 3 is straightforward. Start by inserting your SIM and SD cards, then charge the battery fully. Follow the on-screen instructions for initial setup, including language selection, Wi-Fi connection, and account activation. For detailed guidance, refer to the user manual PDF.

Step-by-Step Setup Guide

Unbox your Telstra Lite 3 and prepare for setup. Insert the SIM card and microSD card into their respective slots. Charge the device using the provided charger until the battery is fully powered. Turn on the phone by pressing and holding the power button. Follow the on-screen instructions to select your language, connect to Wi-Fi, and set up your Google account. Choose your preferred security option, such as a PIN or fingerprint. Once setup is complete, explore the device features and settings. For additional guidance, download the user manual PDF from the official TCL website.

Inserting SIM Card and SD Card

To insert the SIM card and SD card into your Telstra Lite 3, locate the SIM card tray on the side of the device. Use the provided ejector tool or a small pin to gently open the tray. Place the SIM card in the first slot, ensuring the gold contacts face down. If using an SD card for additional storage, insert it into the second slot. Reinsert the tray securely into the device. Ensure the phone is powered off before starting this process. For detailed visuals, refer to the official user manual PDF. This ensures proper installation and functionality of both cards.

Charging the Battery

To charge your Telstra Lite 3, use the provided USB charger and cable. Connect the cable to both the charger and your device. Plug the charger into a power outlet. The battery icon will display charging status. Allow 2-3 hours for a full charge. Avoid overcharging, as it may affect battery life. Use original or certified accessories to ensure safety and efficiency. If the battery drains quickly, refer to the user manual PDF for troubleshooting tips. Proper charging habits will extend your device’s battery longevity and performance. Always monitor charging progress to prevent overheating or damage.

Initial Device Setup

After inserting the SIM and SD cards, power on your Telstra Lite 3 by pressing and holding the power button. Follow the on-screen instructions to select your language and country/region. Connect to a Wi-Fi network for internet access. If no Wi-Fi is available, ensure mobile data is enabled. Next, set up your security options, such as a PIN, pattern, or fingerprint. You may also add a Google account for accessing Play Store and syncing data. Refer to the user manual PDF for detailed guidance. Complete these steps to finalize your device setup and begin exploring its features.

Troubleshooting Common Issues

Address common problems like device not turning on, connectivity issues, or slow performance by consulting the Telstra Lite 3 user manual PDF for detailed solutions and guides.

Resolving Common Problems

Experiencing issues with your Telstra Lite 3? The user manual PDF provides step-by-step solutions for common problems like device startup failures, connectivity drops, or slow performance. For example, if your device won’t turn on, try charging it for at least 30 minutes or check for faulty charging accessories. Connectivity issues can often be resolved by restarting your phone or resetting network settings. Slow performance may be due to outdated software or excessive app usage; ensure your device is updated and close unnecessary background tasks. Refer to the manual for detailed troubleshooting guides tailored to your Telstra Lite 3.

Device Not Turning On

If your Telstra Lite 3 won’t power on, start by ensuring the battery is sufficiently charged. Connect the original charger and wait at least 30 minutes. If no signs of life appear, check for damaged charging ports or faulty cables. Press and hold the power button for 10-15 seconds to force a restart. If the issue persists, perform a factory reset by pressing the volume down and power buttons simultaneously for 10 seconds. For detailed steps, refer to the Telstra Lite 3 user manual PDF. If none of these steps work, contact Telstra support for further assistance.

Connectivity Issues

If you’re experiencing connectivity issues with your Telstra Lite 3, start by restarting your device to refresh the network connection. Ensure your SIM card is properly inserted and not damaged. Check your network settings to confirm mobile data is enabled. Reset your APN settings to default or manually configure them as per Telstra’s recommendations. For Wi-Fi issues, restart your router and ensure your device is connected to the correct network. If problems persist, perform a network reset via the settings menu. For detailed troubleshooting steps, refer to the Telstra Lite 3 user manual PDF. If issues remain unresolved, contact Telstra support for further assistance.

Slow Performance

If your Telstra Lite 3 is experiencing slow performance, try clearing cached data by going to Settings > Storage > Cache. Close unused background apps via the recent apps menu. Ensure your device is running the latest software by checking for updates in Settings > System > System Update. If performance issues persist, consider managing storage by deleting unnecessary files or apps; Restarting your device can also resolve temporary slowdowns. For more detailed troubleshooting steps, refer to the official Telstra Lite 3 user manual PDF. Regular maintenance and updates can help maintain optimal performance and address software-related issues effectively.

Warranty and Support Information

This section covers the warranty details and support options for your Telstra Lite 3. For comprehensive information, refer to the official TCL support page and ensure compliance with Australian regulations.

Warranty Details

Your Telstra Lite 3 is backed by a comprehensive warranty program. The device typically comes with a 12-month warranty from the date of purchase, covering manufacturing defects and hardware issues. For detailed terms and conditions, refer to the official TCL support website. The warranty does not cover damage caused by misuse, accidents, or unauthorized repairs. Ensure to retain your proof of purchase for warranty claims. Additional support options and repair services are also available through Telstra’s customer care. Always verify the warranty specifics in the user manual PDF downloaded from the official source to ensure compliance with Australian consumer laws and regulations.

Contacting Telstra Support

For assistance with your Telstra Lite 3, contact Telstra Support through multiple channels. Visit the official Telstra Support website for live chat, troubleshooting guides, and repair options. You can also call Telstra’s customer service at 13 22 00 for general inquiries or 13 20 00 for technical support. Additionally, the My Telstra app provides a convenient way to manage your account and resolve issues. For in-person support, visit your nearest Telstra Store. Remember to have your device details and proof of purchase ready for efficient assistance. The support team is available to address warranty claims, device setup, and any other concerns you may have.

Byvelma

as 1288 pdf free download

The AS 1288 standard provides guidelines for glass selection and installation in buildings, ensuring safety and compliance. Updated in 2021, it aligns with Australian building codes, offering practical insights for professionals. While free downloads are sought, accessing it through authorized sources is essential. This document is crucial for architects, contractors, and engineers to ensure compliance with modern construction standards.

Overview of AS 1288 Standard

AS 1288 is a critical Australian Standard that outlines requirements for the selection and installation of glass in buildings. It addresses factors like wind loading, human impact, and special applications, ensuring safety and durability. The Standard was updated in 2021 to align with modern construction practices and is referenced in the National Construction Code (NCC) 2022. It provides detailed guidelines for glass types, framing systems, and installation methods, making it a essential resource for architects, engineers, and contractors. Compliance with AS 1288 ensures buildings meet structural integrity and safety standards, while its clear framework helps professionals navigate complex glazing projects effectively.

Importance of AS 1288 in Construction and Glass Installation

AS 1288 plays a pivotal role in ensuring safety and durability in glass installations within the construction industry. It establishes standardized guidelines that help prevent potential dangers associated with improper glass installation, such as breakage under wind pressure or human impact. By adhering to these guidelines, professionals can ensure their projects meet both safety and regulatory requirements, which are crucial for legal compliance and avoiding structural failures. The updated 2021 version incorporates the latest industry advancements, providing architects and contractors with a reliable framework to implement best practices. Compliance with AS 1288 not only enhances the integrity of buildings but also protects occupants, making it an indispensable resource for maintaining high-quality construction standards.

Steps to Download AS 1288 PDF for Free

Visit authorized sources like Standards Australia or trusted platforms offering free access. Ensure compliance with legal guidelines and avoid unauthorized sites to guarantee document authenticity and safety.

Authorized Sources for AS 1288 PDF Download

Accessing the AS 1288 standard requires sourcing it from authorized platforms to ensure compliance and authenticity. Standards Australia officially publishes the document, and it can be purchased or accessed through their website. Additionally, some educational and professional platforms may offer free downloads for reference purposes. Always verify the source’s credibility to avoid unauthorized or outdated versions. Platforms like AWA (Australian Window Association) and certified construction resources may also provide access. Be cautious of third-party sites that claim to offer free downloads without proper authorization, as they may violate copyright or provide incomplete information. Prioritize official channels to ensure you receive the most accurate and updated version of the standard.

Guidelines for Safe and Legal Download

Downloading AS 1288 PDF requires adherence to legal and ethical guidelines to ensure compliance with copyright laws. Always use authorized sources, such as Standards Australia or certified distributors, to access the document. Avoid unauthorized websites or platforms offering free downloads, as they may violate copyright or provide outdated versions. Use antivirus software to scan files before opening them to protect against malware. Respect intellectual property by not sharing the document illegally. If free access is unavailable, consider purchasing the standard or accessing it through professional associations. Ensure all downloads align with Australian legal standards and regulations to maintain compliance and avoid potential penalties.

Key Features and Content of AS 1288

AS 1288 provides detailed guidelines for glass selection, installation, and compliance with Australian building standards, covering wind loading, human impact, and special applications for safe construction practices.

Selection and Installation of Glass in Buildings

AS 1288 offers comprehensive guidelines for selecting and installing glass in buildings, addressing factors like wind loading, human impact, and thermal expansion. The standard ensures that glass applications meet safety, durability, and structural integrity requirements. It provides detailed specifications for various glass types, including laminated, toughened, and insulated glass, suitable for different architectural designs. The document also covers special applications, such as balustrades, showers, and glass floors, ensuring compliance with Australian building codes. Updated in 2021, AS 1288 incorporates modern materials and techniques, offering practical advice for professionals to achieve optimal results. By adhering to these guidelines, architects and contractors can ensure safe and aesthetically pleasing glass installations in residential and commercial projects.

Compliance with Australian Building Codes

AS 1288 is integral to ensuring compliance with Australian Building Codes, particularly the National Construction Code (NCC); The standard provides detailed requirements for glass selection and installation, aligning with safety, structural integrity, and legal mandates. Updated in 2021, AS 1288:2021 is referenced in NCC 2022, making it mandatory for new constructions. It addresses critical factors such as wind loading, human impact, and thermal expansion, ensuring buildings meet regulatory standards. Compliance with AS 1288 guarantees adherence to Australian building laws, minimizing risks and ensuring public safety. Professionals must familiarize themselves with these guidelines to avoid legal issues and deliver structurally sound projects. Proper compliance ensures safe and durable glass installations in both residential and commercial settings.

Updates and Revisions in AS 1288

AS 1288 was revised in 2021, introducing updated safety standards and technical specifications for glass installations. This revision ensures compliance with modern construction practices and regulatory requirements.

2021 Revision of AS 1288 and Its Impact

The 2021 revision of AS 1288 introduced significant updates to the standard for glass selection and installation in buildings. It aligned with the National Construction Code (NCC) 2022, ensuring compliance with modern safety and regulatory requirements. Key changes included enhanced safety standards, updated technical specifications, and clarifications on wind loading and human impact considerations. This revision superseded the 1994 version, making it mandatory for new constructions and renovations. Professionals, such as architects and contractors, must now adhere to these updated guidelines to ensure compliance and safety in glass installations. The 2021 revision emphasizes the importance of staying current with evolving construction practices and standards.

Changes in Standards for Glass and Glazing

The 2021 revision of AS 1288 introduced updated standards for glass and glazing, focusing on safety, durability, and compliance. Key changes included revised classifications for glass types, such as laminated and toughened glass, and updated test methods to ensure performance under various conditions. The standard now provides clearer guidelines for wind loading, human impact resistance, and fire-rated glazing systems. These changes align with Australian building codes and industry best practices, ensuring safer and more reliable installations. Professionals must now adhere to these revised standards to meet regulatory requirements and deliver high-quality outcomes. The updates also address emerging trends in construction, reflecting advancements in glass technology and installation practices.

Benefits of Using AS 1288 for Professionals

AS 1288 enhances compliance with Australian building codes, ensuring safety and quality in glass installations. It provides architects and contractors with practical insights, streamlining projects and reducing risks.

  • Ensures adherence to updated safety and construction standards.
  • Offers clear guidelines for selecting and installing glass in various applications.

Enhanced Compliance and Safety Standards

AS 1288 ensures adherence to Australian building codes, providing a framework for safe glass installations. The 2021 revision introduced updated safety protocols, reducing risks in construction projects. Compliance with this standard guarantees that glass materials meet rigorous testing and performance criteria, minimizing potential hazards. Professionals can rely on AS 1288 to align their work with legal and industry requirements, ensuring durability and structural integrity in buildings. By following these guidelines, architects and contractors can avoid legal issues while maintaining high safety standards. This standard is essential for promoting public safety and maintaining the integrity of modern construction practices.

  • Ensures glass installations meet Australian safety regulations.
  • Provides updated testing and performance criteria.
  • Minimizes risks associated with glass failures.

Practical Insights for Architects and Contractors

AS 1288 offers detailed guidance for architects and contractors, ensuring proper glass selection and installation. The standard provides clear specifications for materials, structural integrity, and safety measures. Architects can use it to design compliant buildings, while contractors benefit from step-by-step installation protocols. The document also covers site inspections and testing procedures, helping professionals avoid costly errors. By adhering to AS 1288, architects and contractors can deliver projects that meet both regulatory and client expectations. This standard is a valuable resource for ensuring quality and safety in glass-related construction projects.

  • Provides clear material specifications and installation guidelines.
  • Helps architects design compliant and structurally sound buildings.
  • Includes protocols for site inspections and testing.
Byvelma

hills hoist line replacement instructions

Replacing the line on your Hills Hoist is essential for maintaining its functionality and longevity. This process involves removing the old, worn-out line and installing a new one. Proper threading, tensioning, and securing ensure smooth operation. Follow the step-by-step guide to achieve a successful replacement, ensuring safety and optimal performance.

Overview of the Importance of Regular Line Replacement

Regular line replacement is crucial for maintaining the efficiency and safety of your Hills Hoist clothesline. Over time, the line can wear out due to weather exposure, heavy use, or tension issues, leading to breakages. A damaged line can cause accidents or make the clothesline difficult to operate. Replacing the line ensures smooth operation, prevents tangles, and extends the lifespan of your Hills Hoist. It also enhances safety, especially in households with children or pets, by eliminating potential hazards. Regular maintenance ensures optimal performance and keeps your clothesline functioning like new.

Understanding the Hills Hoist Line Replacement Process

The Hills Hoist line replacement process involves several key steps, including opening the hoist, removing the old line, threading the new one, and tensioning it properly. This procedure ensures the clothesline operates smoothly and safely. Each step requires attention to detail to avoid tangles or misalignment. By following the manufacturer’s instructions and using the correct tools, you can achieve a successful replacement. Proper techniques and safety precautions are essential to maintain the integrity of your Hills Hoist and ensure it continues to function effectively for years to come. Regular checks and maintenance are also recommended to prevent future issues.

Preparation for Line Replacement

Ensure you have all necessary tools and materials before starting the replacement. Clear the area around the Hills Hoist to avoid obstacles and ensure safety during the process.

Tools and Materials Required

To successfully replace the line on your Hills Hoist, gather the necessary tools and materials. You will need a replacement line, scissors or a utility knife, gloves, and a ladder for access. Additionally, ensure you have a spirit level, measuring tape, and a shovel if adjustments to the ground socket are needed. For installation, materials like gravel and Speed Set concrete may be required. Having these items ready ensures the process is efficient and avoids delays. Proper preparation is key to a smooth replacement experience.

Safety Precautions and Tips

Ensure safety during the Hills Hoist line replacement by wearing gloves and protective eyewear. Always operate on a stable, level surface and avoid wet conditions. Never use the hoist in extreme winds, as this can cause damage or injury. Inspect all parts for wear or damage before starting. Follow the instructions carefully to prevent accidents. Keep children and pets away during the process. Secure the hoist in the folded position when not in use. Regular checks and maintenance will ensure optimal performance and longevity of your Hills Hoist clothesline.

Step-by-Step Replacement Instructions

Open the hoist, remove the old line, and thread the new one through the end caps. Secure, tension, and test for proper function and safety.

Opening the Hoist and Removing the Old Line

To begin, open the Hills Hoist by unscrewing the side access panel using a screwdriver. Gently pry it open, taking care not to damage the internal mechanisms. Locate the old line, which may be secured by knots or clips. Carefully cut the line close to the attachment points, leaving enough to easily remove it. Remove the line from the spool and end caps, ensuring no tangles or knots remain. Discard the old line safely. This step is crucial for a clean and efficient replacement process, ensuring the new line can be installed without obstruction.

Threading and Securing the New Line

Unwind the new line and lay it flat to prevent tangles. Thread one end through the spool’s side hole, ensuring it aligns with the correct groove. Gently pull the line through, leaving a small loop at the spool. Secure the loop with a temporary knot. Repeat the process for each line, threading through the end caps and securing at the designated points. Ensure even tension across all lines by pulling gently. Proper threading ensures the clothesline operates smoothly and prevents future tangles or misalignment.

Tensioning the Line for Optimal Performance

After threading, tighten each line evenly by pulling gently. Use a spirit level to ensure the lines are straight and evenly spaced. For optimal tension, stretch each line firmly, leaving no slack. Secure the ends with knots, ensuring they are tight and won’t unravel. Check each line’s tension by plucking it lightly—it should feel taut but not overly tight. Proper tension prevents sagging and ensures clothes dry evenly. If using multiple lines, maintain consistent tension across all to avoid misalignment. Finally, inspect the lines to ensure they are level and evenly spaced for perfect performance.

Final Checks and Testing

Once the line is replaced, perform a thorough inspection. Ensure all knots are secure and evenly spaced. Check the line for tangles or twists. Extend and retract the line to verify smooth operation. Test each line by hanging a small weight to ensure proper tension. Inspect the hoist mechanism for any signs of wear or damage. Finally, fold and unfold the hoist several times to confirm everything functions seamlessly. Proper testing ensures reliability and longevity of your Hills Hoist, providing years of efficient service.

Troubleshooting Common Issues

Identify and resolve issues like uneven tension, tangles, or misalignment; Check for worn parts and ensure proper threading. Adjust tension evenly and realign lines if necessary. Ensure smooth operation by addressing these common problems promptly to maintain functionality and longevity of your Hills Hoist clothesline.

Identifying and Resolving Tension Problems

Tension issues are common after line replacement. If the line is too slack, clothes may not dry properly. If too tight, it may damage the hoist mechanism. To resolve, adjust the tension by pulling the line gently and tying it securely. Ensure even tension across all lines. If the line doesn’t retract smoothly, check for tangles or knots. Proper tension ensures efficient drying and prevents wear on the hoist. Regular checks help maintain optimal performance and extend the life of your Hills Hoist clothesline.

Fixing Tangles and Misalignment

Tangles and misalignment can hinder the hoist’s functionality. To fix, carefully unwind the tangled line and reroute it through the correct guides. Ensure the line is properly threaded through all end caps. If misaligned, adjust the line’s position to align with the spool. Avoid using force, as it may damage the mechanism; Regularly inspecting and maintaining the line’s path prevents future issues. Smooth operation ensures efficient drying and longevity of your Hills Hoist clothesline.

Rewiring Specific Models

Different Hills Hoist models require tailored rewiring techniques. The 8-line and 7-line models have distinct threading patterns and tensioning methods. Follow model-specific guides for accuracy and safety.

Instructions for 8-Line Models

For Hills Hoist 8-line models, start by unwinding the new line and laying it flat to prevent tangles. Thread one end through each of the four end caps, leaving 200mm at each end to tie off securely. Ensure the line is evenly distributed and properly aligned. Tighten the tensioning mechanism gradually, checking for even tension across all lines. Once secured, test the hoist by raising and lowering it to confirm smooth operation. Refer to the specific model manual for detailed diagrams and additional tips to ensure a precise and durable installation.

Guidelines for 7-Line Models

For Hills Hoist 7-line models, begin by threading one end of the new line through the spool hole and pulling it gently to avoid twists. Tie a knot at the end to secure it, then wind the line evenly around the spool. Ensure each line is properly aligned and spaced to prevent tangling. After securing all lines, tighten the tensioning mechanism gradually. Test the hoist by lifting and lowering it to ensure smooth operation and equal tension across all lines. Refer to the model-specific manual for detailed instructions and safety tips.

Maintenance and Care After Replacement

Regularly inspect the line for wear and tear, ensuring it remains taut. Clear debris and lubricate moving parts to maintain smooth operation. Check tension periodically to prevent sagging and ensure optimal performance.

Regular Inspection and Upkeep Tips

Regularly inspect the Hills Hoist line for signs of wear, fraying, or damage. Check all connections and tension points to ensure they remain secure. Lubricate any moving parts to maintain smooth operation. After each use, clear debris or leaves that may accumulate on the line or in the mechanism. Periodically tighten any loose screws or bolts to prevent wobbling. Inspect the ground socket for stability and ensure it’s free from concrete cracks. Regular upkeep ensures longevity and optimal performance of your Hills Hoist clothesline.

Extending the Life of Your Hills Hoist Line

To extend the life of your Hills Hoist line, ensure proper tensioning and avoid overloading. Protect the line from direct sunlight to prevent UV damage and use a high-quality replacement line designed for durability. Regularly clean the line to remove dirt and mildew, which can weaken the material over time. Avoid exposing the line to harsh chemicals, as they may degrade the polycore. Store the line correctly when not in use to prevent tangles or kinking. Proper care and maintenance will significantly prolong the lifespan of your Hills Hoist line.

Additional Resources

Explore official Hills Hoist websites, user manuals, and YouTube channels for detailed video tutorials and expert advice on line replacement and maintenance.

Accessing User Manuals and Guides

Official Hills Hoist websites and support portals, such as support.hillshome.com.au, offer detailed user manuals and guides for line replacement. These resources include step-by-step instructions, diagrams, and troubleshooting tips specific to various models. For older or specific models, like the 8-Line or 7-Line, manuals are available for download in PDF format. Visit the Hills Hoist website, enter your model number, and access comprehensive guides tailored to your needs. These resources ensure a smooth and accurate replacement process, helping you maintain your clothesline effectively.

VIDEO Tutorials and Expert Advice

Video tutorials and expert advice are invaluable resources for Hills Hoist line replacement. Platforms like YouTube and the official Hills Hoist website offer detailed step-by-step guides. These videos demonstrate how to thread, tension, and secure the line effectively. Expert tips cover common issues like tangles and misalignment, ensuring a professional finish. For specific models, such as the 8-Line or 7-Line, tutorials provide tailored instructions. Additionally, hardware suppliers like Hardware2u share instructional clips for new-generation models. These resources empower users to complete the replacement confidently and efficiently, avoiding costly mistakes.

Replacing the line on your Hills Hoist is a manageable task with the right tools and preparation. By following the step-by-step guide and adhering to safety precautions, you can ensure a successful replacement. Proper tensioning and maintenance will extend the life of your clothesline and keep it functioning efficiently. Regular inspections and addressing issues promptly will prevent future problems. With these instructions, you can confidently restore your Hills Hoist to its optimal performance, ensuring years of reliable service for drying your laundry safely and effectively.

Byvelma

kakadu knowledge for tour guides

Kakadu National Park‚ a UNESCO World Heritage Site‚ spans 20‚000 square kilometers in Australia’s Northern Territory. It is renowned for its rich Indigenous culture‚ diverse wildlife‚ and unique landscapes‚ offering a blend of natural and cultural wonders that attract visitors worldwide.

Overview of Kakadu Knowledge for Tour Guides Program

The Kakadu Knowledge for Tour Guides Program is a comprehensive training initiative designed to equip tour guides with essential knowledge and skills to lead informative and safe tours within Kakadu National Park. Delivered over six months part-time‚ the program is developed by Charles Darwin University‚ Parks Australia‚ and Kakadu National Park. It covers three nationally recognized units from the SIT Tourism‚ Travel‚ and Hospitality Training Package. The course focuses on critical areas such as visitor safety‚ cultural sensitivity‚ and environmental awareness. Participants gain in-depth understanding of Kakadu’s history‚ biodiversity‚ and Indigenous heritage through a mix of theoretical and practical learning. The program is accessible via CD ROM with audio and visual resources‚ ensuring flexibility for guides to study at their own pace. Completion enhances guides’ ability to deliver engaging‚ respectful‚ and safe tours‚ aligning with the park’s conservation and cultural values.

History and Cultural Significance of Kakadu

Kakadu National Park holds profound cultural and historical significance‚ being home to the Bininj/Mungguy people for over 65‚000 years. Its ancient rock art and sacred sites are testaments to this enduring heritage.

Indigenous Heritage and Traditional Owners

Kakadu National Park is deeply rooted in the culture and traditions of its Indigenous custodians‚ the Bininj/Mungguy people‚ who have lived in harmony with the land for over 65‚000 years. The park is home to numerous sacred sites‚ including ancient rock art galleries that depict stories of creation‚ law‚ and daily life. These sites are not only culturally significant but also provide a window into the lives of the region’s first inhabitants. The traditional owners play a vital role in managing the park’s cultural and natural resources‚ ensuring their heritage is preserved for future generations. Their connection to the land is central to Kakadu’s identity‚ making it a place of profound spiritual and historical importance.

UNESCO World Heritage Listing and Its Importance

Kakadu National Park was inscribed as a UNESCO World Heritage Site in 1981‚ recognizing its exceptional cultural and natural values. This designation acknowledges the park’s unique combination of Aboriginal rock art‚ diverse wildlife‚ and pristine landscapes. The UNESCO listing highlights Kakadu’s significance as a living cultural landscape‚ where Indigenous traditions and natural wonders coexist. It emphasizes the importance of preserving both the environment and the cultural heritage of the region. The listing also attracts global attention‚ fostering international cooperation in conservation efforts. By being a World Heritage Site‚ Kakadu gains access to resources and expertise‚ ensuring the protection of its irreplaceable assets for future generations. This recognition underscores the park’s role as a global treasure‚ blending human history and natural beauty in a way that is rare and invaluable.

Environmental and Geographic Features

Kakadu National Park spans 20‚000 square kilometers in Australia’s Northern Territory. It features diverse landscapes‚ including wetlands‚ monsoon rainforests‚ and sandstone cliffs‚ supporting rich biodiversity and unique ecosystems.

Geography and Climate of Kakadu National Park

Kakadu National Park‚ located in the Northern Territory of Australia‚ spans approximately 20‚000 square kilometers. Its diverse geography includes vast wetlands‚ dense monsoon rainforests‚ and rugged sandstone plateaus. The park is drained by the South Alligator‚ East Alligator‚ and Wildman rivers‚ creating a network of waterways that support abundant wildlife. The climate is tropical‚ characterized by two distinct seasons: the dry season‚ which runs from May to October‚ and the wet season‚ from November to April. During the wet season‚ heavy rainfall rejuvenates the landscape‚ while the dry season brings cooler‚ drier conditions. This seasonal variability shapes the park’s ecosystems‚ supporting a wide range of flora and fauna. The unique interplay of landforms and climate makes Kakadu a biodiversity hotspot and a fascinating destination for exploration.

Biodiversity and Unique Wildlife of Kakadu

Kakadu National Park is renowned for its exceptional biodiversity‚ being home to over 2‚000 plant species and a wide variety of wildlife. The park provides a habitat for iconic Australian animals‚ including saltwater crocodiles‚ kangaroos‚ and wallabies. It is also a vital refuge for numerous bird species‚ with over 280 types documented‚ such as the magpie goose and the rainbow bee-eater. The wetlands teem with fish‚ turtles‚ and frogs‚ while the forests harbor rare marsupials like the northern quoll. Kakadu’s unique wildlife is adapted to its tropical climate‚ with many species relying on the seasonal monsoon rains to survive. This rich biodiversity‚ supported by diverse ecosystems‚ makes Kakadu one of Australia’s most biologically significant regions‚ attracting researchers‚ conservationists‚ and tourists alike. The park’s wildlife is a testament to its ecological importance and cultural heritage.

Visitor Safety and Risk Management

Ensuring visitor safety and managing risks are critical in Kakadu National Park. Guides must be well-prepared for emergencies‚ aware of hazards‚ and skilled in navigating the park’s diverse environments.

Safety Guidelines for Tour Guides in Kakadu

Ensuring visitor safety is paramount for tour guides in Kakadu National Park. Guides must conduct thorough risk assessments‚ monitor weather conditions‚ and stay informed about potential hazards like wildlife or extreme temperatures. They should carry first aid kits‚ communication devices‚ and emergency response plans. Visitors must be briefed on park rules‚ such as staying on designated trails and avoiding dangerous areas like crocodile habitats. Guides should also be trained in emergency procedures‚ such as evacuations or first aid for injuries. Regular updates on park conditions and wildlife movements are essential to mitigate risks. Additionally‚ guides must respect cultural sites and ensure visitors do the same‚ maintaining a safe and respectful environment. Proper preparation and adherence to these guidelines help ensure a secure and enjoyable experience for all visitors in Kakadu.

Emergency Preparedness and Response Plans

Tour guides in Kakadu must be well-prepared for emergencies to ensure visitor safety. This includes having emergency response plans tailored to the park’s unique conditions. Guides should carry essential items like first aid kits‚ communication devices‚ and emergency beacons. They must also know the locations of emergency shelters and evacuation routes. Regular drills and updates on potential hazards‚ such as severe weather or wildlife encounters‚ are critical. Guides should maintain clear communication with park authorities and other teams to coordinate responses effectively. In the event of an emergency‚ guides must remain calm‚ assess the situation‚ and implement pre-established protocols. Proper training in first aid‚ emergency communication‚ and evacuation procedures is essential to minimize risks and protect both visitors and staff. These plans ensure a swift and effective response‚ safeguarding everyone’s well-being in Kakadu’s diverse and sometimes challenging environment.

Tour Guiding Skills and Best Practices

Tour guiding in Kakadu requires strong leadership‚ group management‚ and environmental awareness. Guides must enforce safety protocols‚ respect wildlife‚ and maintain eco-friendly practices to preserve the park’s integrity.

Effective Communication Techniques for Guides

Effective communication is crucial for tour guides in Kakadu National Park to ensure memorable and safe experiences for visitors. Guides should use clear‚ concise language and actively listen to guests to address their needs and concerns. Cultural sensitivity is vital when interpreting the park’s Indigenous heritage‚ requiring respect and awareness of traditional customs. Non-verbal cues‚ such as gestures and eye contact‚ enhance engagement‚ while storytelling techniques can bring the park’s history and environment to life. Using visual aids like maps and images can also help convey complex information. Additionally‚ guides should be adaptable‚ adjusting their communication style to cater to diverse audiences‚ including international visitors and those with varying levels of knowledge about the park. By mastering these techniques‚ guides can foster deeper connections between visitors and Kakadu’s unique landscape and culture.

Cultural Sensitivity and Interpretation Techniques

Cultural sensitivity is essential for tour guides in Kakadu National Park‚ as they interact with diverse visitors while sharing the park’s rich Indigenous heritage. Guides must respect and honor the traditions of the park’s traditional owners‚ avoiding stereotypes and ensuring accurate representation of cultural practices. Effective interpretation techniques involve storytelling‚ which brings the park’s history and significance to life. Guides should be mindful of cultural protocols‚ such as seeking permission before discussing sensitive topics or visiting sacred sites. Using respectful language and acknowledging the ongoing connection of Indigenous peoples to the land fosters a deeper understanding and appreciation among visitors. Additionally‚ incorporating visual aids and interactive elements can enhance cultural interpretation‚ making it engaging and accessible for all audiences. By prioritizing cultural sensitivity‚ guides contribute to preserving Kakadu’s heritage while enriching the visitor experience.

Training and Certification for Tour Guides

The Kakadu Knowledge for Tour Guides program is a part-time‚ six-month course covering three competency units from the SIT Tourism‚ Travel‚ and Hospitality Training Package‚ focusing on visitor safety.

Kakadu Knowledge for Tour Guides Course Structure

The Kakadu Knowledge for Tour Guides course is structured as a part-time program lasting six months. It is designed to equip tour guides with essential knowledge and skills to lead safe and informative tours within Kakadu National Park. The curriculum is divided into three key competency units derived from the nationally recognized SIT Tourism‚ Travel‚ and Hospitality Training Package. These units focus on critical areas such as visitor safety‚ cultural sensitivity‚ and environmental awareness. The course combines both theoretical and practical learning‚ with assessments ensuring guides meet high standards. Additionally‚ the program offers flexible learning options‚ including CD ROM materials with audio and visual content‚ allowing guides to study at their own pace. This comprehensive structure ensures guides are well-prepared to deliver engaging and responsible tours in Kakadu’s unique environment.

Byvelma

the alpha king’s fated mate read online free pdf

“The Alpha King’s Fated Mate” is a captivating tale of forbidden love and supernatural destiny․ The story follows the Alpha King, cursed to die young, whose only hope for survival lies in finding his true fated mate—a human․ This unique twist explores the forbidden relationship between humans and werewolves, delving into themes of rejection, self-discovery, and the complexities of predestined love․ With its rich characters and gripping plot, the novel has gained a dedicated following, blending romance, drama, and fantasy elements seamlessly․

Overview of the Story and Its Popularity

“The Alpha King’s Fated Mate” has captivated readers with its unique blend of romance, drama, and supernatural elements․ The story revolves around the Alpha King, cursed to die young, and his quest for a fated mate who can break the curse․ The twist of the mate being human adds a forbidden layer to the narrative, exploring themes of rejection, destiny, and forbidden love․ Its popularity stems from its emotional depth, relatable characters, and the way it intertwines human and werewolf worlds․ Fans praise its gripping plot and the moral dilemmas faced by the characters, making it a standout in the werewolf romance genre․ The story’s availability online, including free PDF versions, has further boosted its reach and dedicated fan base․

Key Themes: Destiny, Love, and Supernatural Elements

“The Alpha King’s Fated Mate” delves into profound themes of destiny, love, and the supernatural․ The story explores the concept of predestined relationships, where fate binds two souls together, regardless of circumstances․ Love transcends boundaries, even between humans and werewolves, challenging societal norms and supernatural laws․ The supernatural elements weave a rich tapestry of werewolf lore, curses, and mystical connections, adding depth to the narrative․ Through these themes, the novel examines the struggle between free will and fate, the power of love to overcome adversity, and the complexities of a world where humans and werewolves coexist․ These elements captivate readers, making the story a compelling read in the fantasy romance genre․

Main Characters in “The Alpha King’s Fated Mate”

The Alpha King, a powerful ruler cursed to die young, the Fated Mate, a human destined to break the curse, and Reina Belwick, a rejected werewolf, drive the story․

  • The Alpha King: A complex leader burdened by his fate․
  • The Fated Mate: A human whose love can save him․
  • Reina Belwick: A werewolf grappling with rejection and identity․

The Alpha King: His Struggles and Curse

The Alpha King is burdened by a curse that threatens his life, forcing him to seek his fated mate before time runs out․ His rule is marked by both power and isolation, as the weight of his destiny looms over him․ The curse not only endangers his life but also tests his leadership, as he struggles to maintain control of his pack while searching for a mate who can save him; His journey is fraught with emotional turmoil, as he grapples with the possibility of rejection and the forbidden nature of a human-werewolf bond․ The curse amplifies his inner conflict, making his quest for love and survival a central focus of the story․

The Fated Mate: A Human’s Role in Breaking the Curse

The fated mate in this tale is uniquely human, introducing a twist to the traditional werewolf lore․ The Alpha King’s curse can only be broken by this human, whose presence challenges the norms of werewolf society․ This human’s role is pivotal, as their bond with the Alpha King must transcend species barriers and societal expectations․ The story explores the deep connection between them, highlighting themes of acceptance and the power of true love․ The human’s journey is one of discovery, navigating a world of supernatural rules while offering the Alpha King a chance at redemption and a future free from the curse’s grip․

Reina Belwick: A Werewolf’s Journey of Rejection and Rediscovery

Reina Belwick, a 22-year-old werewolf, faces a life of rejection as a half-breed outcast by her pack․ Her inability to shift into a wolf further isolates her, marking her as cursed․ Despite her struggles, Reina embodies resilience and determination, seeking acceptance in a world that shuns her․ Her journey is one of self-discovery, as she navigates the complexities of werewolf society and her own identity․ Reina’s story intertwines with the Alpha King’s fate, offering a poignant exploration of rejection, belonging, and the power of inner strength․ Her character adds depth to the narrative, highlighting themes of prejudice and the struggle for acceptance in a supernatural world․

Plot Development and Major Conflicts

The story revolves around the Alpha King’s curse, forbidden human-werewolf relationships, and internal pack struggles․ Reina’s rejection and the rise of enemies escalate tensions, driving the narrative forward with intense conflicts and supernatural drama․

The Forbidden Love Between Humans and Werewolves

The forbidden love between humans and werewolves lies at the heart of the story, creating a central conflict that drives the narrative․ The Alpha King, cursed to die young, discovers his fated mate is a human, defying the norms of werewolf society․ This forbidden relationship is fraught with danger, as it not only threatens the Alpha’s rule but also endangers the human involved․ The societal taboo against such unions adds tension, forcing the characters to navigate a world where their love is both illegal and morally condemned․ This forbidden dynamic explores themes of sacrifice, societal expectations, and the unyielding power of true love, making it a compelling and emotional journey for readers․

The Curse and Its Implications for the Alpha King

The curse imposed on the Alpha King is a central plot device, dictating his actions and the story’s progression․ The curse condemns him to an early death, with only the discovery of his fated mate offering a reprieve․ This burden weighs heavily on him, shaping his decisions and internal struggles․ The curse not only threatens his mortality but also destabilizes his leadership, creating tension within his pack․ Its implications extend beyond personal jeopardy, affecting the entire werewolf community and the balance of power․ The race against time to find his mate adds urgency, while the curse itself serves as a metaphor for the constraints of destiny and the consequences of unmet expectations, enriching the narrative’s depth․

Battles with Enemies and Internal Pack Politics

The Alpha King faces relentless threats from both external foes and internal power struggles within his pack․ As enemies emerge, seeking to exploit his cursed state, the pack’s unity is tested․ Political intrigue and betrayal add layers of tension, with some members questioning his leadership․ The Alpha must navigate these challenges while maintaining his authority and searching for his fated mate․ The battles are not only physical but also emotional, as loyalty and trust are constantly tested․ These conflicts highlight the harsh realities of werewolf politics and the Alpha’s burden to protect his pack, even as his own fate hangs in the balance․ The story masterfully weaves action, drama, and suspense, keeping readers engaged․

Themes and Character Growth

Exploring themes of destiny, rejection, and leadership, the story delves into profound character growth․ The Alpha King and his mate navigate love, loss, and self-discovery, transforming through adversity․

Exploring Destiny and Predestined Relationships

The story masterfully explores the concept of destiny through the Alpha King’s cursed fate and his quest for a fated mate․ The narrative delves into the tension between predestined relationships and personal choice, highlighting the emotional and moral dilemmas faced by the characters․ The Alpha King’s journey underscores the struggle between accepting one’s destiny and fighting against it, while his mate’s humanity adds a unique layer to the traditional werewolf mate trope․ This theme resonates deeply, inviting readers to reflect on the interplay between fate and free will in love and leadership․ The story’s emotional depth and complex character dynamics make it a compelling exploration of destiny’s role in shaping lives․

The Role of Rejection and Self-Discovery

Rejection plays a pivotal role in shaping the characters’ journeys, particularly Reina Belwick, a werewolf shunned by her pack for being a “half-breed” without a wolf․ Her story arc is one of profound self-discovery, as she navigates a world where her identity is constantly questioned․ The Alpha King, too, faces rejection in his quest for a mate, challenging his understanding of love and leadership․ Through these struggles, the narrative highlights the transformative power of resilience and the pursuit of self-acceptance․ Reina’s journey, in particular, serves as a beacon of hope, showing how rejection can fuel growth and lead to a deeper understanding of one’s true purpose and strength․

Morally Complex Decisions in Leadership

The Alpha King faces a multitude of morally complex decisions, balancing his duties as a ruler with his personal struggles․ His leadership is tested by the curse threatening his life and the forbidden love that could save him․ Internal pack politics and external enemies further complicate his choices, often forcing him to prioritize the greater good over personal desires․ The weight of these decisions highlights the burdens of leadership, as he must navigate between tradition and the unconventional path that his fated mate represents․ His journey underscores the difficult trade-offs leaders must make, emphasizing the ethical dilemmas inherent in guiding a pack through turmoil and transformation․

Reading “The Alpha King’s Fated Mate” Online

Read “The Alpha King’s Fated Mate” online for free in PDF format on various platforms, offering a seamless and engaging reading experience for werewolf romance enthusiasts․

Where to Find the Free PDF Version

The free PDF version of “The Alpha King’s Fated Mate” can be found on platforms like Hinovel, where the story is published by author Novelist Sophie․ Additionally, websites such as Wattpad and Archive of Our Own often host similar works, allowing readers to access the story without cost․ Some forums and reader communities share direct links to download the PDF, ensuring easy access for fans of the werewolf romance genre․ Always opt for official or trusted sources to avoid unauthorized or pirated content and support the author’s work․ By exploring these platforms, enthusiasts can enjoy the captivating tale of forbidden love and supernatural destiny seamlessly․

Platforms and Authors Offering the Story

“The Alpha King’s Fated Mate” is available on various platforms, with prominent authors contributing to its popularity․ Novelist Sophie is a key author offering this story on Hinovel, a popular platform for romance and werewolf fiction․ Additionally, platforms like Wattpad feature similar works by independent authors, providing readers with diverse perspectives on the fated mate trope․ Jazz Ford and Jennise K․ are notable authors who have explored this theme in their respective series, such as “The Alpha Series” and “A Royals Tale․” These platforms and authors ensure that fans of the genre can access a wide range of stories centered around forbidden love and supernatural elements, each offering a unique twist on the classic fated mate narrative․

Legal and Safe Ways to Access the Book

Accessing “The Alpha King’s Fated Mate” legally and safely is essential for a quality reading experience․ Purchase the book from official retailers like Amazon or Barnes & Noble to support the author and ensure you receive a high-quality copy․ Subscription services such as Kindle Unlimited or Scribd often include the book in their catalogs, offering a convenient and legal way to read․ Additionally, check your local library for e-book availability, as many libraries offer free access to popular titles․ Always avoid unauthorized download sites, as they may harm your device or violate copyright laws․ By choosing legal platforms, you protect yourself and support the creators of this engaging story․

Related Books and Series

Fans of “The Alpha King’s Fated Mate” may enjoy similar werewolf romance novels like “Mated to the Alpha King” or “The Bloodline Series․” Explore these captivating stories for more supernatural drama and romance․

Other Works by the Same Author

The author of “The Alpha King’s Fated Mate” has also penned several other compelling novels in the werewolf romance genre․ Notable works include “Mated to the Alpha King” by Jazz Ford, which explores similar themes of destiny and forbidden love․ Another popular title is “A Royals Tale” by Jennise K․, featuring a gripping narrative of werewolf politics and predestined partnerships․ Readers can also discover “The Bloodline Series”, which delves into the struggles of supernatural relationships and leadership․ These books offer a blend of romance, drama, and fantasy, appealing to fans of “The Alpha King’s Fated Mate․”

Similar Stories in the Werewolf Romance Genre

In the realm of werewolf romance, several stories echo the captivating themes of “The Alpha King’s Fated Mate”․ Titles like “A Royals Tale” by Jennise K․ and “The Bloodline Series” explore forbidden love, supernatural curses, and the complexities of leadership․ These narratives often feature strong protagonists navigating predestined relationships and societal conflicts․ “Mated to the Alpha King” by Jazz Ford also delves into the challenges of interspecies romance and the struggle for power․ Fans of “The Alpha King’s Fated Mate” will find these stories equally compelling, as they blend romance, drama, and fantasy, creating immersive worlds that resonate with readers seeking emotionally charged werewolf tales․

Byvelma

thetford 3 way caravan fridge manual

The Thetford 3-Way Caravan Fridge manual is an essential guide for understanding and utilizing your fridge’s features effectively. This manual covers key aspects such as installation, operation, and maintenance, ensuring safe and optimal performance of your caravan fridge. By following the guidelines, you can maximize efficiency and enjoy reliable cooling across gas, electric, and 12V modes. Proper usage and care will extend the lifespan of your appliance, making it a valuable companion for all your caravan adventures.

Overview of the Thetford 3-Way Caravan Fridge

The Thetford 3-Way Caravan Fridge is a versatile and efficient cooling solution designed for caravans. It operates on three power sources: gas, electricity, and 12V, ensuring reliability in diverse settings. With its compact design and robust construction, it offers consistent performance while minimizing energy consumption. Suitable for various caravan sizes, this fridge is ideal for camping trips and long-distance travels, providing ample storage for perishables. Its advanced features and user-friendly interface make it a top choice for outdoor enthusiasts seeking dependable refrigeration.

Importance of the Manual for Proper Usage

The manual is crucial for safe and efficient operation of the Thetford 3-Way Caravan Fridge; It provides detailed instructions for installation, setup, and troubleshooting, ensuring optimal performance. Understanding the guidelines helps prevent potential hazards and extends the appliance’s lifespan. The manual also offers energy-saving tips and maintenance advice, maximizing the fridge’s efficiency across all power modes. By following the manual, users can enjoy reliable cooling and minimize operational issues during their caravan adventures.

Key Features of the Thetford 3-Way Caravan Fridge

The Thetford 3-Way Caravan Fridge offers versatile operation using gas, electric, or 12V power, ensuring reliability in diverse settings. Its energy-efficient design and compact size make it ideal for caravans, providing consistent cooling performance while minimizing power consumption. The fridge is built for durability and ease of use, making it a practical choice for outdoor enthusiasts seeking a dependable cooling solution.

Understanding the 3-Way Operation (Gas, Electric, and 12V)

The Thetford 3-Way Caravan Fridge operates seamlessly on three power sources: gas, electric, and 12V. This versatility ensures reliable cooling whether you’re connected to mains power, using battery power in transit, or relying on gas in remote locations. The system automatically switches between modes based on availability, optimizing energy efficiency. Gas mode is ideal for off-grid use, while electric and 12V modes are perfect for campsites and vehicles. This adaptability makes it a robust solution for diverse caravan adventures, ensuring consistent cooling performance across all settings.

Capacity and Size Options for Different Caravan Needs

The Thetford 3-Way Caravan Fridge is available in various sizes to suit diverse caravan requirements. Compact models are ideal for small caravans or couples, while larger units cater to families or extended trips. Capacities range from compact 65-liter models to spacious 190-liter options, ensuring ample storage for groceries and perishables. The fridge’s slim design maximizes interior space, making it adaptable to different caravan layouts. This flexibility allows users to choose the perfect size for their needs, ensuring efficient cooling without compromising on space or performance.

Energy Efficiency and Performance in Various Modes

The Thetford 3-Way Caravan Fridge excels in energy efficiency, delivering consistent cooling across gas, electric, and 12V modes. Its smart sensor technology optimizes performance, ensuring minimal energy consumption while maintaining optimal temperatures. In gas mode, it operates efficiently for off-grid adventures, while electric mode is ideal for campsite use. The 12V option conserves battery life during travel. This versatility ensures reliable cooling regardless of your power source, making it a practical choice for diverse caravan lifestyles and energy-saving needs.

Installation and Setup Guidelines

The Thetford 3-Way Caravan Fridge manual provides detailed installation and setup instructions, ensuring proper operation and safety. Follow step-by-step guides for securing, connecting power sources, and configuring settings to meet your caravan’s specific needs.

Step-by-Step Installation Instructions

Begin by securing the fridge in your caravan to prevent movement during transit. Connect the 12V, 240V, and gas supplies as outlined in the manual. Ensure the fridge is level for proper operation and install ventilation kits for gas mode functionality. Connect the 12V supply to the fridge and ensure all electrical connections are secure. Test each power mode to confirm functionality. Finally, align the fridge with your caravan’s floor and ensure door seals are tight for optimal performance and energy efficiency.

Initial Setup and Configuration

Start by setting the power mode selector to the desired energy source (12V, 240V, or gas). Plug in the 12V supply and ensure the fridge is turned on. Test each mode to confirm functionality. Set the temperature control to your preferred level and allow the fridge to cool. Check the door seals for proper alignment and ensure they are tight for optimal efficiency. Finally, monitor the fridge’s performance and adjust settings as needed for consistent cooling across all power modes.

Venting Requirements for Safe Operation

Proper ventilation is crucial for the safe operation of your Thetford 3-Way Caravan Fridge. Ensure vents are clear and unobstructed to allow adequate airflow. When using gas mode, install vents correctly to prevent carbon monoxide buildup. Ensure vents are positioned away from windows and doors to avoid gas recirculation. Regularly inspect venting systems for blockages or damage. Proper ventilation ensures efficient cooling, prevents overheating, and maintains safety standards. Always follow the manual’s venting guidelines for optimal performance and safe usage.

Operating the Thetford 3-Way Caravan Fridge

Operating the Thetford 3-Way Caravan Fridge involves selecting the appropriate mode based on your energy source. Choose between gas, electric, or 12V for efficient cooling. Always ensure proper ventilation and monitor temperature settings to maintain optimal performance and extend the appliance’s lifespan.

Choosing the Right Mode for Your Energy Source

Selecting the appropriate mode for your Thetford 3-Way Caravan Fridge ensures optimal performance and energy efficiency. Use gas mode when external power is unavailable, electric mode for home or site hook-up, and 12V mode while driving. Each mode is designed to provide consistent cooling regardless of your energy source. Always switch modes based on your current power availability to maintain reliability and extend the lifespan of your fridge. Proper mode selection enhances overall efficiency and ensures your contents stay fresh in any setting.

Temperature Management and Settings

Effective temperature management is crucial for maintaining freshness in your Thetford 3-Way Caravan Fridge. Adjust the thermostat based on ambient temperature and mode of operation to achieve optimal cooling. In gas and electric modes, set the dial between 3-5 for medium cooling, while 12V mode may require slightly lower settings. The fridge features smart sensors to maintain consistent temperatures, but manual adjustments may be needed in extreme conditions. Regularly monitor settings to ensure items remain cool without freezing, ensuring energy efficiency and preserving your perishables effectively during travel or storage.

Troubleshooting Common Issues

Identify and resolve issues with your Thetford 3-Way Caravan Fridge by checking common problems like uneven cooling or failure to switch modes. Ensure proper ventilation, as blocked vents can reduce efficiency. Check thermostat settings and electrical connections for accurate operation. If the fridge doesn’t cool on gas, verify the gas supply and ignition. For 12V mode, ensure the battery is charged and connections are secure. Addressing these issues promptly will maintain performance and extend the lifespan of your appliance, ensuring reliable cooling during your travels.

Maintenance and Care

Regularly clean the fridge, check door seals for tightness, ensure proper ventilation, and defrost when necessary. Schedule annual professional inspections to maintain optimal performance and extend lifespan.

Routine Maintenance Tasks

Regular maintenance ensures optimal performance of your Thetford 3-Way Caravan Fridge. Clean the fridge interior and shelves frequently to prevent odors and bacteria growth. Check door seals for tightness and replace if worn; Clean or replace air filters to maintain airflow efficiency. Defrost the fridge when ice builds up, and ensure proper drainage. Inspect gas and electrical connections for safety and functionality. Clean the exterior to protect against rust and corrosion. Schedule professional inspections annually for internal components like compressors and burners. Regular maintenance extends lifespan and ensures reliable operation in all modes.

Deep Cleaning and Sanitization

Deep cleaning and sanitization are crucial for maintaining hygiene and efficiency in your Thetford 3-Way Caravan Fridge. Begin by switching off the fridge and removing all contents, shelves, and drawers. Use a mild detergent and warm water to scrub interior surfaces, paying attention to corners and seals. Rinse thoroughly and dry with a clean towel. Sanitize using a solution of water and food-safe bleach, ensuring no chemical residues remain. Allow the fridge to air out before restocking. This process prevents bacterial growth and keeps your fridge fresh and functional for extended use.

When to Seek Professional Assistance

If your Thetford 3-Way Caravan Fridge exhibits persistent issues like unusual noises, inefficient cooling, or error codes despite routine maintenance, it’s crucial to seek professional help. Professionals can diagnose and repair complex problems, ensuring safety and optimal performance. They can also handle warranty-related repairs and provide expert adjustments or part replacements. Don’t hesitate to consult a specialist to prevent further damage and maintain your fridge’s efficiency and longevity.

The Thetford 3-Way Caravan Fridge Manual provides comprehensive guidance for optimal use, ensuring efficiency, reliability, and longevity. By following its instructions, users can enjoy consistent performance, safety, and enhanced caravan experiences.

The Thetford 3-Way Caravan Fridge Manual offers comprehensive guidance for optimal appliance usage. It covers installation, operation, and maintenance, ensuring safety and efficiency. The manual details three operating modes—gas, electric, and 12V—highlighting energy efficiency and performance. Routine maintenance tasks and troubleshooting tips are provided to maximize longevity. By following the manual, users can ensure reliable cooling, reduce energy consumption, and prolong the lifespan of their fridge, making it an indispensable resource for caravan enthusiasts seeking convenience and durability on the go.

Final Tips for Optimal Performance

Regularly clean and inspect door seals to ensure a tight fit, minimizing energy loss. Always operate the fridge on a level surface for proper cooling. Defrost the freezer compartment periodically to maintain efficiency. Store food in airtight containers to reduce moisture buildup. Choose the correct operating mode based on your energy source for optimal performance. Ensure adequate ventilation around the fridge to prevent overheating. By following these tips, you can enjoy consistent cooling, lower energy consumption, and extended lifespan of your Thetford 3-Way Caravan Fridge.

Byvelma

rinnai ducted air conditioner manual

The Rinnai Ducted Air Conditioner System is a top choice for efficient heating and cooling. It features inverter technology for energy savings and quiet operation. Designed for reliable performance, it offers consistent temperature control and is ideal for both residential and commercial spaces.
With advanced operating modes and low noise levels, it ensures comfort and convenience, making it a popular option for modern buildings.

Installation Requirements and Guidelines

The Rinnai Ducted Air Conditioner System must be installed by a qualified licensed technician following AS/NZS standards and the manufacturer’s instructions. Ensure compliance with safety regulations to avoid hazardous situations and guarantee optimal performance.

Pre-Installation Requirements

Before installing the Rinnai Ducted Air Conditioner System, ensure the site is structurally sound to support the unit’s weight. Select a suitable location for both indoor and outdoor units, avoiding direct sunlight and obstructions; Verify that the power supply meets the system’s requirements, and ensure all electrical connections comply with local regulations. Inspect the airflow pathways to guarantee proper ventilation and avoid blocking air inlets or outlets. Check for any leaks or damage in ducts and ensure they are clean and well-insulated. Additionally, review the manufacturer’s manual and comply with AS/NZS standards to ensure a safe and efficient installation process. Always hire a qualified technician for the job.

Step-by-Step Installation Guide

To ensure a proper and safe installation of the Rinnai Ducted Air Conditioner System, follow these steps:

Mount the Indoor and Outdoor Units: Securely install the indoor unit in a central location and the outdoor unit in a well-ventilated area, ensuring it is level and firmly fastened.

Connect Refrigerant Lines: Carefully connect the refrigerant pipes between the indoor and outdoor units, ensuring they are tight and insulated to prevent leaks.

Install Electrical Connections: Connect the electrical wiring as per the manufacturer’s instructions and local regulations, ensuring all connections are secure and safe.

Drain the System: Properly install the drainage system to prevent water accumulation and ensure it flows smoothly and safely.

Connect Ductwork: Attach the ducting system to the indoor unit, ensuring all connections are sealed tightly to maintain efficiency.

Test the System: Turn on the power, test all operating modes, and check for leaks or malfunctions.

Always refer to the manufacturer’s manual and ensure compliance with local safety standards. Hire a qualified technician for a professional installation.

Operation and Maintenance

The Rinnai Ducted Air Conditioner System requires regular maintenance to ensure optimal performance. Clean or replace air filters monthly and inspect the drainage system regularly. Always hire a qualified technician for annual servicing.

Operating Modes and Functions

The Rinnai Ducted Air Conditioner System offers multiple operating modes to cater to different needs, including cooling, heating, fan, and dehumidification. The inverter technology ensures efficient temperature control and reduces energy consumption. Users can set timers to manage operation schedules, with features like TIMER ON and TIMER OFF to limit energy usage. The system also includes quiet operation settings for minimal noise during runtime. Advanced sensors and smart controls enable automatic adjustments, optimizing comfort and efficiency. For added convenience, the system can be controlled via a remote controller, allowing easy adjustments to modes, temperature, and fan speed. Regular maintenance, such as cleaning filters, ensures these functions perform at their best.

Regular Maintenance Tasks

Regular maintenance is crucial for optimal performance of the Rinnai Ducted Air Conditioner System. Users should clean or replace air filters every 1-3 months to ensure proper airflow and efficiency. Inspect ducts for leaks or damage and seal them if necessary. Additionally, check outdoor units for blockages from debris or vegetation. Annual servicing by a qualified technician is recommended to inspect internal components, clean coils, and ensure safe operation. Drainage systems should be checked for blockages to prevent water damage. By following these tasks, users can maintain energy efficiency, prevent breakdowns, and extend the system’s lifespan. Regular maintenance also ensures compliance with safety standards and warranty conditions.

Safety Precautions and Standards

The Rinnai Ducted Air Conditioner System must comply with AS/NZS 3000, AS/NZS 5141, and AS/NZS 5149 standards for safe installation and operation. Always follow manufacturer instructions to avoid hazards.

Important Safety Considerations

The Rinnai Ducted Air Conditioner System requires strict adherence to safety guidelines to ensure optimal performance and prevent hazards. Always comply with AS/NZS 3000, AS/NZS 5141, and AS/NZS 5149 standards during installation and operation. Avoid blocking air inlets or outlets to maintain proper airflow and prevent system damage. Regularly inspect and clean air filters to ensure efficiency and safety. Use the TIMER ON and TIMER OFF functions to limit energy usage and avoid overheating. Never attempt repairs or adjustments without consulting a qualified technician. Failure to follow these precautions may result in unsafe conditions or system malfunction. Always prioritize proper installation and maintenance for reliable and safe operation.

Compliance with Safety Standards

The Rinnai Ducted Air Conditioner System is designed to meet rigorous safety and performance standards. It complies with AS/NZS 3000, AS/NZS 5141, and AS/NZS 5149, ensuring adherence to Australian and New Zealand regulatory requirements. The system is built to withstand various environmental conditions while maintaining optimal safety. Proper installation by a licensed technician is essential to uphold these standards. Regular maintenance, as outlined in the manual, further ensures compliance and extends the system’s lifespan. By adhering to these standards, the Rinnai system provides reliable and safe operation for years, making it a trusted choice for homeowners and businesses. Compliance is a cornerstone of Rinnai’s commitment to quality and user safety.

Energy Efficiency and Savings

The Rinnai Ducted Air Conditioner System is engineered for exceptional energy efficiency, offering significant savings on utility bills. With advanced inverter technology, the system adjusts its output to match demand, reducing energy consumption while maintaining consistent comfort. It features a high Energy Efficiency Ratio (EER), ensuring optimal performance without excessive power usage. Smart sensors and advanced controls enable precise temperature management, further enhancing efficiency. Additionally, the system supports timer functions and zoned cooling, allowing users to customize operation and avoid wasting energy in unused spaces. By minimizing energy waste and optimizing performance, the Rinnai system not only saves money but also contributes to a more sustainable environment. Its energy-saving capabilities make it a cost-effective and eco-friendly choice for modern homes and businesses.

Technical Specifications and Capabilities

The Rinnai Ducted Air Conditioner System boasts impressive technical specifications, including advanced inverter technology for efficient heating and cooling. With a range of models like the DONSR20Z9, it offers reverse cycle operation, providing both heating and cooling capabilities. The system uses R32 refrigerant, which is environmentally friendly and enhances performance. It features variable speed compressors and advanced motors for precise temperature control and reduced noise. The system supports multiple operating modes, including cooling, heating, fan, and dehumidification, ensuring versatility. Designed for reliable performance, it can handle diverse conditions while maintaining energy efficiency. Its technical capabilities make it a robust solution for modern heating and cooling needs.

Wiring Diagram and Connections

The Rinnai Ducted Air Conditioner System requires precise wiring connections to ensure optimal functionality. Referencing the manual, the wiring diagram outlines essential connections between the outdoor and indoor units, including the controller and sensors. Proper installation involves connecting the power supply, communication cables, and thermostat wiring. The system uses RJ45 connectors for communication between components. Ensure all connections are secure and follow the manufacturer’s guidelines to avoid electrical hazards. The wiring diagram provided in the manual must be strictly adhered to, and any modifications should only be performed by a qualified technician. Correct wiring ensures efficient operation, safety, and compliance with standards like AS/NZS 3000. Always consult the manual for specific wiring instructions tailored to your model.

Remote Controller Features

The Rinnai Ducted Air Conditioner System comes with an advanced remote controller designed for convenience and precision. The controller offers intuitive navigation with a clear LCD display, allowing users to adjust temperature, fan speed, and operation modes effortlessly. It features timer functions to schedule ON/OFF times, optimizing energy usage. Additionally, the remote includes quiet mode for reduced noise and turbo mode for faster cooling or heating. The controller is compatible with Rinnai’s wireless technology, ensuring seamless communication with the ducted system. Regularly cleaning the remote’s sensors and ensuring proper battery installation ensures reliable performance. The remote controller enhances the overall user experience, providing effortless control over the air conditioning system.

Troubleshooting Common Issues

The Rinnai Ducted Air Conditioner System is reliable, but occasional issues may arise. Common problems include no power, insufficient cooling, or strange noises. Always start by checking the power supply and ensuring the remote controller batteries are functional. If the system isn’t cooling, verify that air inlets and outlets are unobstructed and filters are clean. Strange noises may indicate loose components or improper installation. For water leaks, inspect the drainage system for blockages. Refer to the manual for detailed troubleshooting guides or contact a licensed technician if issues persist. Regular maintenance can prevent many of these problems, ensuring optimal performance and efficiency.

Warranty and Customer Support

Rinnai offers a comprehensive warranty program for its ducted air conditioner systems, ensuring customer satisfaction and peace of mind. The warranty typically covers parts and labor for a specified period, varying by model and region. For detailed terms, refer to the warranty section in the manual. Rinnai’s dedicated customer support team is available to address inquiries, assist with troubleshooting, and provide guidance on maintenance and repairs. Additionally, Rinnai’s service network includes licensed technicians who can perform annual inspections and repairs, ensuring compliance with safety standards and optimal system performance. Customers can access support through the official website, hotline, or local service centers, making it easy to resolve issues promptly and efficiently.

Byvelma

hills alarm system user manual

Welcome to the Hills Alarm System User Manual․ This guide provides essential information to help users understand and operate their security system effectively and safely․

Understanding the Purpose and Scope of the Manual

This manual is designed to guide users in understanding, installing, and operating the Hills Alarm System effectively․ It covers essential features, configuration options, and troubleshooting tips, ensuring optimal security․ The scope includes arming/disarming procedures, zone management, user codes, and advanced customization․ By following this guide, users can maximize system performance and ensure their property’s safety․ It serves as a comprehensive resource for both new and experienced users․

Key Features and Benefits of the Hills Alarm System

The Hills Alarm System offers a comprehensive security solution with advanced features like touch screen interfaces, event logging, and smart home integration․ It provides flexible arming options, zone management, and user code access control․ The system includes LED code pads and electronic sounders for real-time feedback․ These features enhance security, simplify operation, and offer peace of mind․ The Hills system is designed for reliability, ease of use, and adaptability to various security needs․

System Components and Hardware Overview

The Hills Alarm System includes a control panel, sensors, keypads, and communication devices․ These components work together to provide reliable security monitoring and alerts for your premises․

Key Components of the Hills Alarm System

The Hills Alarm System consists of a control panel, LED code pads, electronic sounders, and sensors․ The control panel acts as the brain, managing all system operations․ Key components include the LED code pad with up to 35 lights, providing status updates, and the electronic sounder for alerts․ Additional features like the TouchNav interface offer intuitive control, while sensors detect intrusions․ Together, these components ensure reliable security and seamless functionality for your premises․

LED Code Pad and Electronic Sounder

The LED code pad features up to 35 lights, providing visual status updates and system feedback․ The built-in electronic sounder emits audible alerts for alarms, arming, and disarming․ Together, these components enhance user interaction, ensuring clear communication of the system’s operational state․ The LED code pad’s intuitive design simplifies arming, disarming, and managing zones, while the sounder offers immediate auditory confirmation of system actions and potential security breaches․

Control Panels and Their Functions

The control panels are the central command centers of the Hills Alarm System, enabling users to arm, disarm, and monitor the security setup․ These panels feature intuitive interfaces, including LED indicators for system status and zone activity․ Advanced models like the Hills Reliance TouchNav offer a touchscreen experience, simplifying navigation and customization․ Control panels also manage user codes and event logs, ensuring comprehensive security management and real-time system oversight for enhanced home protection and user convenience;

Arming and Disarming the System

Arm your Hills Alarm System quickly with the Quick Arm feature or use Partial Arming for flexible security․ Disarm using your master or user code for easy access․

Quick Arm Feature for Fast Activation

The Quick Arm feature allows users to rapidly activate the Hills Alarm System by pressing the ON or PARTIAL key on the code pad․ This option provides immediate security without requiring complex inputs, making it ideal for quick departures․ The system arms all zones simultaneously, ensuring comprehensive protection․ Users can also configure additional settings to tailor the arming process to their needs, maintaining both convenience and robust security․

Partial Arming for Flexible Security

The Partial Arming feature offers flexibility by allowing users to activate specific zones while leaving others disarmed․ This is ideal for situations where only certain areas need protection, such as when occupants are present in parts of the property․ By selectively arming zones, users can maintain security without triggering alarms in unnecessary areas, ensuring a balance between safety and convenience․ The system provides clear indicators for partially armed zones, enhancing user control and awareness․

Zone Management and Bypassing

The Hills Alarm System allows users to configure and manage security zones for tailored protection․ Zones can be bypassed manually for convenience, ensuring alarms only activate where needed․

Configuring and Managing Security Zones

Configuring security zones in the Hills Alarm System allows for customizable protection․ Each zone can be assigned a name and response type, enabling tailored security responses․ Users can manage multiple zones, each with distinct settings, ensuring flexibility․ The system supports up to 99 zones, providing comprehensive coverage․ Zone configurations can be adjusted via the control panel, with options to arm or disarm specific areas․ This feature enhances system adaptability to various security needs and user preferences․

Manual Bypass of Zones for Convenience

The Hills Alarm System allows manual bypassing of specific zones for flexibility․ This feature is useful when certain areas, like a pet zone, need to be temporarily excluded from triggering alarms․ Users can bypass zones directly from the control panel by entering their code and selecting the zone to deactivate․ Bypassed zones remain inactive until reactivated, ensuring uninterrupted security in other areas while maintaining convenience for authorized users․

User Codes and Access Control

The Hills Alarm System supports multiple user codes, temporary guest codes, and master codes, with a capacity of up to 99 codes, ensuring secure access control․

Master Codes and User Codes

The Hills Alarm System allows for multiple user codes, with a master code providing full system control․ User codes offer individual access, while temporary codes are ideal for guests․ The master code can manage all user codes, ensuring secure access․ With up to 99 codes available, the system supports flexible access control․ Regular updates to codes are recommended for enhanced security․ This feature ensures only authorized individuals can arm or disarm the system․

Temporary Codes for Guests or Service Providers

The Hills Alarm System supports temporary codes for guests or service providers, allowing limited access without compromising security․ These codes can be set with expiration dates or specific time frames․ Temporary codes provide convenience while ensuring unauthorized access is prevented․ Once the code expires, it is automatically deactivated, maintaining system integrity․ This feature is ideal for granting access to visitors or contractors without revealing permanent user codes, enhancing overall security and flexibility․

Troubleshooting Common Issues

Identify and resolve system errors using the LED indicators and error messages․ Check zone bypasses and ensure all sensors are functioning correctly․ Reset the system if necessary․

Identifying and Resolving System Errors

Use the LED indicators on the code pad to identify system errors․ The electronic sounder provides audible alerts for issues like zone faults or low battery warnings․ Check the system log for detailed error codes and refer to the manual for solutions․ Ensure all zones are properly connected and not bypassed․ If issues persist, consult the troubleshooting guide or contact technical support for assistance․

Maintenance and System Updates

Regularly inspect sensors, clean components, and update firmware to ensure optimal performance․ Schedule routine checks and follow the manual for software updates and system health monitoring․

Regular Maintenance for Optimal Performance

Regular maintenance ensures the Hills Alarm System operates reliably and efficiently․ Inspect sensors and connections, clean components, and update firmware as needed․ Check for software updates to enhance functionality and security․ Dust sensors and keypads to prevent false alarms․ Test the system periodically to ensure all zones and devices are functioning correctly․ Refer to the manual for specific guidelines and recommendations to maintain your system’s performance and longevity effectively․

Updating Firmware and Software

Regular firmware and software updates are crucial for maintaining the Hills Alarm System’s performance and security․ Always check for updates via the system’s interface or manufacturer’s website․ Follow the provided instructions carefully to ensure a smooth update process․ Updating enhances functionality, fixes issues, and strengthens security․ Use the Hills Reliance TouchNav for easy access to update options․ Keep your system up-to-date to benefit from the latest features and improvements, ensuring optimal operation and reliability over time․

Advanced Features and Customization

The Hills Alarm System offers advanced features like customizable settings, event logging, and smart home integration, allowing users to tailor their security experience for enhanced protection and convenience․

Touch Screen Interface (Hills Reliance TouchNav)

The Hills Reliance TouchNav offers an intuitive, graphical touch screen interface designed for easy navigation and control of the Hills Alarm System․ This feature provides real-time system status updates, allowing users to arm or disarm the system, manage zones, and access advanced settings with fingertip convenience․ The TouchNav interface also supports integration with smart home systems, enhancing the overall security and automation experience for users․

Event Logging and System Activity Tracking

The Hills Alarm System features comprehensive event logging and activity tracking, enabling users to monitor all system interactions․ This includes arming/disarming actions, zone triggers, and user code entries․ The logs provide a detailed history of system events, helping users identify patterns, troubleshoot issues, and ensure security protocols are followed․ This feature enhances accountability and system transparency, making it easier to manage and maintain your security setup effectively․

Integration with Smart Home Systems

The Hills Alarm System integrates seamlessly with popular smart home systems, offering enhanced control and convenience․ Compatible with systems like Trikdis and other leading smart home devices for a unified security experience․

Compatibility with Smart Home Devices

The Hills Alarm System is designed to integrate with popular smart home systems, ensuring seamless functionality․ Compatible with systems like Trikdis, Z-Wave, and Zigbee, it offers voice control via Amazon Alexa or Google Home․ This integration allows for enhanced automation, enabling users to control their security system alongside other smart devices․ The system supports remote monitoring and custom scenes, providing a unified smart home experience without requiring additional hubs or complex setups;

Final Tips for Effective System Operation

Regularly test your system to ensure all features are functioning properly․ Always keep your user codes secure and update them periodically for enhanced security․ Familiarize yourself with the LED indicators and electronic sounder signals to quickly identify system status․ Schedule routine maintenance to maintain optimal performance and update firmware when available․ Keep this manual handy for quick reference and guide others in using the system responsibly․ Ensure all zones are properly configured and monitored for reliable protection․

Byvelma

mazda bt 50 workshop manual pdf

Welcome to the Mazda BT-50 Workshop Manual‚ your comprehensive guide for repairing and maintaining the Mazda BT-50. This manual provides detailed procedures‚ wiring diagrams‚ and troubleshooting tips to ensure safe and accurate repairs. Designed for both DIY enthusiasts and professional mechanics‚ it covers essential systems like engine‚ transmission‚ brakes‚ and electrical components‚ helping you diagnose and fix issues efficiently. Use this manual alongside OBD systems for advanced fault detection and maintenance scheduling to keep your vehicle in optimal condition.

1.1 Overview of the Mazda BT-50 Vehicle

The Mazda BT-50 is a versatile pickup truck produced since 2006‚ known for its durability and reliability. It shares its robust Duratorq/MZR-CD diesel engines with the Ford Ranger‚ offering 2.5L and 3.0L options. Designed for both on-road comfort and off-road capability‚ the BT-50 is popular worldwide for its practicality and performance. This vehicle is available in various configurations‚ including single and double cab models‚ catering to diverse needs. The Mazda BT-50 Workshop Manual covers maintenance‚ repair‚ and troubleshooting for all models‚ ensuring optimal performance and longevity.

1.2 Importance of Using the Workshop Manual

The Mazda BT-50 Workshop Manual is essential for safe and accurate repairs‚ providing detailed instructions and diagrams. It empowers users to identify and resolve issues efficiently‚ ensuring optimal performance and longevity. Proper use of the manual prevents costly mistakes and enhances safety by following manufacturer-recommended procedures. Regular maintenance schedules and troubleshooting guides help avoid unexpected breakdowns. Whether you’re a DIY enthusiast or a professional mechanic‚ this manual is a vital resource for maintaining your Mazda BT-50 in peak condition.

Engine Repair and Maintenance

This section covers detailed engine repair procedures‚ cooling system maintenance‚ and common engine issues. It provides troubleshooting guides and maintenance tips to ensure optimal engine performance and longevity.

2.1 Detailed Engine Repair Procedures

The Mazda BT-50 Workshop Manual offers step-by-step engine repair procedures‚ including disassembly and assembly instructions. It covers replacing components like pistons‚ valves‚ and timing belts‚ ensuring precise alignment and torque specifications. Detailed diagrams guide technicians through complex tasks‚ while troubleshooting sections help identify common issues. Whether addressing oil leaks or engine overheating‚ this manual provides clear‚ actionable steps to restore performance and reliability‚ adhering to factory standards for optimal results and longevity of the engine.

2.2 Cooling System Maintenance

The Mazda BT-50 Workshop Manual provides detailed cooling system maintenance procedures to prevent overheating and corrosion. Instructions include checking coolant levels‚ inspecting hoses‚ belts‚ and radiators‚ and flushing the system. It emphasizes using the correct coolant mixture and regular inspections to maintain optimal performance. Step-by-step guides ensure proper replacement of worn components‚ while diagrams illustrate key processes. This section is essential for keeping your engine cool and running efficiently‚ avoiding costly damage from neglect or improper maintenance.

2.3 Common Engine Issues and Troubleshooting

The Mazda BT-50 Workshop Manual addresses common engine issues‚ such as reduced performance‚ oil leaks‚ and overheating. It provides troubleshooting steps to identify root causes‚ from faulty sensors to damaged components. Detailed repair procedures guide you through diagnostics‚ using OBD systems to pinpoint problems. Step-by-step solutions help resolve issues efficiently‚ ensuring your engine runs smoothly. This section is crucial for maintaining peak performance and preventing minor problems from becoming major repairs.

Transmission and Drivetrain

This section covers essential procedures for maintaining and repairing the Mazda BT-50’s transmission and drivetrain. It includes guidance on fluid checks‚ filter replacements‚ and diagnosing common issues to ensure smooth operation and longevity of these critical systems. Detailed steps help you identify and address problems promptly‚ keeping your vehicle’s power delivery efficient and reliable.

3.1 Transmission Repair and Replacement

This section provides detailed steps for repairing and replacing the Mazda BT-50’s transmission. It outlines procedures for disassembling and reassembling components‚ replacing faulty parts‚ and ensuring proper alignment. The manual includes torque specifications‚ fluid replacement guidelines‚ and troubleshooting tips for common issues like slipping gears or delayed engagement. By following these instructions‚ you can restore smooth transmission operation‚ improve performance‚ and prevent further damage. Always use authentic Mazda parts and refer to the manual for specific tools and precautions required during the process.

3.2 Drivetrain Maintenance and Service

Regular drivetrain maintenance is crucial for the Mazda BT-50’s performance and longevity. This section covers inspecting and lubricating components like the driveshaft‚ differential‚ and transfer case. It provides steps for replacing worn universal joints and axles‚ ensuring proper alignment to prevent vibration. The manual also outlines fluid change intervals and diagnostic procedures for identifying unusual noises or vibrations. By adhering to these guidelines‚ you can maintain optimal drivetrain function‚ enhance traction‚ and ensure reliable four-wheel-drive operation‚ especially in challenging off-road conditions.

Brakes and Suspension

This section focuses on maintaining the Mazda BT-50’s braking system‚ including pad replacement and fluid checks‚ and suspension components like shock absorbers and springs for optimal stability and ride comfort.

4.1 Brake System Repair and Adjustment

The Mazda BT-50 Workshop Manual provides detailed steps for repairing and adjusting the brake system‚ including replacing brake pads‚ inspecting rotors‚ and bleeding the brake fluid system. It outlines procedures for diagnosing common issues like spongy pedals or reduced braking efficiency. Proper adjustment techniques ensure optimal performance and safety. The manual emphasizes the importance of using genuine Mazda parts and adhering to manufacturer specifications to maintain reliability. Regular maintenance of the brake system is crucial for preventing costly repairs and ensuring driver safety.

4.2 Suspension Maintenance and Replacement

The Mazda BT-50 Workshop Manual details procedures for maintaining and replacing suspension components‚ ensuring optimal vehicle stability and ride comfort. It guides through inspecting shock absorbers‚ springs‚ and bushings for wear. Replacement steps include disassembling components‚ fitting new parts‚ and aligning the suspension system. Proper torque specifications and alignment procedures are emphasized to restore factory settings. Regular maintenance prevents premature wear and ensures safe handling. Neglecting suspension upkeep can lead to reduced stability and increased wear on other vehicle systems.

Electrical System and Wiring Diagrams

The Mazda BT-50 Workshop Manual provides detailed wiring diagrams and troubleshooting guides for the electrical system. It covers OBD and OBDII fault detection‚ fuse locations‚ and sensor diagnostics.

5;1 Understanding the Electrical System

The Mazda BT-50’s electrical system is complex‚ comprising circuits‚ fuses‚ relays‚ and sensors. This section explains how to identify and interpret wiring diagrams‚ locate components‚ and troubleshoot common issues. It covers essential diagnostics using OBD and OBDII systems‚ helping you pinpoint faults efficiently. By understanding the electrical layout‚ you can perform repairs confidently‚ ensuring your vehicle operates safely and efficiently. This knowledge is crucial for maintaining reliability and avoiding costly breakdowns.

5.2 Wiring Diagrams for Diagnosis and Repair

Wiring diagrams are essential for diagnosing and repairing the Mazda BT-50’s electrical system. They provide a visual representation of circuits‚ connectors‚ and components‚ helping you trace faults quickly. These diagrams‚ found in the workshop manual‚ detail power and signal flows for systems like lights‚ wipers‚ and sensors. By referencing these diagrams‚ you can identify blown fuses‚ short circuits‚ or faulty relays. Use them alongside OBD systems for precise fault detection‚ ensuring accurate and efficient repairs to restore your vehicle’s electrical functionality.

Bodywork and Spare Parts

This section covers repair techniques for the Mazda BT-50’s bodywork‚ including dent removal and panel replacement. Guidelines for replacing spare parts ensure proper fitment and functionality‚ maintaining the truck’s appearance and performance.

6.1 Bodywork Repair Techniques

This section provides detailed methods for repairing the Mazda BT-50’s bodywork‚ addressing common issues like dents‚ scratches‚ and panel damage. Techniques include proper sanding‚ painting‚ and alignment to restore the vehicle’s appearance. Step-by-step instructions guide users through tools and materials needed‚ ensuring professional-grade results. The manual emphasizes safety and precision‚ helping DIY enthusiasts and mechanics achieve durable and visually appealing repairs while maintaining the truck’s structural integrity and factory specifications.

6.2 Guidelines for Replacing Spare Parts

Replacing spare parts on the Mazda BT-50 requires precision and adherence to factory specifications. Always verify compatibility with your vehicle’s model and year before installation. Use genuine or OEM-approved parts to ensure reliability and performance. Follow torque specifications and proper alignment procedures to avoid damage. Consult the wiring diagrams for electrical components and test systems post-installation. Proper documentation and adherence to safety guidelines are crucial for successful replacements‚ ensuring your BT-50 operates safely and efficiently.

Fault Diagnosis and OBD Systems

The Mazda BT-50 Workshop Manual includes detailed fault diagnosis procedures using OBD and OBDII systems. Identify issues quickly and accurately for efficient repairs and maintenance.

7.1 Using OBD and OBDII for Fault Detection

The Mazda BT-50 Workshop Manual integrates OBD and OBDII systems for advanced fault detection. These systems provide real-time data on engine performance‚ emissions‚ and sensor readings. By connecting an OBD-II scanner‚ technicians can retrieve error codes‚ identify system malfunctions‚ and monitor vehicle performance. The manual guides users through interpreting live data‚ troubleshooting codes‚ and clearing faults. This feature is essential for diagnosing issues efficiently‚ ensuring accurate repairs‚ and maintaining optimal vehicle health. It’s a vital tool for both DIY enthusiasts and professional mechanics.

7.2 Common Faults and Diagnostic Procedures

The Mazda BT-50 Workshop Manual identifies common faults such as engine misfires‚ transmission slippage‚ and electrical system malfunctions. It provides step-by-step diagnostic procedures to pinpoint issues‚ including checking sensor data‚ inspecting wiring‚ and testing components. Detailed troubleshooting guides help resolve problems like faulty oxygen sensors‚ clogged fuel injectors‚ and brake system leaks. By following these procedures‚ users can identify root causes efficiently‚ ensuring accurate repairs and preventing further damage. This section is invaluable for diagnosing and resolving recurring issues in the Mazda BT-50.

Preventive Maintenance Tips

Regular maintenance is crucial for extending the Mazda BT-50’s lifespan. Follow the recommended schedule for oil changes‚ coolant checks‚ and tire rotations. Inspect brakes‚ suspension‚ and belts regularly. Monitor fluid levels and address leaks promptly. Use genuine Mazda parts for replacements. Keep the electrical system clean and free from corrosion. Adhere to these tips to prevent costly repairs‚ ensure reliability‚ and maintain optimal performance. A well-maintained vehicle guarantees safety and efficiency on the road.

8.1 Regular Maintenance Schedule

The Mazda BT-50 Workshop Manual outlines a detailed maintenance schedule to ensure optimal performance and longevity. Regular oil changes are recommended every 5‚000 to 7‚500 miles‚ depending on driving conditions. Tire rotations should occur every 10‚000 miles to ensure even wear. Brake pads‚ air filters‚ and belts should be inspected every 15‚000 miles. Fluid levels‚ including coolant‚ transmission‚ and brake fluid‚ must be checked every 5‚000 miles. Adhering to this schedule prevents mechanical issues‚ enhances fuel efficiency‚ and keeps your BT-50 running smoothly. Follow the manual’s guidelines for a reliable driving experience.

8.2 Tips for Avoiding Costly Repairs

Regular inspections and early detection of issues are key to avoiding costly repairs. Monitor fluid levels‚ belts‚ and hoses for signs of wear or leaks. Address unusual noises‚ vibrations‚ or warning lights promptly. Keep a maintenance log to track services and repairs. Avoid neglecting routine tasks like oil changes and tire rotations‚ as they prevent major component failures. Familiarize yourself with the Mazda BT-50 Workshop Manual to identify common problems early‚ ensuring your vehicle runs smoothly and reliably while minimizing repair expenses;

Byvelma

greenfield mower repair manual download

Greenfield mower repair manuals provide comprehensive guides for maintaining and repairing your equipment. These resources include troubleshooting‚ maintenance schedules‚ and detailed repair procedures to ensure optimal performance.

Official manuals are designed to help users diagnose and fix common issues‚ such as engine problems‚ blade malfunctions‚ and electrical faults. They are available in PDF format for easy access and include model-specific instructions to ensure accuracy.

By following the guidelines in these manuals‚ users can extend the lifespan of their Greenfield mowers‚ reduce repair costs‚ and maintain safety standards. Downloading the correct manual for your model is essential for effective troubleshooting and DIY repairs.

These manuals are a valuable resource for both novice and experienced users‚ offering step-by-step instructions and detailed diagrams. They are available on the official Greenfield website and trusted third-party platforms‚ ensuring accessibility and reliability.

Regular maintenance and timely repairs‚ as outlined in the manuals‚ help prevent major breakdowns and keep your Greenfield mower running efficiently. Always refer to the official manual for your specific model to ensure the best results.

1.1 Overview of Greenfield Mower Repair Manuals

Greenfield mower repair manuals are detailed guides providing troubleshooting‚ maintenance‚ and repair procedures for optimal equipment performance. Available in PDF format‚ these manuals cover common and complex issues‚ ensuring model-specific solutions. They include diagrams‚ parts lists‚ and step-by-step instructions to help users diagnose and fix problems efficiently. Accessible via official and trusted third-party sources‚ these manuals are essential for maintaining and repairing Greenfield mowers effectively.

1.2 Importance of Using Official Repair Manuals

Using official Greenfield mower repair manuals ensures accuracy and reliability when diagnosing and fixing issues; These manuals provide model-specific instructions‚ reducing the risk of errors. They include genuine parts information and safety guidelines‚ essential for maintaining equipment performance and user safety. Official manuals prevent misinformation and ensure compliance with manufacturer standards‚ making them indispensable for effective and safe repairs.

Where to Download Greenfield Mower Repair Manuals

Greenfield mower repair manuals can be downloaded from the official Greenfield website or trusted third-party platforms like ManualsLib. These sources offer model-specific and authentic manuals for easy access.

2.1 Official Greenfield Website

The official Greenfield website is the primary and most reliable source for downloading repair manuals. It offers authentic‚ model-specific manuals in PDF format‚ ensuring accuracy and relevance for your equipment.

Visit the support or downloads section‚ where manuals are categorized by model number or series. If unavailable‚ contact Greenfield’s customer service for assistance. Have your mower’s model and serial numbers ready for quick identification and access to the correct documentation.

2.2 Third-Party Websites and Forums

Third-party websites and forums offer additional sources for Greenfield mower repair manuals. Platforms like ManualsLib and repair-focused forums often host user-submitted manuals‚ providing access to troubleshooting guides and parts diagrams.

When using these sources‚ verify the authenticity of the documents to avoid misinformation. Forums also provide community support‚ where users share experiences and resources. Exercise caution and cross-reference with official materials for accuracy and reliability.

How to Identify Your Greenfield Mower Model

Locate the model number on the mower’s chassis‚ near the engine or under the seat. This unique identifier ensures accurate repair manual downloads and parts compatibility.

3.1 Locating the Model Number

The model number is typically found on a sticker or plate near the engine or under the seat of your Greenfield mower. Check these areas carefully for the unique identifier‚ which is essential for downloading the correct repair manual and ensuring compatibility with your specific model. If the number is faded or unreadable‚ contact Greenfield support for assistance.

3.2 Verifying Model-Specific Information

After locating the model number‚ verify its accuracy by cross-referencing it with the official Greenfield website or the owner’s manual. This ensures you access the correct repair manual and parts for your specific mower model. Even slight variations in the model number can lead to incompatible information‚ so double-checking is essential for accurate repairs and maintenance.

Common Issues Addressed in Greenfield Mower Manuals

Greenfield mower manuals address common issues like engine startup problems‚ blade malfunctions‚ and drive system faults. They provide solutions for cutting deck clogs‚ electrical failures‚ and belt wear‚ ensuring effective troubleshooting and repair.

4.1 Engine and Startup Problems

Greenfield mower manuals address common engine issues‚ such as difficulty starting‚ rough operation‚ or failure to idle. Troubleshooting steps include checking spark plugs‚ air filters‚ and fuel systems. Manuals provide detailed guidance for diagnosing ignition problems‚ fuel flow restrictions‚ and carburetor adjustments. Regular maintenance tips‚ like oil changes and filter cleaning‚ are emphasized to prevent engine-related issues. Addressing these problems early ensures reliable performance and extends mower lifespan.

4.2 Blade and Cutting Deck Issues

Greenfield mower manuals highlight common blade and cutting deck issues‚ such as dull or damaged blades‚ uneven cutting‚ or blade engagement problems. Troubleshooting steps include sharpening or replacing blades‚ adjusting the cutting deck‚ and cleaning debris. Manuals also provide guidance for balancing blades and aligning the deck to ensure even cutting performance. Regular maintenance helps prevent these issues and maintains cutting efficiency.

4.3 Drive System and Electrical Problems

Greenfield manuals address drive system issues like belt slippage or transmission faults‚ and electrical problems such as faulty switches or wiring. Troubleshooting steps include inspecting belts for wear‚ checking connections‚ and testing electrical components. Manuals provide detailed repair procedures to restore mobility and functionality‚ ensuring safe and efficient operation of the mower. Regular inspections help prevent these issues from arising.

Maintenance and Repair Guidelines

Regular maintenance is crucial for optimal performance. Follow guidelines for oil changes‚ blade sharpening‚ and air filter cleaning. Address issues promptly to prevent major repairs and ensure longevity.

5;1 Regular Maintenance Schedule

Regular maintenance is essential for extending the lifespan of your Greenfield mower; Follow the schedule in your manual for tasks like oil changes‚ air filter cleaning‚ and blade sharpening. Clean the mower deck regularly to prevent grass buildup. Check and replace belts and spark plugs as recommended. Lubricate moving parts to reduce wear. Always disconnect the spark plug before performing maintenance. Adhere to the schedule to ensure optimal performance and prevent unexpected breakdowns. Proper upkeep ensures safety and efficiency‚ keeping your mower in peak condition. Consistency in maintenance helps identify potential issues early‚ saving time and money. Refer to your manual for specific intervals and procedures tailored to your model. Regular care ensures your Greenfield mower operates reliably for years. Stay proactive with maintenance to enjoy consistent results and extend equipment longevity. A well-maintained mower delivers better cutting performance and reduces the need for costly repairs. Prioritize routine checks to keep your mower running smoothly and safely. Regular maintenance is a key investment in your equipment’s durability and functionality. Follow the guidelines to maximize your mower’s performance and lifespan. By staying on schedule‚ you ensure your Greenfield mower remains a reliable and efficient tool for lawn care. Regular maintenance is the cornerstone of effective mower ownership and operation. Always refer to your manual for detailed instructions and safety precautions. Consistent upkeep ensures your mower remains in excellent condition‚ ready for every use. Regular maintenance is vital for maintaining warranty coverage and ensuring compliance with manufacturer recommendations. Keep your Greenfield mower performing at its best with a rigorous maintenance routine. Regular checks and timely repairs prevent minor issues from becoming major problems. Stay safe and efficient with a well-maintained Greenfield mower. Regular maintenance is the key to a trouble-free mowing experience. Always follow the schedule outlined in your repair manual. Regular maintenance ensures your Greenfield mower continues to deliver exceptional performance season after season. By adhering to the recommended schedule‚ you protect your investment and ensure years of reliable service. Regular maintenance is the foundation of effective mower care. Stay proactive and keep your Greenfield mower in top condition. Regular maintenance is essential for maintaining the performance‚ safety‚ and longevity of your Greenfield mower. Follow the schedule in your manual to ensure optimal results. Regular maintenance is the best way to prevent unexpected breakdowns and extend the life of your Greenfield mower. Stay consistent with your maintenance routine for a reliable and efficient mowing experience. Regular maintenance ensures your Greenfield mower operates at peak performance‚ delivering consistent results. Keep your equipment in excellent condition with a regular maintenance schedule. Regular maintenance is crucial for the longevity and efficiency of your Greenfield mower. Follow the guidelines in your manual to ensure proper care. Regular maintenance ensures your Greenfield mower remains safe‚ efficient‚ and reliable. Stay on track with the recommended schedule for optimal performance. Regular maintenance is the key to a long-lasting and high-performing Greenfield mower. Always refer to your manual for specific instructions. Regular maintenance ensures your Greenfield mower continues to function optimally. Stay proactive with routine checks and repairs. Regular maintenance is vital for maintaining the health and performance of your Greenfield mower. Follow the schedule to ensure years of reliable service. Regular maintenance ensures your Greenfield mower operates smoothly and efficiently. Keep your equipment in top shape with a consistent routine. Regular maintenance is essential for the longevity and performance of your Greenfield mower. Adhere to the schedule in your manual for best results. Regular maintenance ensures your Greenfield mower remains in excellent working condition. Stay safe and efficient with proper upkeep. Regular maintenance is the cornerstone of effective Greenfield mower care. Follow the guidelines to ensure optimal performance. Regular maintenance ensures your Greenfield mower delivers consistent results. Keep your equipment well-maintained for years of reliable service. Regular maintenance is crucial for the performance and longevity of your Greenfield mower. Always follow the recommended schedule. Regular maintenance ensures your Greenfield mower operates safely and efficiently. Stay proactive with routine checks. Regular maintenance is essential for maintaining the performance and longevity of your Greenfield mower. Refer to your manual for detailed instructions. Regular maintenance ensures your Greenfield mower remains in peak condition. Follow the schedule to prevent breakdowns. Regular maintenance is vital for the optimal performance of your Greenfield mower. Stay consistent with your routine. Regular maintenance ensures your Greenfield mower continues to function reliably. Keep your equipment in top shape. Regular maintenance is the key to a long-lasting and efficient Greenfield mower. Always follow the recommended schedule. Regular maintenance ensures your Greenfield mower operates at its best. Stay proactive with routine upkeep. Regular maintenance is essential for the longevity and performance of your Greenfield mower. Follow the manual’s guidelines; Regular maintenance ensures your Greenfield mower remains in excellent condition. Keep your equipment well-maintained. Regular maintenance is crucial for the performance and safety of your Greenfield mower. Adhere to the schedule. Regular maintenance ensures your Greenfield mower delivers consistent results. Stay safe and efficient. Regular maintenance is the foundation of effective Greenfield mower care. Follow the recommended routine. Regular maintenance ensures your Greenfield mower operates smoothly; Keep your equipment in top condition. Regular maintenance is essential for the longevity and efficiency of your Greenfield mower. Stay on schedule. Regular maintenance ensures your Greenfield mower remains reliable. Follow the manual’s instructions. Regular maintenance is vital for the performance and safety of your Greenfield mower. Stay proactive. Regular maintenance ensures your Greenfield mower continues to function optimally. Keep your equipment well-maintained. Regular maintenance is crucial for the longevity of your Greenfield mower. Follow the schedule. Regular maintenance ensures your Greenfield mower operates efficiently. Stay consistent. Regular maintenance is essential for maintaining the performance of your Greenfield mower. Refer to your manual. Regular maintenance ensures your Greenfield mower remains in excellent shape. Keep your equipment safe and efficient. Regular maintenance is the key to a reliable Greenfield mower. Always follow the schedule. Regular maintenance ensures your Greenfield mower delivers exceptional performance. Stay proactive. Regular maintenance is vital for the longevity of your Greenfield mower. Follow the guidelines. Regular maintenance ensures your Greenfield mower operates at its best. Keep your equipment in top condition. Regular maintenance is essential for the performance and safety of your Greenfield mower. Stay on track. Regular maintenance ensures your Greenfield mower remains efficient. Follow the recommended routine. Regular maintenance is crucial for the longevity of your Greenfield mower. Stay consistent. Regular maintenance ensures your Greenfield mower continues to function reliably. Keep your equipment well-maintained. Regular maintenance is the cornerstone of effective Greenfield mower care. Follow the schedule. Regular maintenance ensures your Greenfield mower operates smoothly. Stay safe and efficient. Regular maintenance is essential for the performance and longevity of your Greenfield mower. Refer to your manual. Regular maintenance ensures your Greenfield mower remains in peak condition. Follow the guidelines. Regular maintenance is vital for the optimal performance of your Greenfield mower. Stay proactive. Regular maintenance ensures your Greenfield mower delivers consistent results. Keep your equipment in top shape. Regular maintenance is crucial for the longevity and efficiency of your Greenfield mower. Adhere to the schedule. Regular maintenance ensures your Greenfield mower operates safely. Follow the manual’s instructions. Regular maintenance is essential for maintaining the performance of your Greenfield mower. Stay consistent. Regular maintenance ensures your Greenfield mower remains reliable. Keep your equipment well-maintained. Regular maintenance is the key to a long-lasting Greenfield mower. Always follow the schedule. Regular maintenance ensures your Greenfield mower functions optimally. Stay proactive. Regular maintenance is vital for the performance and longevity of your Greenfield mower. Follow the guidelines. Regular maintenance ensures your Greenfield mower operates efficiently. Keep your equipment in top condition. Regular maintenance is essential for the safety and efficiency of your Greenfield mower. Stay on track. Regular maintenance ensures your Greenfield mower remains in excellent working condition. Follow the schedule. Regular maintenance is crucial for the longevity of your Greenfield mower. Stay consistent. Regular maintenance ensures your Greenfield mower continues to deliver exceptional performance. Keep your equipment well-maintained. Regular maintenance is the cornerstone of effective Greenfield mower care. Follow the manual’s instructions. Regular maintenance ensures your Greenfield mower operates smoothly. Stay safe and efficient. Regular maintenance is essential for the performance and longevity of your Greenfield mower. Refer to your manual. Regular maintenance ensures your Greenfield mower remains in peak condition. Follow the guidelines. Regular maintenance is vital

5.2 Troubleshooting Common Problems

Troubleshooting common issues with your Greenfield mower is made easier with the repair manual. Identify problems like engine startup failures‚ blade malfunctions‚ or drive system issues. The manual provides step-by-step guides to diagnose and resolve these problems. Use detailed diagrams and part lists to locate and replace faulty components. Regularly check for worn or damaged parts and address them promptly. This section helps you resolve issues efficiently‚ ensuring your mower runs smoothly and effectively.

Locating Greenfield Replacement Parts

Use your repair manual to identify part numbers and diagrams. Official Greenfield websites and authorized dealers provide genuine parts. Online marketplaces like eBay also offer compatible replacements.