Welcome to the Aprilaire 400 installation manual. This guide provides comprehensive instructions for installing the Aprilaire 400 humidifier‚ designed for flexible installation on either the supply or return plenum of a forced air system. Ensure proper setup for optimal performance and safety.
What’s Included in the Manual
This manual provides detailed instructions and guidelines for the proper installation‚ operation‚ and maintenance of the Aprilaire 400 humidifier. It includes step-by-step installation procedures‚ safety precautions‚ and troubleshooting tips to ensure optimal performance. The manual covers key features such as reversible installation options‚ compatibility with forced air systems‚ and integration with HVAC controls. Additionally‚ it outlines system requirements‚ wiring instructions‚ and maintenance schedules‚ including cleaning and replacing the water panel. Safety warnings and installation templates are also provided to guide users through the process. The manual serves as a comprehensive resource for homeowners and professionals to install‚ operate‚ and maintain the Aprilaire 400 effectively‚ ensuring improved indoor air quality and humidity control.

Key Features and Benefits of the Aprilaire 400
The Aprilaire 400 humidifier is designed to provide efficient and reliable whole-house humidity control. Its key features include flexible installation options‚ allowing it to be mounted on either the supply or return plenum of a forced air system. The unit is easily reversible‚ accommodating both right-hand and left-hand bypass pipe connections‚ which simplifies installation. With compact dimensions‚ it fits seamlessly into various HVAC systems. The Aprilaire 400 operates quietly and integrates effortlessly with existing heating‚ ventilation‚ and air conditioning systems‚ ensuring optimal performance. It offers automatic and manual operation modes‚ giving users control over humidity levels. The humidifier’s design minimizes water usage while maintaining efficient moisture distribution. Additionally‚ its durable construction and low-maintenance requirements make it a practical choice for homeowners. By improving indoor air quality and preventing dryness-related issues‚ the Aprilaire 400 enhances comfort and protects your home from structural damage caused by dry air.

System Requirements and Compatibility
The Aprilaire 400 is designed for installation in forced air handling systems and is compatible with both supply and return plenums. It integrates seamlessly with HVAC systems and works with models 400A and 400M‚ requiring a qualified installer for proper setup.
Safety Precautions and Warnings
Before installing the Aprilaire 400 humidifier‚ it is essential to follow all safety precautions to avoid potential hazards. Ensure the power to the HVAC system is turned off at the circuit breaker or fuse box before starting the installation. Always discharge the high-voltage capacitor to prevent electrical shock. Disconnect all leads and ensure the system is grounded properly to avoid damage or injury. Avoid exposing electrical components to water‚ as this can lead to short circuits or electrical hazards.
Do not attempt installation without proper qualifications‚ as improper setup can void the warranty or result in unsafe operation. Keep the area clean and free from debris to prevent accidents. Follow the manufacturer’s instructions carefully‚ and ensure all connections are secure and watertight. Failure to adhere to these precautions may result in electrical hazards‚ water damage‚ or reduced system performance. Always prioritize safety to ensure a successful and trouble-free installation.
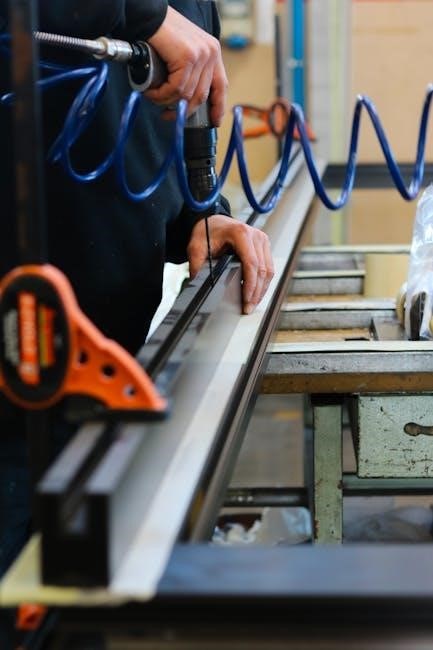
Step-by-Step Installation Guide
Unpack and prepare the Aprilaire 400 humidifier‚ ensuring all components are included. Locate the installation site on the supply or return plenum. Follow the provided template for precise measurements and alignment. Mount the humidifier securely‚ ensuring proper leveling. Connect the bypass duct and water panel according to the manufacturer’s instructions. Double-check all connections for tightness and alignment to ensure proper functionality.
Preparing the Installation Site
Before installing the Aprilaire 400 humidifier‚ ensure the installation site is properly prepared. Begin by unpacking the humidifier and verifying all components are included. Choose a location on either the supply or return plenum of your forced air system‚ ensuring easy access for future maintenance. Measure the plenum to confirm compatibility with the humidifier’s dimensions (15 x 14⅜ x 10 inches). Use the provided installation template to mark the correct cutout dimensions for the bypass duct. Ensure the area is clean‚ dry‚ and free from obstructions to prevent any installation challenges. Verify that the water supply and electrical connections are nearby and accessible. Finally‚ review the safety precautions and installation instructions thoroughly before proceeding. Proper preparation ensures a smooth and successful installation process.
Choosing the Installation Location
Choosing the right location for your Aprilaire 400 humidifier is crucial for optimal performance and ease of maintenance. The unit can be installed on either the supply plenum or the return plenum of your forced air heating system. Ensure the location provides sufficient space for the humidifier’s dimensions (15 x 14⅜ x 10 inches) and allows easy access for future maintenance. Select a spot where the bypass duct can be installed without kinking or restricting airflow. The Aprilaire 400 is reversible‚ making it adaptable for either right-hand or left-hand bypass pipe connections‚ offering flexibility in installation. Avoid areas where water leakage or condensation might occur. Additionally‚ ensure the location is close to a water supply line and electrical connections to simplify the installation process. Proper placement will ensure efficient operation and minimize potential issues during setup.
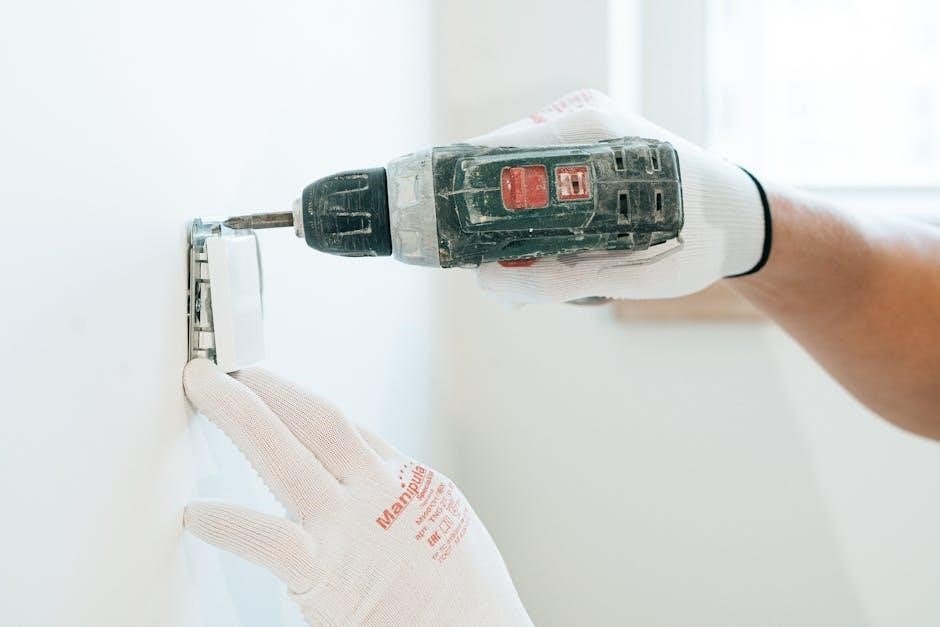
Mounting the Humidifier
Mounting the Aprilaire 400 humidifier requires careful attention to ensure proper installation and operation. Begin by positioning the unit on the selected plenum‚ ensuring it is level and securely fastened. Use the provided screws to attach the humidifier to the plenum‚ making sure not to over-tighten‚ as this could damage the unit or the ductwork. The Aprilaire 400 is designed to be reversible‚ so it can accommodate either right-hand or left-hand bypass connections‚ offering flexibility in installation. Verify that the humidifier is properly aligned with the bypass duct opening to ensure smooth airflow. After mounting‚ double-check that the unit is level to prevent water from pooling inside the humidifier. Proper drainage is crucial‚ so ensure the drain pan (if applicable) is correctly positioned and connected. Follow the installation template provided in the manual for precise measurements and alignment. Once mounted‚ proceed to connect the bypass duct and water panel as outlined in subsequent sections. Secure mounting is essential for efficient operation and long-term performance of the humidifier.
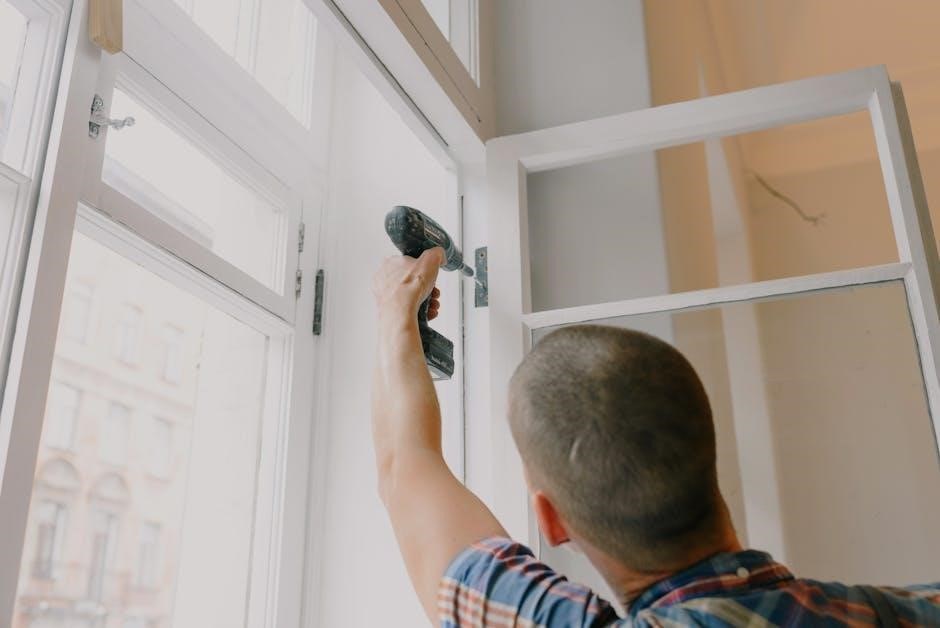
Connecting the Bypass Duct
Connecting the bypass duct is a critical step in the installation of the Aprilaire 400 humidifier. Begin by locating the bypass duct opening on the plenum‚ ensuring it aligns with the humidifier’s inlet. Use the installation template provided in the manual to mark the correct dimensions for the bypass duct opening. Carefully cut out the marked area using a duct saw or a sharp utility knife‚ ensuring smooth edges to prevent air leaks. Once the opening is prepared‚ attach the bypass duct to the humidifier’s inlet using the supplied clamps or screws. Tighten the connections firmly to ensure a secure fit and prevent any gaps. If necessary‚ trim the bypass duct to the appropriate length to fit the plenum opening. After securing the bypass duct‚ reattach any access panels or ductwork that were removed during the installation. Finally‚ inspect the bypass duct connection to ensure there are no leaks or obstructions. Proper connection of the bypass duct is essential for efficient operation of the humidifier and even distribution of humidity throughout the system.
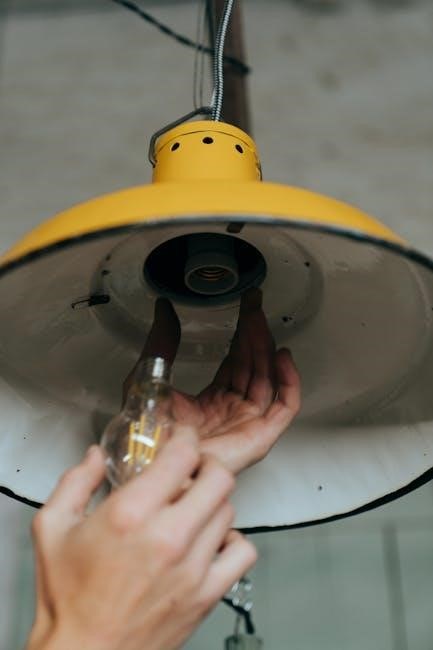
Installing the Water Panel
Installing the water panel in your Aprilaire 400 humidifier is a straightforward process that ensures proper humidity distribution. Begin by turning off the water supply to the humidifier to prevent any leaks during installation. Locate the water panel compartment‚ which is typically accessed through the top or side of the humidifier‚ depending on the model. Open the compartment by removing the screws or latches holding it in place. Carefully pull out the old water panel‚ taking note of its orientation and position. Insert the new water panel‚ ensuring it aligns properly with the guides or slots inside the compartment. Once the panel is securely in place‚ replace the compartment cover and reattach any screws or latches. Turn the water supply back on and check for any leaks around the water panel connections. It is essential to replace the water panel annually or as recommended in the manual to maintain efficiency and prevent mold buildup. Proper installation of the water panel is crucial for the optimal performance of your Aprilaire 400 humidifier.
Wiring and Electrical Connections
Connect the Aprilaire 400 humidifier control to your HVAC system‚ ensuring proper wiring according to the manufacturer’s instructions. Disconnect power before starting work. Verify circuit ratings and wire connections to match system requirements for safe and efficient operation.
Connecting the Humidifier Control
Connecting the Aprilaire 400 humidifier control involves integrating it with your HVAC system to ensure proper operation. Start by locating the control unit‚ typically installed in the cold air return duct. Follow the wiring diagram provided in the manual to connect the control to your HVAC system’s thermostat or control board. Ensure all connections are secure and match the system’s voltage requirements. The control unit operates in two modes: Automatic and Manual. In Automatic mode‚ the system adjusts humidity levels based on outdoor temperature and indoor conditions. In Manual mode‚ you can set a fixed humidity level. Refer to the wiring instructions in the manual for detailed steps on connecting the control to the humidifier and HVAC system. Always disconnect power before performing any electrical work to avoid injury or damage. Proper wiring ensures safe and efficient operation of the Aprilaire 400 humidifier.
- Connect the control unit to the HVAC system’s thermostat or control board.
- Ensure all wiring matches the system’s voltage requirements.
- Set the control to Automatic or Manual mode based on your preference.
- Disconnect power before performing any electrical work.
By following these steps‚ you can ensure the Aprilaire 400 humidifier operates efficiently and safely‚ providing optimal humidity control for your home.
Integrating with HVAC System
Integrating the Aprilaire 400 humidifier with your HVAC system is essential for seamless operation. The humidifier is designed to work in conjunction with your forced air heating‚ ventilating‚ and air conditioning system. Begin by ensuring the humidifier control is installed in the cold air return duct. This allows the control to monitor indoor humidity levels and activate the humidifier when needed. Connect the humidifier’s wiring to your HVAC system’s thermostat or control board‚ following the wiring diagram provided in the manual. The system operates in two modes: Automatic and Manual. In Automatic mode‚ humidity levels adjust based on outdoor temperature and indoor conditions‚ while Manual mode allows for fixed humidity control. Proper integration ensures the humidifier operates efficiently with your HVAC system‚ providing optimal indoor air quality. Always follow the manufacturer’s instructions for wiring and installation to ensure safety and performance.
- Install the humidifier control in the cold air return duct.
- Connect the control to your HVAC system’s thermostat or control board.
- Set the control to Automatic or Manual mode based on preference.
- Ensure all wiring follows the provided diagram for safe and proper operation.
Correct integration ensures the Aprilaire 400 humidifier works efficiently with your HVAC system‚ maintaining desired humidity levels and improving indoor comfort.
Maintenance and Upkeep
Regular maintenance ensures optimal performance and longevity of the Aprilaire 400; Clean the humidifier and replace the water panel annually or as recommended. Check the drain system for proper water flow and system efficiency. Schedule annual professional inspections.
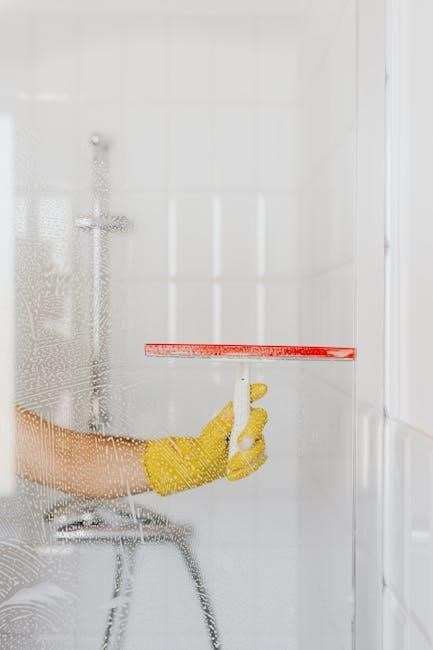
Cleaning the Humidifier
Regular cleaning of the Aprilaire 400 humidifier is essential to maintain efficiency and prevent mold or bacteria growth. Start by turning off the power to the unit and draining any remaining water from the system. Use a mixture of water and vinegar to clean the humidifier’s interior‚ paying special attention to areas around the water panel and drain. Scrub gently to remove mineral buildup without damaging components. Rinse thoroughly and allow the unit to dry completely before restarting. Additionally‚ inspect and clean the drain system to ensure proper water flow and prevent clogs. For optimal performance‚ clean the humidifier at least once every heating season or as needed based on usage. Always refer to the manufacturer’s guidelines for specific cleaning instructions tailored to your model. Regular maintenance will help extend the lifespan of your Aprilaire 400 and ensure it continues to provide reliable humidity control for your home.
Replacing the Water Panel

To ensure optimal performance and prevent mineral buildup‚ the water panel in your Aprilaire 400 humidifier should be replaced annually or as recommended by the manufacturer. Start by turning off the power to the humidifier and closing the water supply valve. Locate the water panel‚ typically found in the base of the unit‚ and remove any clips or screws securing it in place. Gently pull out the old water panel and dispose of it properly. Take the new water panel and insert it into the housing‚ ensuring it is securely seated and aligned correctly. Replace any clips or screws you removed earlier. Turn the water supply back on and check for any leaks around the panel. Regular replacement of the water panel is crucial for maintaining humidity levels and preventing potential damage to the system. Always use a genuine Aprilaire replacement part to ensure compatibility and performance. By following these steps‚ you can keep your Aprilaire 400 operating efficiently and effectively throughout the heating season.

Troubleshooting Common Issues
Common issues with the Aprilaire 400 include improper installation‚ water panel clogs‚ and electrical connection problems. Check for leaks‚ ensure the water panel is clean‚ and verify all electrical connections are secure. Refer to the manual for detailed solutions.
Identifying Common Problems
When troubleshooting the Aprilaire 400‚ common issues often stem from improper installation or maintenance. One of the most frequent problems is inadequate humidity output‚ which can result from a clogged water panel or incorrect bypass duct connections. Leaks are another common issue‚ typically caused by loose fittings or damaged gaskets. Additionally‚ electrical malfunctions‚ such as the humidifier not turning on‚ may occur due to faulty wiring or a malfunctioning humidistat. Some users also report issues with the unit overflowing‚ which is often linked to improper drainage or excessive water flow. Regularly inspecting the water panel and ensuring proper installation of the bypass duct can help prevent many of these issues. If the humidifier is not integrated correctly with the HVAC system‚ it may fail to operate efficiently. Always refer to the installation manual for guidance on diagnosing and resolving these common problems.
Solutions and Repairs
To address common issues with the Aprilaire 400‚ start by identifying the root cause. For low humidity output‚ clean or replace the water panel and ensure proper bypass duct connections. Leaks can often be resolved by tightening fittings or replacing worn-out gaskets. Electrical issues may require checking the wiring connections or replacing the humidistat. If the unit overflows‚ inspect the drain system for blockages and adjust the water flow rate. Regular maintenance‚ such as cleaning the humidifier and replacing the water panel annually‚ can prevent many problems. Always refer to the installation manual for specific repair instructions. If issues persist‚ consult a qualified HVAC technician to ensure proper resolution and maintain warranty validity.
Congratulations! You have successfully completed the installation‚ maintenance‚ and troubleshooting process for your Aprilaire 400 humidifier. By following the guidelines outlined in this manual‚ you have ensured that your system is set up correctly‚ operates efficiently‚ and provides optimal humidity control for your home. Proper installation and regular upkeep are key to maintaining indoor air quality‚ reducing energy costs‚ and extending the lifespan of your humidifier.
Remember to perform routine maintenance tasks‚ such as cleaning the humidifier and replacing the water panel‚ to keep your system running smoothly. If you encounter any issues‚ refer to the troubleshooting section for quick solutions. For more complex problems‚ consult a qualified HVAC professional. With proper care‚ your Aprilaire 400 will continue to deliver reliable performance and enhance your home’s comfort for years to come. Always keep this manual handy for future reference and enjoy the benefits of a healthy‚ balanced indoor environment.


About the author