Monthly Archive January 25, 2025

Byvelma

washing instructions for patagonia nano puff

Proper care ensures the Patagonia Nano Puff’s longevity and performance. Follow these guidelines to maintain its loft‚ water-resistance‚ and breathability. This guide covers washing‚ drying‚ and special care tips for optimal durability.

Why Proper Care Matters for Patagonia Nano Puff

Proper care is essential to maintain the Patagonia Nano Puff’s performance and extend its lifespan. This jacket features synthetic insulation and a DWR (durable water repellent) finish‚ which require specific attention to retain their functionality. Improper washing or drying can damage the insulation‚ reduce water-resistance‚ and compromise breathability. By following care guidelines‚ you preserve the jacket’s loft‚ ensure moisture-wicking properties‚ and maintain its lightweight durability. Additionally‚ proper care aligns with Patagonia’s environmental ethos‚ as extending the life of your gear reduces the need for frequent replacements. Taking the time to care for your Nano Puff ensures it remains a reliable and high-performing outdoor companion for years to come;

General Washing Instructions for Patagonia Nano Puff

Proper care is essential to maintain the Patagonia Nano Puff’s performance and extend its lifespan. This jacket features synthetic insulation and a DWR (durable water repellent) finish‚ which require specific attention to retain their functionality. Improper washing or drying can damage the insulation‚ reduce water-resistance‚ and compromise breathability. By following care guidelines‚ you preserve the jacket’s loft‚ ensure moisture-wicking properties‚ and maintain its lightweight durability. Additionally‚ proper care aligns with Patagonia’s environmental ethos‚ as extending the life of your gear reduces the need for frequent replacements. Taking the time to care for your Nano Puff ensures it remains a reliable and high-performing outdoor companion for years to come.

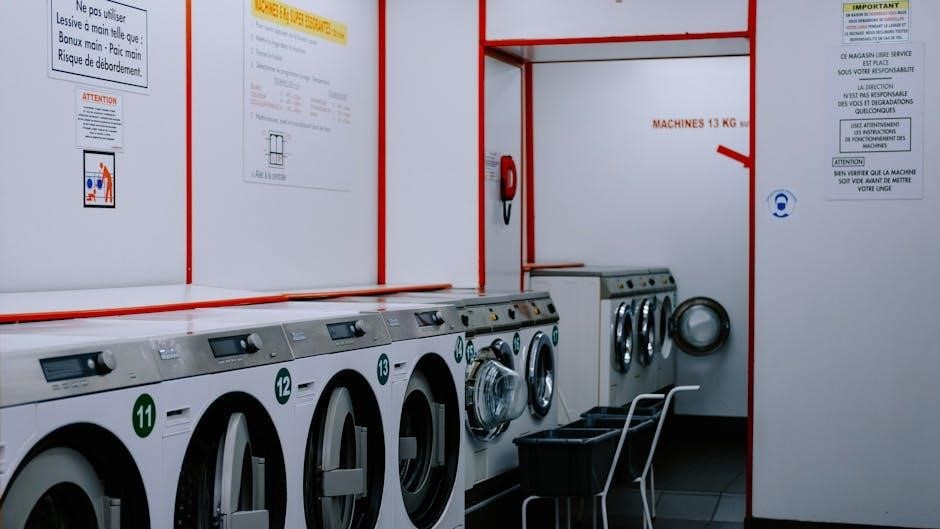
Machine Washing: Key Guidelines

Machine washing your Patagonia Nano Puff is a convenient option when done correctly. Use a gentle wash cycle with cold water to prevent damage to the insulation and DWR finish. Turn the jacket inside out before washing to minimize wear on the exterior fabric. Use a mild detergent specifically designed for synthetic fabrics or technical gear‚ avoiding fabric softeners or bleach‚ as these can degrade the material. Do not overload the washing machine‚ as this can cause unnecessary stress on the fabric. After washing‚ reshape the jacket while it’s damp to maintain its original form. Always check the care label for specific instructions to ensure optimal results.

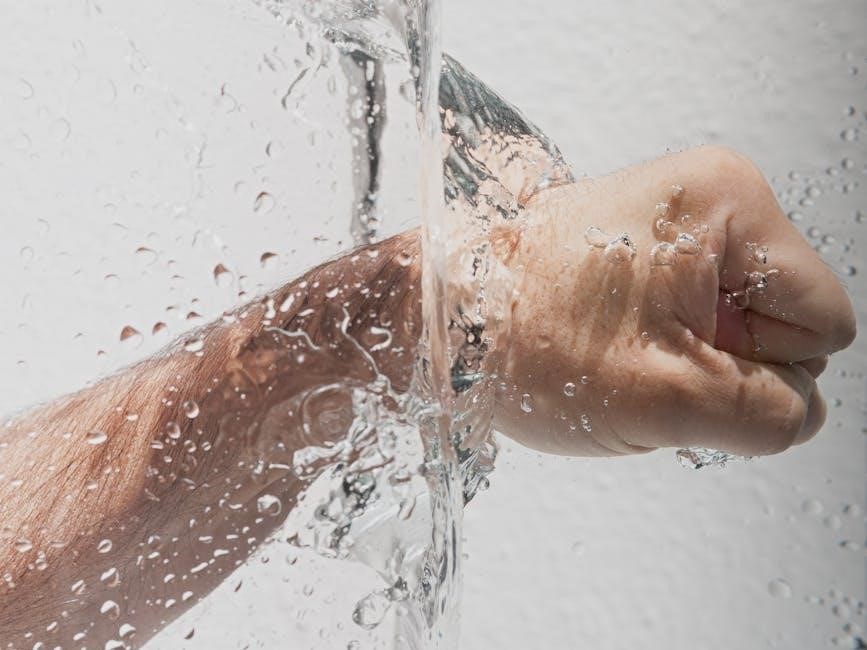
Hand Washing: A Gentle Alternative

Hand washing is a gentle and effective method for cleaning your Patagonia Nano Puff. Fill a sink or basin with cold water and add a small amount of mild detergent specifically designed for synthetic or technical fabrics. Gently agitate the water to create a soap solution‚ then submerge the jacket‚ turning it inside out to minimize wear on the exterior. Use a soft sponge or scrub brush to gently remove dirt‚ focusing on high-wear areas. Avoid soaking the jacket for extended periods‚ as this can break down the insulation. Rinse thoroughly with clean‚ cold water to remove all soap residue. Gently squeeze out excess water without wringing‚ then lay the jacket flat to air dry. This method helps preserve the DWR finish and maintain loft.

Drying Instructions for Patagonia Nano Puff

Proper drying is crucial for maintaining the Nano Puff’s performance. Machine dry on low heat or air dry by laying it flat away from direct sunlight.

Machine Drying on Low Heat

Machine drying the Patagonia Nano Puff on a low heat setting is a convenient option. Place the jacket in a well-ventilated dryer and select a gentle cycle with low heat. Remove the jacket as soon as the cycle ends to prevent over-drying. High heat can damage the fabric and reduce insulation performance. Avoid using fabric softeners or bleach‚ as they can degrade the material. If possible‚ air dry the jacket to maintain its loft and water-resistance. Proper drying ensures the Nano Puff remains lightweight‚ warm‚ and functional for years to come. Always follow the care tag instructions for optimal results.

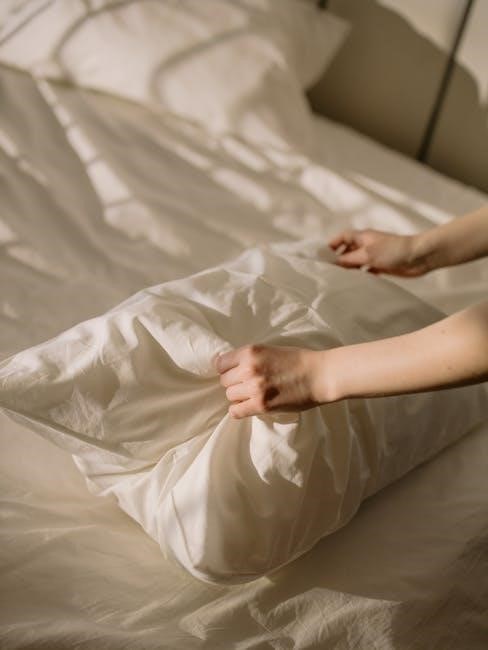
Air Drying: The Recommended Method

Air drying is the optimal method for preserving the Patagonia Nano Puff’s performance and longevity. After washing‚ gently remove excess water without wringing or twisting. Lay the jacket flat on a clean‚ dry surface or hang it on a sturdy hanger in a well-ventilated area. Avoid direct sunlight‚ as it may cause fading. Do not use fabric softeners or bleach‚ as they can harm the material. Air drying helps maintain the jacket’s loft and water-resistance. If you prefer‚ you can tumble dry on low heat‚ but air drying is gentler and recommended. Proper drying ensures the Nano Puff remains lightweight‚ warm‚ and functional for years to come.

Special Care Tips for Patagonia Nano Puff

Special care ensures the Nano Puff retains its performance. Wash inside out‚ avoid fabric softeners‚ and reapply DWR for waterproofing. These tips maintain its quality and functionality.

Washing Inside Out to Minimize Wear

Washing the Patagonia Nano Puff inside out helps minimize wear and tear on the fabric. This method protects the outer surface from friction and abrasion during the wash cycle. Turn the jacket inside out before placing it in the washing machine or hand-washing it. Use a mild detergent to avoid damaging the material or its waterproof coating. Gently scrub or agitate the fabric to remove dirt without causing excessive stress. After washing‚ reshape the garment while it’s damp to maintain its original form. This simple step ensures the Nano Puff remains in great condition‚ preserving its loft and water-resistance for years to come.

Avoiding Fabric Softeners and Harsh Chemicals

Avoiding fabric softeners and harsh chemicals is crucial when washing the Patagonia Nano Puff. Fabric softeners leave a residue that can reduce the jacket’s breathability and water-resistance. Similarly‚ harsh chemicals‚ including bleach‚ can damage the fabric’s synthetic fibers and strip away its waterproof coating. Instead‚ opt for a mild detergent specifically designed for technical or waterproof garments. This ensures the Nano Puff retains its performance features‚ such as loft and water-repellency. Always check the detergent label for compatibility with synthetic materials. By avoiding these chemicals‚ you preserve the jacket’s functionality and extend its lifespan. This simple precaution helps maintain the garment’s quality and ensures it continues to perform as intended.

Maintaining Performance and Quality

Regular maintenance ensures the Patagonia Nano Puff retains its loft‚ water-resistance‚ and breathability. Use mild detergents‚ avoid fabric softeners‚ and reapply DWR finish as needed for optimal performance.

Reapplying DWR Finish for Waterproofing

To maintain the Patagonia Nano Puff’s waterproofing and breathability‚ reapplying a DWR (durable water repellent) finish is essential after repeated washing. Use a high-quality‚ spray-on DWR treatment specifically designed for waterproof fabrics. After washing‚ allow the jacket to dry completely before applying the treatment. Follow the product’s instructions for proper application. For optimal results‚ tumble dry the jacket on a low heat setting or iron it on a low setting without steam to reactivate the DWR finish. This step ensures the Nano Puff retains its water-resistant properties and continues to perform at its best over time.

Common Mistakes to Avoid

Avoid using bleach‚ ironing‚ or high heat‚ as these can damage the Nano Puff’s fabric and its water-resistant coating‚ reducing its performance and longevity.

Never Bleach or Iron the Nano Puff

Avoid using bleach or ironing your Patagonia Nano Puff‚ as these actions can irreparably damage the fabric and its water-resistant coating. Bleach breaks down synthetic materials and removes the DWR finish‚ while ironing can melt or distort the lightweight insulation. Instead‚ focus on gentle cleaning methods like hand washing or machine washing on a cold‚ delicate cycle. For stubborn stains‚ use a soft sponge or brush with mild detergent and rinse thoroughly. Air drying is the best way to maintain the jacket’s loft and performance. Always refer to the care label for specific guidance to preserve the quality and functionality of your Nano Puff.

Avoiding High Heat and Aggressive Washing

To preserve the Patagonia Nano Puff’s performance‚ avoid exposing it to high heat or aggressive washing methods. High heat can damage the synthetic insulation and compromise the DWR (durable water repellent) finish. Aggressive washing‚ such as using harsh detergents or scrubbing too vigorously‚ can wear down the fabric and reduce its water-resistance. Instead‚ opt for cold water washing and mild detergents specifically designed for synthetic materials. Avoid fabric softeners‚ as they can leave residues that affect breathability. For tough stains‚ gently spot clean with a soft sponge or brush. Air drying is recommended to maintain the jacket’s loft and functionality. By avoiding high heat and harsh washing‚ you ensure the Nano Puff remains durable and performs as intended.

Proper care ensures the Patagonia Nano Puff remains durable‚ water-resistant‚ and insulating. Follow these guidelines to maintain its performance and extend its lifespan effectively.

Ensuring Longevity of Your Patagonia Nano Puff

To ensure your Patagonia Nano Puff lasts for years‚ proper care is essential. Regular washing with mild detergents and avoiding fabric softeners help maintain its loft and water-resistance. Air drying is recommended to preserve insulation and prevent damage from high heat. Washing inside out minimizes abrasion‚ while reapplying a DWR finish restores waterproofing. Avoid harsh chemicals‚ bleaching‚ or ironing‚ as these can degrade the material. By following these guidelines‚ you’ll keep your Nano Puff performing at its best‚ ensuring it remains a reliable and durable piece of outdoor gear for your adventures.

Byvelma

pathways to astronomy 6th edition pdf

Overview of “Pathways to Astronomy 6th Edition”

The 6th Edition of Pathways to Astronomy offers an engaging introduction to astronomy‚ divided into 86 flexible units․ It caters to students and enthusiasts‚ blending foundational concepts with dynamic visuals and real-world applications‚ making it an ideal resource for both classroom and independent learning․

Pathways to Astronomy 6th Edition is a comprehensive guide designed for introductory astronomy courses․ It breaks down complex concepts into 86 engaging units‚ offering flexibility for learners․ Authored by Stephen E․ Schneider and Thomas T․ Arny‚ the textbook combines clear explanations with dynamic visuals‚ making it accessible for students and astronomy enthusiasts alike․ Its structured approach ensures a smooth journey through the cosmos‚ from basic principles to advanced topics․

1․2 Key Features of the 6th Edition

The 6th Edition of Pathways to Astronomy features an updated‚ modern approach to learning astronomy․ With 800 pages‚ it includes 86 well-organized units‚ flexible for both linear and non-linear reading․ The textbook offers enhanced visuals‚ real-world applications‚ and supplementary resources like test banks․ Available in PDF‚ it provides digital access across devices‚ making it ideal for today’s learners․ Its engaging content and structured design ensure a comprehensive understanding of astronomy’s fundamentals and beyond․

Structure and Organization of the Book

Organized into 86 engaging units‚ the book offers a flexible structure‚ allowing readers to explore topics sequentially or in a personalized order․

2․1 Division into 86 Units

The textbook is thoughtfully divided into 86 units‚ each focusing on specific topics in astronomy․ This structure allows for a comprehensive yet modular approach‚ enabling readers to explore the universe systematically․ Each unit builds upon the previous one‚ creating a seamless narrative that enhances understanding․ The division ensures that complex concepts are broken down into digestible sections‚ making the subject accessible to both students and enthusiasts․

2․2 Flexibility in Reading and Assigning Units

The 86 units in Pathways to Astronomy are designed for flexibility‚ allowing readers to explore topics in sequence or skip and reorder chapters based on interest or curriculum needs․ This adaptability makes it ideal for both structured coursework and self-paced learning‚ catering to diverse learning styles and teaching approaches while maintaining a logical flow of astronomical concepts․

Authors and Their Expertise

Stephen E․ Schneider and Thomas T․ Arny‚ renowned astronomy professors‚ bring extensive expertise to Pathways to Astronomy‚ ensuring a comprehensive and accessible exploration of the cosmos․

3․1 Stephen E․ Schneider and Thomas T․ Arny

Stephen E․ Schneider and Thomas T․ Arny are distinguished professors in the Astronomy Department at the University of Massachusetts․ Their collaboration on Pathways to Astronomy reflects their commitment to education․ Schneider‚ a current professor‚ and Arny‚ an emeritus professor‚ bring decades of research and teaching experience․ Their expertise spans various astronomical phenomena‚ ensuring the textbook is both authoritative and engaging for learners․

3․2 Their Contributions to Astronomy Education

Stephen E․ Schneider and Thomas T․ Arny have significantly influenced astronomy education through their innovative textbook‚ Pathways to Astronomy․ Their work emphasizes clarity and accessibility‚ breaking complex concepts into manageable units․ By integrating real-world applications and dynamic visuals‚ they have made astronomy engaging for students and enthusiasts alike‚ fostering a deeper understanding of the cosmos and its wonders․

Availability and Access to the PDF Edition

The Pathways to Astronomy 6th Edition PDF is widely accessible via platforms like McGraw-Hill Education‚ Issuu‚ and other digital retailers‚ ensuring easy download for students and enthusiasts․

4․1 Platforms for Downloading the PDF

The Pathways to Astronomy 6th Edition PDF is available on platforms like McGraw-Hill Education‚ Issuu‚ and online retailers․ These platforms offer direct downloads‚ ensuring easy access for students․ Many sites provide free previews‚ while others require purchase․ The PDF format allows flexibility‚ enabling users to view the textbook on multiple devices․ Additionally‚ it supports offline reading‚ making it a convenient option for learning on the go without internet connectivity․

4․2 Purchase Options and Digital Retailers

The Pathways to Astronomy 6th Edition PDF can be purchased through platforms like McGraw-Hill Education‚ Amazon‚ and RedShelf․ These digital retailers offer secure transactions and immediate access to the textbook․ The PDF is available for purchase online‚ ensuring a seamless experience for students; Retailers often provide detailed product descriptions‚ including ISBN numbers like 1260258068‚ to confirm the correct edition before purchase․

Benefits of the Digital Format

The Pathways to Astronomy 6th Edition PDF offers unmatched accessibility‚ allowing students to study across devices like tablets‚ smartphones‚ and laptops․ It saves physical space and reduces clutter‚ making learning more convenient and environmentally friendly․

5․1 Flexibility Across Devices

The digital format of Pathways to Astronomy 6th Edition ensures seamless access across various devices‚ including smartphones‚ tablets‚ and laptops․ This versatility allows learners to study anytime‚ anywhere‚ without the constraints of a physical textbook․ The PDF version is optimized for readability on smaller screens‚ making it ideal for on-the-go learning․ This flexibility enhances the overall educational experience‚ catering to diverse learning preferences and environments․

5․2 Convenience for Students and Enthusiasts

The Pathways to Astronomy 6th Edition PDF offers unmatched convenience for students and astronomy enthusiasts․ Its digital format allows for easy access‚ portability‚ and efficient studying․ Learners can quickly search for specific topics‚ highlight key points‚ and annotate sections for better retention․ This convenience makes it an invaluable resource for those seeking to deepen their understanding of astronomy‚ whether in a formal classroom setting or through self-directed learning․

Supplementary Resources and Support

The 6th Edition provides access to test banks‚ educational materials‚ and online communities․ These resources enhance learning and offer platforms for discussion‚ fostering a deeper understanding of astronomy concepts․

6․1 Test Banks and Educational Materials

The 6th Edition includes comprehensive test banks and educational materials‚ providing instructors with tools to assess student progress․ These resources‚ accessible online‚ support structured learning and offer additional study aids for students‚ enhancing their understanding of astronomy concepts through interactive and supplementary content․

6․2 Online Communities and Forums

Online communities and forums provide a platform for students and enthusiasts to discuss Pathways to Astronomy 6th Edition․ These spaces foster collaboration‚ allowing users to share insights‚ ask questions‚ and engage with experts․ They also offer access to supplementary resources‚ creating a supportive environment for learners to explore astronomy together․

Target Audience

Pathways to Astronomy 6th Edition is designed for students and amateur astronomers‚ offering a comprehensive introduction to astronomy for introductory courses and self-study․

7․1 For Students and Amateur Astronomers

The Pathways to Astronomy 6th Edition is tailored for students and amateur astronomers‚ providing a clear introduction to astronomy․ Its 86 units offer flexibility‚ allowing readers to explore topics at their own pace․ The PDF format enhances accessibility‚ enabling study on various devices․ This resource is ideal for introductory courses and self-study‚ making complex concepts approachable for learners of all levels․

7․2 Suitability for Introductory Courses

The Pathways to Astronomy 6th Edition is an excellent choice for introductory astronomy courses․ Its structured approach‚ divided into 86 units‚ provides a logical progression of topics․ The PDF format ensures accessibility across devices‚ making it ideal for classroom use or independent study․ It supports educators by offering a flexible framework to assign units‚ catering to diverse learning needs and curricular requirements‚ while maintaining an engaging and comprehensive introduction to astronomy․

Why Choose “Pathways to Astronomy 6th Edition”

Choose Pathways to Astronomy 6th Edition for its structured yet flexible units‚ offering an engaging and comprehensive learning experience․ Its positive reviews highlight its effectiveness in astronomy education․

8․1 Unique Approach to Learning Astronomy

The 6th Edition of Pathways to Astronomy employs a unique modular structure‚ dividing content into 86 interconnected units․ This approach allows learners to explore topics in a logical sequence or focus on specific areas of interest‚ enhancing flexibility and personalization․ The text seamlessly integrates foundational concepts with real-world applications‚ fostering a deeper understanding of astronomy․ Its innovative design makes complex topics accessible and engaging for students and enthusiasts alike․

8․2 Positive Reviews and Recommendations

The 6th Edition of Pathways to Astronomy is praised for its clear explanations and engaging structure․ Educators and students highlight its ability to simplify complex concepts‚ making it accessible to newcomers․ The modular design and supplementary resources are frequently commended‚ while its availability in PDF enhances convenience․ Positive reviews emphasize its value as a comprehensive and user-friendly guide for both academic and personal astronomy exploration․

How to Access the PDF Version

To access the PDF of Pathways to Astronomy 6th Edition‚ visit reputable platforms like McGraw-Hill Education or authorized digital retailers․ Use direct download links or search for reliable sources to ensure authenticity and safety․

9․1 Direct Download Links and Platforms

Access the PDF of Pathways to Astronomy 6th Edition through platforms like McGraw-Hill Education‚ Issuu‚ or RedShelf․ Use direct links or search by ISBN (1260258068) for quick access․ Ensure reliability by purchasing from authorized retailers and avoiding unauthorized sites to maintain content quality and security․ Always verify the source and use secure payment methods to download safely․

9․2 Tips for Finding Reliable Sources

When searching for the Pathways to Astronomy 6th Edition PDF‚ prioritize official retailers like McGraw-Hill Education or RedShelf․ Verify the ISBN (1260258068) to ensure authenticity․ Avoid unauthorized sites to prevent downloading corrupted files․ Use secure payment methods and check for user reviews or ratings to confirm reliability․ Always download from trusted platforms to guarantee access to the complete‚ high-quality content of the textbook․

Pathways to Astronomy 6th Edition is a comprehensive guide to exploring the cosmos‚ offering structured learning through 86 units․ It inspires curiosity and a deeper appreciation for astronomy‚ making it an invaluable resource for both students and enthusiasts alike․

10․1 Final Thoughts on the Textbook

Pathways to Astronomy 6th Edition is a cornerstone of astronomy education‚ offering a structured yet flexible approach to understanding the cosmos․ Its division into 86 units ensures a seamless learning experience‚ catering to both beginners and enthusiasts․ The PDF format enhances accessibility‚ allowing readers to explore the universe’s wonders on various devices․ With its engaging narrative and supplementary resources‚ this textbook remains an indispensable tool for anyone passionate about astronomy․

10․2 Encouragement to Explore the Cosmos

Pathways to Astronomy 6th Edition inspires readers to embark on a journey of cosmic discovery․ Its clear structure and engaging content make astronomy accessible to everyone‚ fostering curiosity and a deeper appreciation for the universe․ Whether you’re a student or an amateur astronomer‚ this textbook invites you to explore the wonders of the cosmos‚ sparking a lifelong passion for understanding the stars and beyond․

Byvelma

archangel michael guido reni

Guido Reni’s Archangel Michael masterfully depicts the celestial warrior defeating Satan, symbolizing the eternal struggle between light and darkness, a quintessential Christian art theme․

1․1 Overview of the Painting

Guido Reni’s Archangel Michael is a striking oil on canvas created in 1635, depicting the celestial warrior triumphing over Satan․ The painting captures a dramatic scene from Christian theology, with Michael, clad in a Roman military cloak and cuirass, trampling the dragon-like figure of Satan․ The artwork is renowned for its vivid use of light and color, emphasizing the contrast between divine light and darkness․ Commissioned for the Church of the Capuchins, it remains a powerful symbol of good’s victory over evil, showcasing Reni’s mastery of baroque art and emotional expression․

1․2 Historical Context of the Artwork

Guido Reni’s Archangel Michael was painted in 1635 during the Baroque period, a time of religious and artistic revival․ Commissioned by Cardinal Antonio Barberini for the Church of the Capuchins in Rome, the painting reflects the Catholic Church’s emphasis on counter-reformation ideals․ Reni’s work was part of a broader artistic movement aiming to evoke emotional and spiritual responses․ The painting’s creation coincided with a period of heightened religious fervor, making it a significant piece in the church’s collection․ It also underscores Reni’s reputation as a leading artist of his time, blending classical influences with dramatic baroque elements․

1․3 Significance of Archangel Michael in Art

Archangel Michael holds profound significance in Christian art as a symbol of divine justice and victory over evil․ Often depicted as a warrior, he embodies strength and protection․ In Guido Reni’s work, Michael trampling Satan represents the triumph of good over evil, a theme central to Christian theology․ This imagery has been a recurring motif in art, inspiring countless interpretations․ Reni’s portrayal, with its dramatic composition and emotional depth, solidifies Michael’s role as a cultural and religious icon, transcending time to resonate with audiences seeking hope and divine assurance․ His depiction remains a powerful visual testament to faith and redemption․

Guido Reni: The Artist Behind the Masterpiece

Guido Reni, a prominent 17th-century Italian painter, is celebrated for his emotional depth and classical influences, creating works that reflect divine beauty and spiritual intensity․

2․1 Biography of Guido Reni

Guido Reni (1575–1642) was a prominent Italian painter from Bologna, known for his expressive and emotionally charged works․ Born into a family of musicians, Reni began his artistic training under Denial and later the Carracci brothers․ He gained acclaim for his lyrical style, which blended elegance with dramatic intensity, earning him the nickname “The Divine Guido․” His career spanned multiple genres, from religious to mythological themes, leaving a lasting impact on Baroque art․ Reni’s personal life was marked by struggles, including gambling debts, yet his artistic legacy endures as a testament to his talent․

2․2 Reni’s Artistic Style and Techniques

Guido Reni’s artistic style is characterized by elegance, refinement, and emotional depth․ He excelled in using light and color to create dramatic effects, often employing chiaroscuro to heighten tension․ Reni’s compositions are balanced and harmonious, reflecting his study of classical art․ His figures are graceful, with serene expressions, conveying a sense of ideal beauty․ Reni’s technique included meticulous attention to detail and a mastery of anatomical precision․ His use of vivid colors and dynamic movement added energy to his works, while his ability to evoke emotion through subtle gestures and expressions remains a hallmark of his artistry․

The Painting’s Iconography

Guido Reni’s painting symbolizes the cosmic battle between good and evil, with Archangel Michael triumphing over Satan, depicted as a dragon, embodying light’s victory over darkness․

3․1 Imagery of the Battle Between Good and Evil

Guido Reni’s painting vividly captures the dramatic confrontation between Archangel Michael and Satan, portrayed as a dragon․ Michael, clad in a Roman military cloak and cuirass, stands triumphantly, his sword raised high․ Satan, beneath his foot, is depicted with a twisted face and monstrous features, symbolizing evil’s defeat․ The dynamic composition emphasizes movement and tension, with angels joining Michael in the celestial battle․ Reni’s use of light and shadow heightens the emotional intensity, contrasting divine purity with the darkness of the fallen․ This iconic scene encapsulates the eternal struggle between good and evil, resonating deeply with Christian theology and art․

3․2 Symbolism of Light and Darkness

Guido Reni’s painting masterfully employs light and darkness to symbolize the conflict between good and evil․ Archangel Michael, bathed in radiant light, embodies divine purity and strength, while Satan, shrouded in shadows, represents chaos and evil․ The stark contrast between these elements underscores the spiritual battle, with light signifying redemption and darkness symbolizing sin․ Reni’s use of chiaroscuro amplifies the dramatic tension, creating a visual and emotional divide between the celestial and the fallen․ This duality reinforces the painting’s theological message, emphasizing the triumph of light over darkness and good over evil․

3․3 Depiction of Satan as a Dragon

In Guido Reni’s painting, Satan is depicted as a dragon with a human head, symbolizing evil and chaos․ This representation draws from biblical imagery, particularly the Book of Revelation, where the dragon embodies Satan’s fall․ The dragon’s grotesque features, twisted face, and rough, bat-like wings emphasize its malevolent nature․ Archangel Michael’s triumph over this creature visually reinforces the victory of divine justice over evil․ The depiction of Satan as a dragon underscores the painting’s theological themes, creating a striking visual contrast between good and evil, and highlighting the cosmic struggle between light and darkness․

Theological Themes in the Painting

The painting embodies central Christian themes: the battle between good and evil, divine justice, and the expulsion of evil from heaven, symbolizing eternal redemption․

4․1 The Role of Archangel Michael in Christian Theology

Archangel Michael holds a significant position in Christian theology as a divine warrior and protector of faith․ He is often depicted as a defender of heaven, leading the battle against evil forces․ Michael is revered as a symbol of courage and righteousness, embodying God’s justice․ His role in defeating Satan, as described in the Book of Revelation, underscores his importance as a protector of the faithful and a champion of divine authority․ This depiction aligns with Guido Reni’s portrayal, highlighting Michael’s celestial authority and unwavering commitment to God’s will․

4․2 The Fall of Lucifer and the War in Heaven

The Fall of Lucifer and the War in Heaven are central to Christian theology, depicting a celestial conflict between good and evil․ Archangel Michael leads the faithful angels against Lucifer, who rebels against God․ This battle, described in Revelation, results in Lucifer’s transformation into Satan and his expulsion from heaven․ Guido Reni’s painting vividly captures this narrative, with Michael triumphantly trampling the dragon, symbolizing Satan’s defeat․ The artwork emphasizes the divine struggle and the ultimate victory of righteousness, resonating with the theological themes of redemption and the eternal conflict between light and darkness․

4․3 The Triumph of Good Over Evil

Guido Reni’s depiction of Archangel Michael triumphing over Satan embodies the ultimate victory of good over evil․ The painting symbolizes divine justice and the celestial triumph, where Michael, as a warrior of light, defeats the dragon representing Satan․ This triumph reinforces the theological message of hope and redemption, showcasing the power of faith and righteousness․ The artwork visually conveys the eternal struggle between light and darkness, with Michael’s victory signifying the enduring prevalence of good in the cosmic battle․ It serves as a powerful reminder of divine order and the inevitability of evil’s defeat․

Artistic Elements and Composition

Guido Reni’s masterful use of light, color, and dynamic composition creates a powerful visual narrative, blending classical influences with dramatic movement and anatomical precision․

5․1 Use of Color and Light

Guido Reni’s use of color and light in Archangel Michael is striking, employing vivid hues and dramatic contrasts to emphasize the battle between good and evil․ The painting utilizes chiaroscuro, with light radiating from Michael, symbolizing divine grace, while darkness shrouds Satan, representing evil․ Reni’s mastery of tenebrism creates a dynamic interplay of shadows and illumination, heightening the emotional intensity of the scene․ The vibrant colors and intricate light effects not only enhance the composition but also deepen the theological significance, drawing the viewer’s eye to Michael’s triumphant figure․ This technique underscores the painting’s spiritual and artistic brilliance․

5․2 Anatomical Detail and Movement

Guido Reni’s Archangel Michael showcases exceptional anatomical detail, with the archangel’s poised stance and muscular form reflecting classical ideals of beauty and strength․ Michael’s graceful yet powerful movement conveys divine authority, while Satan’s twisted pose embodies chaos․ Reni’s precise rendering of human anatomy highlights the tension between order and disorder, emphasizing the battle’s intensity․ The flowing robes and dynamic postures create a sense of motion, drawing the viewer into the dramatic confrontation․ This attention to detail underscores Reni’s mastery of capturing both physical and emotional depth in his subjects․ The painting’s anatomical precision enhances its theological and artistic impact․

5․4 The Influence of Classical Art on Reni’s Work

Guido Reni’s Archangel Michael reflects the strong influence of classical art, particularly in its composition and anatomical precision․ The archangel’s idealized form, poised stance, and balanced proportions echo classical sculptures, evoking harmony and timeless beauty․ Reni’s meticulous attention to detail and use of contrapposto highlight his study of ancient Greek and Roman art․ This classical influence not only elevated the painting’s aesthetic but also reinforced its theological themes, presenting the divine as both powerful and serene․ The fusion of classical ideals with religious subject matter underscores Reni’s deep respect for tradition and his innovative approach to sacred art․

The Painting’s Legacy

Guido Reni’s Archangel Michael remains an iconic masterpiece, inspiring later artists and captivating audiences with its timeless depiction of divine triumph, solidifying its cultural and religious significance․

6․1 Influence on Later Artists

Guido Reni’s Archangel Michael profoundly influenced later artists, particularly in its dynamic composition and dramatic use of light․ The painting’s emotional intensity and anatomical precision inspired Baroque and Neoclassical artists to explore similar themes of divine conflict․ Its balanced proportions and vivid symbolism set a benchmark for religious art, while its portrayal of movement and tension became a model for depicting celestial battles․ Reni’s masterpiece remains a timeless icon, continuing to inspire artists and captivate audiences with its enduring beauty and spiritual depth, solidifying its place in the canon of Western art history․

6․2 Cultural and Religious Impact

Guido Reni’s Archangel Michael holds profound cultural and religious significance, embodying the triumph of good over evil․ It became a powerful symbol of faith, inspiring devotion and reinforcing Catholic doctrine․ The painting’s dramatic imagery and emotional depth resonated deeply with audiences, making it a focal point in religious art․ Its widespread reproduction in engravings and prints further amplified its influence, spreading its message across Europe․ The work not only beautified places of worship but also strengthened religious identity, solidifying its role as a cultural and spiritual icon of the Baroque era, while addressing contemporary theological themes․ Its legacy endures as a masterpiece of sacred art․

6․3 Scandals and Controversies Surrounding the Painting

Guido Reni’s Archangel Michael was not without controversy․ Its commission by Cardinal Antonio Barberini sparked rumors of favoritism and artistic rivalry․ Reni’s meticulous style often led to disputes with patrons, and this painting was no exception․ Additionally, the artist’s personal life, including alleged ties to a mysterious woman, drew scrutiny․ Some art historians suggest the painting’s dramatic intensity reflects Reni’s inner turmoil․ These scandals, though overshadowed by the work’s brilliance, remain a fascinating aspect of its history, adding layers to its cultural narrative and enduring fascination․ The painting’s legacy is thus intertwined with both reverence and intrigue․

Guido Reni’s Archangel Michael embodies the triumph of good over evil, capturing divine struggle and redemption through masterful artistry, leaving an enduring legacy in Christian art and culture․

7․1 Summary of Key Points

Guido Reni’s Archangel Michael is a 17th-century masterpiece depicting the celestial warrior defeating Satan, symbolizing the triumph of good over evil․ Commissioned for a church, the painting showcases vivid imagery, with Michael trampling a dragon representing Satan․ Reni’s use of light and color emphasizes divine purity and power․ The artwork reflects Christian theology, highlighting Michael’s role as a protector and the fall of Lucifer․ Its dramatic composition and emotional depth have influenced later artists, solidifying its cultural and religious significance while sparking controversies over its interpretations and historical context․

7․2 Reflection on the Painting’s Enduring Significance

Guido Reni’s Archangel Michael remains a timeless masterpiece, captivating audiences with its powerful depiction of good triumphing over evil․ Its vivid imagery and emotional depth continue to inspire spiritual reflection and artistic admiration․ The painting’s universal themes of hope, faith, and the struggle between light and darkness resonate across cultures and centuries․ Reni’s mastery of composition and symbolism ensures its enduring relevance, making it a landmark in religious and artistic history․ Its influence on later artists and its role in devotion highlight its lasting impact, solidifying its place as a cultural and spiritual treasure․

Byvelma

nxstage system one user manual

The NxStage System One is a portable, FDA-cleared hemodialysis system designed for home use, offering simplicity, flexibility, and convenience for patients with end-stage renal disease.

1.1 Overview of the NxStage System One

The NxStage System One is a portable hemodialysis system designed for home use, offering simplicity, flexibility, and convenience for patients with end-stage renal disease. It is a compact, user-friendly device that enables patients to perform hemodialysis in the comfort of their own homes. The system incorporates advanced technology, including a cartridge system and optional PureFlow SL for dialysate preparation, making it easy to use and transport. Its design promotes patient autonomy, allowing for frequent and personalized therapy, which can improve overall health outcomes and quality of life.

1.2 Key Features and Benefits

The NxStage System One offers portability, ease of use, and flexibility, making it ideal for home hemodialysis. Its compact design saves space, while the user-friendly interface simplifies operation. The system supports frequent dialysis, enhancing health outcomes. It features a cartridge system and optional PureFlow SL for dialysate preparation, reducing reliance on external supplies. FDA-cleared and designed for patient autonomy, it empowers individuals to manage their therapy confidently. These features collectively improve quality of life and provide a convenient, efficient dialysis solution.

Getting Started with the NxStage System One

Getting started involves understanding the system components, initial setup, and proper installation. This ensures safe and effective operation of the NxStage System One for home dialysis.

2.1 System Components and Accessories

The NxStage System One includes a compact control unit, cartridges, and accessories like the PureFlow SL for dialysate preparation. These components ensure portability and ease of use, enabling patients to perform hemodialysis at home effectively. The system is designed to be user-friendly, with all necessary elements integrated for convenience and safety. Proper understanding of each component is essential for successful operation and maintenance, as outlined in the user manual. This setup simplifies home dialysis, making it accessible and manageable for patients.

2.2 Initial Setup and Installation

The NxStage System One requires careful initial setup to ensure proper functionality. The control unit, cartridges, and PureFlow SL must be connected according to the user manual. Patients or caregivers should follow the step-by-step installation guide to prepare the system for use. This includes priming the lines, testing the equipment, and ensuring all components are securely connected. Proper installation is critical for safe and effective dialysis sessions. Always refer to the user manual for detailed instructions to avoid errors and ensure compliance with safety guidelines.

Operating the NxStage System One

The NxStage System One is designed for user-friendly operation, with a simple interface for inputting treatment parameters and monitoring sessions. Its portability and intuitive design make it ideal for home use, allowing patients to manage their dialysis therapy with ease and flexibility.

3.1 User-Friendly Interface and Navigation

The NxStage System One features an intuitive interface designed to simplify dialysis therapy management. Its touchscreen display provides clear, step-by-step guidance, ensuring easy navigation for patients and caregivers. The system offers customizable prescription settings, real-time monitoring, and visual alerts for seamless operation. This user-centric design minimizes complexity, enabling patients to perform treatments confidently and independently. The interface also includes interactive tutorials and troubleshooting guides, further enhancing usability and accessibility for home dialysis users.

3.2 Inputting Prescription Parameters

Inputting prescription parameters into the NxStage System One is straightforward, with the user guide providing clear instructions. Patients or caregivers can easily customize treatment settings, such as dialysis time, blood flow rate, and dialysate concentration, to meet individual needs. The system ensures accuracy by guiding users through each step, minimizing errors. Adherence to prescribed parameters is critical for effective therapy, and the user manual emphasizes the importance of following these settings precisely to ensure safe and optimal dialysis outcomes.

3.3 Monitoring During Dialysis Sessions

Monitoring during dialysis sessions with the NxStage System One is essential for ensuring safe and effective therapy. The system tracks vital parameters such as blood pressure, flow rates, and fluid levels, providing real-time updates. Alarms are triggered if preset limits are exceeded, allowing for prompt intervention; Users are advised to closely observe these metrics and follow the user manual’s guidance for troubleshooting. Regular monitoring ensures the therapy remains within prescribed settings, optimizing patient outcomes and minimizing potential complications.

NxStage System One User Guide

The NxStage System One User Guide provides clear instructions for operating and troubleshooting the system, ensuring safe and effective use in home hemodialysis therapy.

4.1 Structure and Content of the User Manual

The NxStage System One User Manual is a comprehensive guide designed to assist patients and clinicians in understanding and operating the system effectively. It includes detailed sections on system settings, troubleshooting common alarms, and technical specifications. The manual also covers essential topics such as anticoagulation protocols, cartridge replacement, and proper maintenance procedures. Appendices provide additional resources, including quick reference guides and troubleshooting checklists. The manual is structured to ensure safe and effective use of the NxStage System One, making it an indispensable tool for home hemodialysis therapy.

4.2 Troubleshooting Common Alarms and Issues

The user manual provides detailed guidance for resolving common alarms and technical issues with the NxStage System One. It includes step-by-step instructions for identifying and addressing error codes, such as connectivity problems or cartridge malfunctions. The manual also offers troubleshooting checklists to help users quickly diagnose and resolve issues. For critical alarms, it advises consulting the technical support team or referring to the troubleshooting section in the user guide. This ensures safe and effective operation of the system, minimizing downtime during dialysis sessions.

Technical Specifications and Requirements

The NxStage System One is a portable, FDA-cleared hemodialysis system designed for home use, integrating water treatment and dialysate mixing technology into a compact, user-friendly design.

5.1 System Settings and Configuration

The NxStage System One features customizable system settings to meet individual patient needs. The control unit allows adjustment of dialysate composition, temperature, and flow rate. Cartridge configuration, including the PureFlow SL, ensures proper dialysate preparation. The system’s user interface provides clear navigation for setting therapy parameters, monitoring, and troubleshooting. Configuration options are detailed in the user manual, ensuring safe and effective operation. Regular updates and maintenance are required to maintain optimal performance and patient safety.

5.2 Cartridge System and Sterilization Methods

The NxStage System One utilizes a cartridge-based system for dialysate preparation and delivery. The cartridges are gamma sterilized, ensuring safety and eliminating the need for ethylene oxide (ETO) or electron beam (e-Beam) methods. The PureFlow SL system integrates with the cartridges, allowing patients to prepare dialysate at home without external water treatment. Proper cartridge replacement and sterilization procedures are detailed in the user manual to maintain system integrity and patient safety during hemodialysis sessions.

Safety and Precautions

Adherence to guidelines is critical. Monitor blood pressure and ensure aseptic technique. Follow training materials and instructions to avoid complications. Always review warnings and contraindications before use.

6.1 Important Safety Information

Ensure adherence to safety guidelines when using the NxStage System One. Always maintain aseptic technique and monitor blood pressure during therapy. Follow all training materials and instructions provided to avoid complications. Improper use can lead to serious health risks. Federal law restricts the sale of this device to physician orders only. Read the complete Instructions for Use for detailed safety precautions, contraindications, and side effects. The system is intended for single-patient use to prevent cross-contamination and ensure optimal performance.

6.2 Contraindications and Warnings

The NxStage System One is not suitable for patients with certain medical conditions or those requiring specific dialysis modalities. Severe hypotension, unstable vascular access, or hypersensitivity to system components are contraindications. Use with caution in patients with cardiovascular instability; Adhere strictly to prescribed treatment parameters to avoid adverse effects. Always follow the Clinician and Patient Training Resources for proper usage. Failure to comply may result in serious health complications. Review the full package labeling for comprehensive contraindications and warnings before initiating therapy.

Maintenance and Troubleshooting

Regular maintenance is essential to ensure the NxStage System One operates efficiently and safely. Refer to the troubleshooting guides for resolving common technical issues. Users can address minor alarms and errors independently, but complex problems require professional assistance. Always follow the Troubleshooting the Cycler video or quick reference guide for detailed instructions. For advanced support, consult the technical documentation or contact NxStage support. Proper maintenance and prompt issue resolution are critical for optimal system performance and patient safety.

7.1 Regular Maintenance Requirements

Regular maintenance is crucial for ensuring the optimal performance and longevity of the NxStage System One. Users must replace cartridges and check filters periodically to maintain functionality. The system’s cartridge replacement schedule is outlined in the user manual, and sterilization methods like gamma sterilization are recommended. Proper cleaning and inspection of all components are essential to prevent technical issues. Additionally, users should review and follow the maintenance guidelines provided in the NxStage System One User Guide to ensure safe and effective operation. Regular upkeep helps maintain patient safety and system efficiency.

7.2 Resolving Common Technical Issues

Common technical issues with the NxStage System One can often be resolved by referring to the troubleshooting section in the user manual. Alarms and error messages should be addressed promptly by checking connections, ensuring proper cartridge installation, and verifying system settings. Users are advised to restart the system if necessary and review the troubleshooting guide for specific solutions. For unresolved issues, contacting NxStage technical support or consulting the technical documentation is recommended to ensure optimal functionality and patient safety. Regular updates and maintenance can also prevent recurring technical problems.

Training and Support

The NxStage System One provides comprehensive training resources, including user guides, quick reference materials, and troubleshooting videos. Clinicians and patients can access detailed documentation and support services to ensure safe and effective use, fostering independence and confidence in managing dialysis therapy.

8.1 Clinician and Patient Training Resources

The NxStage System One offers extensive training resources for both clinicians and patients, ensuring safe and effective use of the system. These include detailed user guides, quick reference materials, and troubleshooting videos. The NxStage System One Users Guide provides step-by-step instructions, while the Nursing Manual offers clinical insights. Additional resources like the PureFlow SL User Guide and Cartridge Instructions further support therapy management. These materials are designed to empower users with knowledge, fostering confidence and independence in performing hemodialysis therapy.

8.2 Accessing Technical Documentation

Technical documentation for the NxStage System One is readily available online, including user manuals, troubleshooting guides, and specific instructions for system settings. Users can access these resources through the official NxStage website or authorized distributors. Documents are typically provided in PDF format, requiring Adobe Acrobat Reader for viewing. The NxStage System One Users Guide and Technical Manuals are comprehensive resources for understanding system operations, maintenance, and troubleshooting. These documents ensure users have the necessary information to operate the system safely and effectively, adhering to FDA guidelines and manufacturer recommendations.

The NxStage System One is a portable, user-friendly hemodialysis solution offering flexibility and convenience for patients with end-stage renal disease, empowering them with control over their therapy.

9.1 Summary of Key Points

The NxStage System One is a portable, user-friendly hemodialysis system designed for home use, offering flexibility and convenience for patients with end-stage renal disease. It provides simplified therapy management, empowering patients with greater control over their treatment. The system’s compact design and ease of use make it ideal for home hemodialysis, allowing for more frequent sessions and improved quality of life. The user manual is essential for safe and effective use, detailing setup, operation, and troubleshooting to ensure optimal therapy outcomes for patients and clinicians alike.

9.2 Final Thoughts on the NxStage System One

The NxStage System One represents a significant advancement in home hemodialysis, offering patients unparalleled portability, ease of use, and flexibility. Its user-centric design empowers individuals to manage their therapy confidently, enhancing their quality of life. With comprehensive support resources and a focus on safety, the System One stands out as a reliable solution for patients seeking independence in their renal care. It embodies innovation in healthcare, making home dialysis more accessible and manageable than ever before.

Byvelma

8865 instructions

Form 8865 is used by U.S. persons to report interests in foreign partnerships. It ensures compliance with IRS regulations, requiring detailed disclosures. Proper completion is essential for accuracy.

Purpose of Form 8865

Form 8865 is used to report interests in foreign partnerships and certain transactions. It ensures U.S. persons comply with IRS requirements, providing detailed disclosures. The form captures ownership stakes, income allocations, and changes in partnership interests. It also applies to indirect or attributed interests. Accurate reporting is crucial for tax compliance, avoiding penalties. The form helps the IRS monitor international transactions and enforce tax laws effectively.

Overview of Filing Requirements

Form 8865 must be filed by U.S. persons with interests in foreign partnerships. Filers must submit the form with their tax return, with deadlines aligning with their return due date. Separate forms are required for each foreign partnership. Attach schedules like A, K-1, K-2, and K-3 as needed. Even if no tax return is required, Form 8865 must still be filed. Ensure accurate completion to avoid penalties. File electronically or by mail, attaching it to your tax documents. Follow IRS instructions carefully for compliance.

Categories of Filers

U.S. persons with foreign partnership interests are categorized into four groups. These include direct, indirect, attributed, and constructive ownership. Each category has specific filing criteria.

Category 1: U.S. Persons with Direct Interests

U.S. persons with direct interests in a foreign partnership must file Form 8865. This includes owning a stake directly in the partnership. They must report their share of income, deductions, and credits. Schedule K-1 is crucial for detailing this information. Proper documentation ensures compliance with IRS regulations. Failure to report can lead to penalties. The form requires detailed disclosures about the partnership’s operations and the filer’s ownership percentage.

Category 2: U.S. Persons with Indirect Interests

U.S. persons with indirect interests in a foreign partnership must also file Form 8865. This includes interests held through another entity, such as a corporation or partnership. Indirect interests are subject to specific reporting requirements. Filers must disclose their proportionate share of income, deductions, and credits. Schedule A is used to detail ownership structures. Accurate reporting is critical to avoid penalties. The IRS requires complete transparency regarding indirect ownership stakes in foreign entities. Proper documentation ensures compliance with all applicable regulations. Separate filings may be necessary for multiple foreign partnerships.

Category 3: U.S. Persons with Certain Attributed Interests

Category 3 includes U.S. persons with attributed interests in a foreign partnership, such as through family members or controlled entities. These interests are treated as owned directly for reporting purposes. Filers must report proportionate shares of income, deductions, and credits. Schedule A is required to detail ownership and interests. Accurate disclosure is crucial to meet IRS requirements. Attributed interests often involve complex relationships, so proper documentation is essential. Separate filings may be necessary for each foreign partnership. Failure to report attributed interests can result in penalties and compliance issues.

Category 4: U.S. Persons with Constructive Ownership

Category 4 encompasses U.S. persons with constructive ownership in a foreign partnership. This occurs when an individual indirectly owns an interest through another entity or person. Constructive ownership applies even without direct legal ownership. Specific rules determine when interests are attributed. Filers must report their constructive shares of income and deductions. Schedule A and additional schedules are required to detail ownership structures. Proper reporting ensures compliance with IRS regulations. Constructive ownership can be complex to determine, so careful analysis is necessary to avoid penalties.

Essential Schedules and Attachments

Form 8865 requires several key schedules, including Schedule A for ownership details, Schedule K-1 for income sharing, and Schedules K-2 and K-3 for international tax items.

Schedule A: Partnerships and Ownership

Schedule A of Form 8865 details partnerships and ownership interests. It requires the name, EIN, and ownership percentage of each foreign partnership. Additional information includes the partnership’s country, tax year, and other identifiers. This schedule ensures a clear understanding of the partnership structure and the U.S. person’s interest. Accurate completion is crucial for compliance with IRS regulations and proper reporting of foreign partnership activities.

Schedule K-1: Partner’s Share of Income, Deductions, Credits, etc.

Schedule K-1 outlines a partner’s share of income, deductions, and credits from a foreign partnership. It provides detailed financial information, ensuring accurate reporting of each partner’s distributive share. This schedule is essential for complying with IRS requirements and must be completed for each partner with an interest in the partnership. Proper completion ensures all financial aspects are transparent and align with U.S. tax regulations, facilitating accurate tax filings and compliance.

Schedule K-2: Items of International Tax Relevance

Schedule K-2 reports items of international tax relevance, such as foreign taxes paid, foreign tax credits, and other globally relevant financial details. It provides detailed information about the partnership’s international transactions and is crucial for ensuring compliance with U.S. tax laws. This schedule is essential for accurately reporting global income and credits, aiding in the prevention of double taxation. Proper completion of Schedule K-2 ensures that all international tax matters are transparently disclosed, aligning with IRS requirements for foreign partnerships.

Schedule K-3: Partner’s Share of Income, Deductions, Credits, etc. (continued)

Schedule K-3 provides a detailed breakdown of each partner’s share of income, deductions, and credits from foreign partnerships. It continues the reporting from Schedule K-1, offering a comprehensive view of each partner’s financial involvement. This schedule is crucial for ensuring accurate tax reporting and compliance with IRS regulations; It includes specific allocations and adjustments, aiding in the proper calculation of each partner’s tax liability. Proper completion of Schedule K-3 ensures transparency and clarity in reporting foreign partnership interests.

Filing Requirements and Deadlines

Form 8865 must be filed by the taxpayer’s regular tax return deadline. For individuals, this is typically April 15, while businesses may have earlier deadlines, with penalties for late submissions.

General Filing Deadlines

Form 8865 must be filed by the taxpayer’s regular tax return deadline. For individuals, this is typically April 15, while businesses may have earlier deadlines. The form should accompany the taxpayer’s income tax return or be filed separately if no return is required. Electronic filing is recommended for accuracy and timeliness. Missing the deadline may result in penalties, so careful attention to the IRS calendar is crucial. Ensure all schedules and attachments are included to avoid delays in processing.

Extensions and Late Filing Penalties

Extensions for filing Form 8865 can be requested using Form 4868 for individuals or Form 7004 for businesses. The standard extension period is six months. Late filing may result in penalties, calculated based on the unpaid tax or failure to report income. Interest accrues on unpaid amounts, and additional penalties may apply for negligence or disregard of filing requirements. Timely filing and requesting extensions when necessary are crucial to avoid IRS penalties and ensure compliance with tax regulations.

Special Instructions for Completing Form 8865

Ensure accuracy by following IRS guidelines, properly reporting interests, and completing all relevant schedules. Adhere to specific instructions for each category of filers to maintain compliance.

Step-by-Step Guide to Completing the Form

Determine your filing category (1-4) based on ownership type.
Gather all required documents, including foreign partnership details.
Complete the main form, ensuring accurate information on interests and transactions.
Attach necessary schedules (e.g., K-1, K-2) for detailed reporting.
Review for compliance with IRS guidelines and deadlines.
Submit electronically or by mail, adhering to specified filing procedures.

Common Mistakes to Avoid

Avoid filing incorrect or incomplete schedules, such as missing Schedule K-1 or K-2. Ensure accurate reporting of ownership percentages and transaction details. Do not overlook filing deadlines or extensions. Verify proper categorization of filers to meet specific requirements. Avoid omitting signatures or necessary attachments; Double-check foreign partnership details for accuracy. Ensure compliance with IRS guidelines to prevent penalties. Review the form thoroughly before submission to catch errors early.

Additional Resources and References

Visit the IRS website for Form 8865 instructions, schedules, and publications. Utilize tax professional guidance for complex filings. Access IRS Revenue Procedures for detailed rules.

IRS Guidance and Publications

The IRS provides comprehensive guidance through Form 8865 instructions and related publications. Visit the official IRS website for access to downloadable forms, schedules, and detailed revenue procedures. Key resources include the Instructions for Form 8865, which outline filing requirements, categories of filers, and step-by-step completion tips. Additionally, Revenue Procedure 2009-37 offers insights into reporting foreign partnerships. Utilize these resources to ensure compliance with all IRS regulations and accurately complete your form. Always refer to the latest updates for the most current information.

Professional Assistance and Tools

Consulting tax professionals or using specialized tools can simplify the complexities of Form 8865. Tax software like TurboTax or H&R Block offers guided workflows for accurate filing. Additionally, certified public accountants (CPAs) or tax attorneys with expertise in international tax law can provide tailored advice. The IRS website also offers resources, including detailed instructions and FAQs, to assist filers. Leveraging these tools ensures compliance and reduces errors, especially for complex cases involving foreign partnerships and multiple schedules.

Byvelma

sharper image drone instruction manual

Welcome to the Sharper Image Drone Instruction Manual! This guide provides essential information to help you safely and effectively operate your drone. Designed for all skill levels, this manual covers features, setup, and troubleshooting to ensure a seamless flying experience. Please read carefully to maximize your enjoyment and understanding of the device.

Overview of the Sharper Image Drone

The Sharper Image Drone is a versatile, user-friendly device designed for both indoor and outdoor use. Equipped with a built-in gyroscope for stability and LED directional lights, it offers a 164-foot flight range and HD video capabilities. This nano quadcopter is suitable for all skill levels, delivering smooth flights and easy controls. Its compact design and advanced features make it an excellent choice for capturing memorable moments from the sky.

Importance of Reading the Manual

Reading the manual is crucial for safe and effective operation of the Sharper Image Drone. It provides essential instructions for setup, usage, and maintenance, ensuring optimal performance and longevity. Understanding safety guidelines and troubleshooting tips helps prevent accidents and resolves common issues. Keep this guide handy for future reference to fully enjoy your drone experience and maintain its functionality over time.

Features of the Sharper Image Drone

The Sharper Image Drone offers indoor/outdoor versatility, a built-in gyroscope for stability, LED directional lights, and a 164-ft. flight range, ensuring smooth and enjoyable flights.

Indoor and Outdoor Usage

The Sharper Image Drone is designed for both indoor and outdoor flights, offering versatility for various environments. Its compact size and stable design make it suitable for flying at home or in open spaces. The drone performs smoothly in different settings, ensuring an enjoyable experience regardless of location. This adaptability makes it a great choice for users seeking flexibility in their flying adventures.

Built-in Gyroscope for Stability

The Sharper Image Drone features a built-in gyroscope, enhancing flight stability and control. This advanced technology ensures smooth and steady movements, making it easier for users of all skill levels to operate. The gyroscope automatically adjusts to maintain balance, providing a more enjoyable and precise flying experience. It’s a key feature that contributes to the drone’s overall performance and maneuverability in various conditions.

LED Directional Lights

The Sharper Image Drone is equipped with LED directional lights, enhancing visibility and orientation during flight. These lights not only improve safety but also add a sleek, modern aesthetic to the drone. They illuminate the direction of movement, making it easier to control the drone, especially in low-light conditions or when performing aerial stunts. The LED lights contribute to a more dynamic and enjoyable flying experience while ensuring better navigation and awareness.

Flight Range and Camera Capabilities

The Sharper Image Drone offers an impressive 164-foot flight range, allowing for extended exploration and photography. Equipped with a high-definition camera, it captures crisp photos and videos, which can be stored on an SD card or transferred via USB. This feature-rich drone is perfect for enthusiasts seeking to document their adventures with clarity and precision, making it an ideal choice for both casual and professional use.

Safety Precautions and Warnings

Adhere to all safety guidelines to ensure safe operation. Avoid collisions with obstacles and people. Do not fly near airports or in bad weather conditions. Keep the drone out of reach of children and avoid flying in restricted areas. Always follow local regulations and manufacturer instructions.

General Safety Guidelines

Always follow safety guidelines to ensure safe and responsible operation of your Sharper Image Drone. Keep the drone away from children and pets. Avoid flying near people, animals, or sensitive objects. Do not operate the drone in extreme weather conditions such as heavy rain or strong winds. Ensure the area is clear of obstacles before flying. Follow all local regulations and safety standards.

Operating Environment Considerations

Ensure the drone is operated in a safe and suitable environment. Avoid flying near obstacles, power lines, or tall structures. Choose open, spacious areas for optimal performance. Always maintain a clear line of sight with the drone. Be aware of wind conditions, as strong gusts may affect stability. Follow local regulations and ensure compliance with aviation guidelines in your area. Proper environment selection enhances both safety and flight quality.

Unboxing and Parts List

Inside the box, you’ll find the Sharper Image Drone, remote control, USB-C charging cable, and instruction manual. All components are included for a complete setup experience.

Components Included in the Package

Your Sharper Image Drone package includes the drone unit, a remote control, a USB-C charging cable, and this instruction manual. Additionally, the drone features a built-in rechargeable battery and an SD card slot for storage. Ensure all components are present before proceeding with setup. These items provide everything needed for a complete and enjoyable flying experience.

Understanding the Drone’s Anatomy

The Sharper Image Drone features a sleek design with a power button on top and LED directional lights on the front for easy navigation. The charging port is located on the bottom, and the remote control includes joysticks for precise movement. Familiarizing yourself with these components ensures smooth operation and enhances your flying experience. Proper understanding of the drone’s anatomy is key to safe and effective use.

Charging the Drone

Charge your Sharper Image Drone using the included USB-C cable. Plug the cable into the drone’s charging port and connect to a power source. Allow 1-2 hours for full charge. The LED lights will indicate charging status. Ensure the battery is fully charged before first use to optimize performance and longevity.

First-Time Charging Instructions

Before first use, charge the drone for 1-2 hours using the USB-C cable. Connect the cable to the drone’s port and a power source. LED lights will indicate charging status—steady for charging, off when fully charged. Ensure the battery is fully charged to optimize performance and longevity. Avoid overcharging to maintain battery health and ensure safe operation.

Using the USB-C Charging Cable

To charge the Sharper Image Drone, insert the USB-C end into the drone’s charging port and connect the other end to a compatible power source. Ensure the port is clean and free of debris for proper connection. The LED lights will indicate charging progress. Use only the provided cable to maintain compatibility and safety. Avoid using damaged cables to prevent potential issues during charging.

Pairing the Drone with the Remote Control

Turn on the drone and ensure the remote is off. Locate the pairing button on the drone or remote, press and hold until lights flash, confirming connection.

Syncing the Drone and Remote

Ensure both the drone and remote are turned off. Locate the pairing button on the remote and press and hold it until the LED lights begin to flash. Turn on the drone and wait for the lights to blink, indicating pairing mode. Once both devices are in pairing mode, they should automatically connect. If the connection is successful, the LED lights will stop blinking and remain solid. If pairing fails, restart the process or reset the drone and remote by pressing and holding the reset button for a few seconds. Ensure both devices are fully charged before attempting to pair again.

Calibrating the Drone for Flight

Place the drone on a flat, stable surface. Turn on the drone and remote. Press and hold the power button until the LED lights flash. Rotate the drone 360 degrees slowly to initialize the gyroscope. Once the lights stop blinking, the calibration is complete. Ensure the drone is upright and avoid moving it during this process. Calibration ensures stable flight performance and proper orientation.

Pre-Flight Checks

Ensure the battery is fully charged, propellers are secure, and the remote control is functioning properly. Check for any damage or loose parts before each flight.

Powering On the Drone

Locate the power button on the top of the drone. Press and hold it for 1-2 seconds until the LED lights illuminate. Ensure the remote control is turned off before powering on the drone. Once powered on, the drone is ready for syncing with the remote control. Always follow this sequence to avoid connectivity issues.

Checking the Remote Control Functionality

After powering on the drone, turn on the remote control. Ensure all joysticks and buttons respond correctly. Test the throttle, direction, and stunt buttons to confirm proper functionality. Verify the LED indicators on the remote align with the drone’s status. If any issues arise, refer to the troubleshooting section for resolution. Proper remote functionality is crucial for safe and precise flight control.

Flying the Sharper Image Drone

The LED lights provide clear direction and visibility, enhancing flight experiences both day and night, while indicating drone orientation and status for safe operations.

Basic Flight Controls and Movements

Mastering the Sharper Image Drone’s controls begins with the remote. Pushing the left joystick up increases throttle, while moving it left or right adjusts yaw. The right joystick controls pitch (forward/backward) and roll (side-to-side). Press the power button on the drone until LED lights activate. Ensure the remote is off, then sync by pressing the drone’s stunt button. Practice in an open area to get comfortable with movements and responsiveness.

Using the Stunt Button for Tricks

To perform tricks, locate the stunt button on your remote. Press and hold it to activate stunt mode. The drone will beep, signaling it’s ready. Use the joysticks to execute flips, spins, and other maneuvers. Start at a safe altitude to avoid collisions. Practice tricks in open spaces to master control and precision. The stunt button enhances your flying experience with exciting aerial moves.

Troubleshooting Common Issues

Common issues include connection problems or flight instability. Restart the drone and remote, ensure proper pairing, and check for software updates. Consult the manual for detailed solutions.

Resolving Connection Problems

To resolve connection issues, ensure the drone and remote are properly paired. Turn both off, then restart the drone by pressing and holding the power button until LEDs flash. Re-sync by pressing the pairing button on the remote and drone simultaneously. Ensure no other devices interfere with the 2.4GHz frequency. If issues persist, restart both devices and repeat the pairing process. Consult the manual for additional troubleshooting steps.

Addressing Flight Stability Concerns

If your drone experiences instability, ensure the built-in gyroscope is calibrated. Perform calibration by placing the drone on a flat surface, turning it on, and following the manual’s calibration steps. Check for software updates and ensure the drone is operated in ideal environmental conditions. Avoid flying in strong winds or near obstacles. If issues persist, reset the drone by power-cycling it and retry the calibration process.

Maintenance and Storage

Regularly clean the drone with a soft cloth and store it in a dry, cool place. Avoid exposure to extreme temperatures and moisture. Keep out of reach of children and ensure all components are secure before storage. Proper maintenance ensures optimal performance and extends the drone’s lifespan.

Cleaning the Drone

To maintain your drone’s performance, clean it regularly with a soft, dry cloth. Gently wipe the exterior, paying attention to vents and LED lights. Avoid using harsh chemicals or water, as they may damage electronic components. For stubborn dirt, dampen the cloth slightly but ensure the drone is dry before storage. Regular cleaning prevents debris buildup and ensures smooth operation. Always power off the drone before cleaning.

Proper Storage Techniques

Store your drone in a cool, dry place away from direct sunlight and moisture. Use the original packaging or a protective case to prevent damage. Remove the battery and store it separately in a cool, dry environment. Avoid leaving the drone in extreme temperatures or humid conditions. Regularly check stored components for dust or damage. Proper storage ensures longevity and optimal performance when you’re ready to fly again.

Final Tips for Enjoying Your Drone

To maximize your drone experience, practice in open spaces and avoid extreme weather conditions. Regularly clean the device to maintain performance. Explore all features gradually and refer to this manual for any questions. Always follow safety guidelines and local regulations. Happy flying and enjoy capturing stunning moments with your Sharper Image Drone!

Resources for Further Assistance

For additional support, visit the official Sharper Image website to download the latest manuals or contact customer support. Online forums and tutorials offer valuable tips and tricks. Ensure to use authorized retailers for genuine parts and accessories. Stay updated with firmware upgrades to optimize your drone’s performance and enjoy a hassle-free flying experience.

Byvelma

dtf care instructions

Direct-to-Film (DTF) printing is an innovative method for creating vibrant, durable designs on fabrics. Proper care ensures longevity and maintains the print’s quality and appearance effectively.

1.1 What is DTF Printing?

Direct-to-Film (DTF) printing is a cutting-edge method for customizing fabrics with vibrant, long-lasting designs. It involves printing designs onto a film, which is then transferred to the fabric using heat and pressure, creating a durable bond. This technique is popular for its versatility across various fabrics and its ability to maintain color vibrancy over time, making it ideal for custom apparel.

1.2 Benefits of DTF Printing

DTF printing offers exceptional durability, vibrant colors, and versatility across various fabrics. Its ability to produce intricate designs and maintain color consistency makes it ideal for custom apparel. The technique ensures a soft, breathable finish, enhancing comfort without compromising on visual appeal. Additionally, DTF prints are known for their resistance to fading and cracking, making them a popular choice for long-lasting, high-quality designs.

Pre-Wash Care for DTF Prints

Allowing a waiting period before washing is crucial for DTF prints. This ensures the adhesive cures properly, enhancing durability and preventing peeling or cracking over time.

2.1 Importance of Waiting Period

Allowing a curing period is essential for DTF prints. The adhesive needs time to bond with the fabric properly. Waiting 24-48 hours before washing ensures durability and prevents peeling or cracking. This step is crucial for the print’s longevity, as rushing it can weaken the bond and lead to premature wear. Proper curing ensures vibrant colors and a professional finish, making it a cornerstone of DTF care. Always prioritize this step.

2.2 Recommended Waiting Time

Experts recommend allowing DTF prints to cure for at least 24 hours before washing. For optimal bonding, 48 hours is ideal. This waiting period ensures the adhesive fully attaches to the fabric, enhancing durability. Proper curing prevents peeling and cracking, maintaining the print’s vibrancy. Always adhere to this timeframe to preserve the quality and longevity of your DTF designs. Consistency in waiting time is key to professional results.

Washing Instructions for DTF Prints

To maintain DTF print quality, wash garments inside out using cold water and a gentle cycle. Avoid harsh chemicals and fabric softeners to preserve vibrancy and prevent peeling.

3.1 Turning Garments Inside Out

Turning garments inside out before washing is crucial for protecting DTF prints. This simple step reduces friction and abrasion, preventing fading and cracking of the design. By shielding the print from direct contact with washing machine agitation, colors remain vibrant and the adhesive stays intact. It’s a simple yet effective method to ensure the longevity and quality of your DTF prints after multiple washes. Always prioritize this step for optimal care.

3.2 Water Temperature Guidelines

Using cold or cool water is essential for preserving DTF prints. Water temperatures should not exceed 30°C to 40°C (86°F to 104°F) to prevent the adhesive from weakening. Hot water can cause prints to crack or peel, while cold water helps maintain color vibrancy and fabric integrity. Always opt for a cool wash cycle to ensure the longevity and durability of your DTF designs, keeping them fresh and intact for extended periods.

3.3 Choosing the Right Detergent

Selecting a mild detergent is crucial for maintaining DTF print quality. Avoid harsh chemicals, bleach, or fabric softeners, as they can weaken the adhesive and cause peeling. Opt for a gentle, liquid detergent that is free from abrasive additives. This ensures the print remains vibrant and intact while protecting the fabric. Proper detergent choice helps preserve the durability and appearance of DTF designs during washing.

3.4 Selecting the Gentle Cycle

Choosing the gentle cycle is essential for preserving DTF prints. This cycle minimizes mechanical stress, reducing wear and tear on both the fabric and the print. A delicate wash setting ensures the adhesive remains intact, preventing peeling or cracking. By selecting a gentle cycle, you protect the vibrant colors and maintain the durability of the DTF design, ensuring it withstands repeated washing without degradation. This step is crucial for long-term care.

3.5 Avoiding Harsh Chemicals

Harsh chemicals, such as bleach or fabric softeners, can weaken the adhesive used in DTF printing, leading to peeling or cracking. These chemicals disrupt the bond between the print and fabric, reducing durability. To preserve the design, opt for mild detergents that are gentle on both the fabric and the print. Avoiding such chemicals ensures the vibrant colors and integrity of the DTF print remain intact after washing. This step is vital for maintaining longevity.

Drying Instructions for DTF Prints

Air drying is the preferred method to prevent cracking and fading. If using a dryer, select a low-heat setting to protect the print’s vibrancy and durability.

4.1 Tumble Drying on Low Heat

Tumble drying on low heat is a suitable option for DTF prints. It prevents excessive heat damage, which can cause peeling or cracking. To maintain vibrancy, ensure the dryer is set to a low-heat cycle. Remove the garment as soon as the cycle ends to prevent wrinkles and creases. This method helps preserve the print’s durability and appearance, extending its lifespan effectively. Proper drying ensures the design remains intact and vibrant for years.

4.2 Air Drying as a Preferred Method

Air drying is the preferred method for DTF prints to maintain their vibrancy and durability. Lay the garment flat or hang it inside out in a well-ventilated area. Avoid direct sunlight, as it can cause fading. Air drying prevents heat damage from machines, ensuring the print stays intact. This gentle method is ideal for preserving the quality and extending the lifespan of the DTF design effectively. Proper airflow ensures even drying without compromising the print’s integrity.

Post-Wash Care for DTF Prints

After washing, iron inside out on low heat to protect the print. Store garments in a cool, dry place, avoiding direct sunlight to preserve vibrancy and durability.

5.1 Ironing Inside Out

Ironing DTF prints inside out on low heat prevents direct contact with the print, minimizing damage. Place a cloth over the print for extra protection. Avoid using steam, as it can weaken the adhesive. Ironing inside out ensures the design remains vibrant and intact, while preventing cracking or peeling. Always test a small, inconspicuous area first to ensure safety. Proper ironing techniques help maintain the print’s durability and appearance.

5.2 Proper Storage Techniques

Store DTF-printed garments in a cool, dry place away from direct sunlight to prevent fading. Fold or hang them neatly to avoid creases. Use breathable fabric bags or cloth covers instead of plastic. Keep the items clean and dry before storing to prevent moisture buildup. Proper storage helps maintain the print’s vibrancy and prevents cracking or peeling over time. Avoid stacking heavy items on top of DTF prints to ensure their longevity.

Maintaining Vibrancy of DTF Prints

Regularly washing inside out in cold water and using mild detergents helps preserve colors. Avoid fabric softeners and harsh chemicals to maintain the print’s vibrancy and durability effectively.

6.1 Tips to Preserve Colors

Turning garments inside out before washing shields the design from friction and fading. Using cold water prevents color bleeding, while mild detergents avoid harsh chemicals that degrade inks. Air drying instead of heat helps maintain vibrancy. Avoiding fabric softeners ensures the adhesive remains strong, preventing peeling and cracking over time. These practices protect and extend the life of DTF prints effectively and reliably.

6.2 Avoiding Fabric Softeners

Fabric softeners weaken the adhesive used in DTF prints, leading to peeling and cracking. Opt for mild detergents without softening agents to preserve the print’s integrity. Avoiding these chemicals ensures the design remains vibrant and durable over time, maintaining the quality of the DTF print through repeated washing and wear. This practice is essential for long-lasting results and prevents premature degradation of the printed design.

Preventing Peeling and Cracking

Preventing peeling and cracking in DTF prints requires avoiding harsh chemicals, fabric softeners, and excessive heat. Proper care practices ensure the adhesive remains intact, maintaining design durability.

7.1 Common Causes

The primary causes of peeling and cracking in DTF prints include exposure to harsh chemicals, fabric softeners, and high heat during washing or drying. Additionally, insufficient curing time after application can weaken the adhesive bond, leading to premature wear. Abrasive fabrics and rough washing cycles can also contribute to damage, diminishing the print’s longevity and vibrancy over time.

7.2 Solutions to Enhance Durability

To enhance the durability of DTF prints, ensure garments are turned inside out before washing and use cold water with a mild detergent. Avoid fabric softeners and harsh chemicals, as they weaken the adhesive; Select a gentle wash cycle and air dry or tumble dry on low heat. Proper storage, such as folding instead of hanging, can also prevent stretching and stress on the print. Additional tips include minimizing sun exposure and avoiding abrasive fabrics.

Tips for Long-Term Durability

For long-term durability, avoid over-drying and minimize sun exposure. Use gentle cycles, cold water, and mild detergents. Proper storage and avoiding harsh chemicals are essential.

8.1 Avoiding Over-Drying

Avoiding over-drying is crucial to maintain the integrity of DTF prints. Remove garments promptly after drying cycles to prevent excessive heat exposure. Air drying or using low-heat settings minimizes stress on the print. Over-drying can cause the adhesive to weaken, leading to peeling or cracking. Proper drying techniques ensure the design remains vibrant and durable for a longer period. Always follow recommended drying guidelines to preserve the quality of your DTF prints effectively.

8.2 Minimizing Sun Exposure

Prolonged sun exposure can cause DTF prints to fade or crack due to UV rays weakening the adhesive and ink. To protect your designs, avoid direct sunlight or turn garments inside out when exposed. This simple step helps preserve vibrancy and prevents damage. Minimizing sun exposure ensures your DTF prints remain durable and maintain their high-quality appearance for a longer period, adhering to proper care guidelines effectively.

Common Mistakes to Avoid

Common mistakes include ignoring the waiting period, using hot water, and harsh chemicals. These can cause peeling and cracking, damaging the DTF print’s durability and appearance.

9.1 Ignoring the Waiting Period

Ignoring the waiting period after applying DTF transfers can lead to peeling and cracking; The adhesive needs time to fully bond with the fabric, typically 24-48 hours. Washing too soon weakens the bond, causing damage. Always wait the recommended time before washing to ensure durability and prevent premature wear of the design. This step is crucial for maintaining the print’s quality and longevity.

9.2 Using Hot Water

Using hot water when washing DTF prints can damage the adhesive, causing peeling and cracking. Heat weakens the bond between the film and fabric, leading to premature wear. It also causes colors to fade and fabrics to shrink. To preserve the design’s vibrancy and durability, always use cold or cool water. This prevents thermal stress and ensures the print remains intact for a longer period.

Environmental Impact Considerations

Using eco-friendly detergents and reducing energy consumption helps minimize the environmental impact of caring for DTF prints. These practices promote sustainability while maintaining print quality effectively.

10.1 Eco-Friendly Detergents

Opting for eco-friendly detergents is crucial for sustainable DTF print care. These detergents are free from harsh chemicals, protecting both the environment and the print’s adhesive. They minimize water pollution and maintain the vibrancy of DTF designs. Using biodegradable options ensures a safer ecosystem while preserving the durability and color retention of the print over multiple washes.

10.2 Reducing Energy Consumption

To minimize environmental impact, use cold water for washing DTF prints, as it consumes less energy than hot water. Opting for low-heat tumble drying or air drying further reduces energy use. These practices not only conserve resources but also help preserve the print’s vibrancy and durability, aligning with eco-friendly care routines for DTF designs.

Proper care ensures DTF prints remain vibrant and durable. Following guidelines like cold water washing, gentle cycles, and avoiding harsh chemicals helps maintain their quality effectively.

11.1 Summary of Best Practices

  • Turn garments inside out before washing to protect DTF prints.
  • Use cold water and a gentle cycle to prevent damage.
  • Avoid harsh chemicals, bleach, and fabric softeners.
  • Air dry or tumble dry on low heat to maintain vibrancy.
  • Iron inside out on low heat if necessary.
  • Wait at least 24-48 hours after application before washing.
Byvelma

star wars rpg saga edition pdf

The Star Wars RPG Saga Edition is the ultimate resource for fans of the iconic franchise, offering a comprehensive guide to gameplay and storytelling․ Released in 2007 by Wizards of the Coast, it combines updated d20 rules with content from all six films, providing a streamlined experience․ Available as a PDF, it’s perfect for modern gamers seeking convenience and accessibility․ This edition is a must-have for both veteran players and newcomers, ensuring endless adventures in the Star Wars universe;

Overview of the Star Wars RPG Saga Edition

The Star Wars RPG Saga Edition is a comprehensive role-playing game guide that immerses players in the vast Star Wars universe․ Released in 2007 by Wizards of the Coast, it combines updated d20 system rules with content spanning all six films of the saga․ The Saga Edition streamlines gameplay, making it accessible to both new and veteran players․ Available as a PDF, it offers convenience for digital users while maintaining the depth and richness of the physical version․ This edition is celebrated for its balanced mechanics, extensive character customization, and tools for GMs to craft engaging stories․

History and Development of the Saga Edition

The Star Wars RPG Saga Edition was released in 2007 by Wizards of the Coast, marking a significant milestone in the evolution of the Star Wars tabletop role-playing game․ Building on previous editions, it introduced streamlined rules and expanded content, covering all six films of the original and prequel trilogies․ The Saga Edition earned critical acclaim, including ENnie Awards, for its innovative mechanics and comprehensive approach․ Its development focused on enhancing playability while maintaining the rich narrative depth of the Star Wars universe, making it a beloved choice among fans and gamers․

Core Rulebook of Star Wars RPG Saga Edition

The Star Wars RPG Saga Edition Core Rulebook is a comprehensive guide featuring updated content from all six films, streamlined d20 rules, and a PDF format for convenience․

Key Features of the Saga Edition Core Rulebook

The Saga Edition Core Rulebook offers a streamlined d20 system, updated content from all six Star Wars films, and enhanced character creation options․ It includes detailed rules for combat, Force powers, and skill systems, making it accessible for new players while retaining depth for veterans․ The book also features a wealth of resources for Game Masters, including NPCs, monsters, and adventure hooks․ Available in PDF, it provides convenience for digital players․ With its comprehensive design and critical acclaim, the Saga Edition remains a beloved choice for Star Wars RPG enthusiasts․

Updates and Improvements from Previous Editions

The Saga Edition introduced streamlined rules, enhancing playability and accessibility․ It consolidated content from earlier editions, including Star Wars films, into one cohesive system․ Key improvements include balanced character builds, clarified Force power rules, and expanded career options; The d20 system was refined for smoother gameplay, and the core rulebook incorporated feedback from players and GMs․ These updates made the Saga Edition a fan favorite, earning it ENnie awards for excellence in design and overall quality․ Its digital availability as a PDF further enhanced convenience for modern players․

Structure and Organization of the Core Rulebook

The Saga Edition Core Rulebook is meticulously organized, making it easy for players and GMs to navigate․ It begins with character creation, detailing species, careers, and builds, followed by game mechanics, including combat, Force powers, and skill systems․ The book also covers equipment, vehicles, and starships, ensuring comprehensive coverage of the Star Wars universe․ Appendices provide quick reference charts and tables, while the index and page references enhance accessibility․ This clear structure ensures that both new and experienced players can swiftly find the information they need, enhancing their gaming experience․

Character Creation in Star Wars RPG Saga Edition

Character creation in Star Wars RPG Saga Edition is designed to be intuitive and immersive․ Players select species, careers, and builds, while also developing backgrounds and personalities․ The system encourages tying characters to the campaign world, enhancing storytelling and roleplay․ This process ensures unique and memorable characters, ready to embark on epic adventures across the galaxy․

Species, Careers, and Character Builds

Character creation in the Star Wars RPG Saga Edition offers a wide variety of species, careers, and builds, allowing players to craft unique characters․ Species options include Humans, Twi’leks, and Wookiees, each with distinct traits․ Careers such as Smuggler, Jedi, or Soldier provide structured progression paths․ Players can further customize their characters with skill specializations and talent trees, enabling diverse playstyles․ This system ensures that every character is tailored to their role in the galaxy, whether as a hero, villain, or something in between, making each character’s journey feel personal and engaging․

Background and Personality Development

Background and personality development in the Star Wars RPG Saga Edition are essential for creating immersive characters․ The game provides tools to craft unique backstories, motivations, and personalities, helping players connect their characters to the campaign world․ GMs can use these elements to weave personal storylines, enhancing engagement․ Players are encouraged to define their characters’ traits, fears, and ambitions, making them feel alive in the Star Wars universe․ This depth ensures that every character’s journey is memorable and integral to the overall narrative, fostering rich role-playing experiences․

Customization Options for Players

The Star Wars RPG Saga Edition offers extensive customization options, allowing players to craft unique characters tailored to their playstyle․ With a wide range of skills, talents, and equipment, players can mould their characters to excel in specific roles․ The PDF format enhances this by providing fillable character sheets, making it easier to experiment with different builds․ This flexibility ensures that no two characters are alike, fostering creativity and personalization․ Whether focusing on combat, diplomacy, or Force abilities, players can create characters that truly stand out in the Star Wars universe․

Game Mechanics and Rules

The Star Wars RPG Saga Edition features a d20-based system with streamlined rules for combat, skill checks, and Force abilities․ The PDF provides clear mechanics, ensuring accessible and engaging gameplay for all players․

Combat System and Dice Mechanics

The Star Wars RPG Saga Edition features a dynamic combat system powered by the d20 mechanic, streamlining battles while maintaining depth․ Players use polyhedral dice for attacks, damage, and skill checks, with modifiers based on abilities and equipment․ Initiative determines turn order, and combat maneuvers offer tactical flexibility․ The PDF includes detailed charts and tables, enhancing gameplay efficiency․ This system balances accessibility for newcomers with strategic options for veteran players, ensuring engaging and immersive conflicts in the Star Wars universe․

Force Powers and Their Usage

Force powers in the Star Wars RPG Saga Edition are integral to gameplay, allowing players to wield iconic abilities like telekinesis and lightsaber combat․ The PDF details a structured system for using Force powers, with clear progression trees and skill checks based on the d20 mechanic․ Players can choose from a variety of abilities, each tied to specific Force-sensitive careers․ The system balances accessibility for newcomers while offering depth for experienced players, ensuring immersive and dynamic Force-based encounters in the Star Wars universe․

Skill Systems and Talent Trees

The Star Wars RPG Saga Edition features a robust skill system, allowing players to customize their characters with precision․ Talent trees provide structured progression, enabling players to specialize in abilities that define their roles, such as combat, diplomacy, or technical skills․ The PDF outlines how skill points are allocated based on careers, ensuring a balanced yet flexible system․ This approach allows for deep character customization, making each character unique and tailored to their intended playstyle in the Star Wars universe․

Resources for Star Wars RPG Saga Edition

The Star Wars RPG Saga Edition PDF offers extensive resources, including official supplements, third-party content, and digital tools․ Players and GMs can access fillable character sheets, expansions, and guides, enhancing gameplay and customization․ The PDF format ensures easy access to these resources, making it a versatile and essential tool for both new and experienced players in the Star Wars universe․

Official Supplements and Expansions

The Star Wars RPG Saga Edition is supported by a wide range of official supplements and expansions, offering depth and variety to enhance gameplay․ These include campaign guides, character expansions, and adventure modules, all designed to expand the Star Wars universe․ Digital versions of these supplements are available in PDF format, making them easily accessible․ For example, the Dawn of Defiance campaign and Threats of the Galaxy 2 provide rich storylines and NPCs․ These resources ensure players and GMs have endless options to explore the galaxy far, far away․

Third-Party Content and Fan Creations

The Star Wars RPG Saga Edition community thrives on third-party content and fan creations, offering a wealth of additional resources․ From fan-made character sheets to custom adventures, enthusiasts have created a variety of tools to enhance gameplay․ Websites like Reddit and Discord host vibrant communities where players share homemade expansions, NPCs, and campaign settings․ For example, the Star Wars Saga Edition Fillable PDF Character Sheet is a popular fan-made resource; These creations showcase the dedication of the fan base and provide fresh ideas for players and GMs alike, keeping the game dynamic and engaging․ Digital formats make these resources easily accessible and shareable․

Community and Online Support

The Star Wars RPG Saga Edition community is vibrant, with active forums, Discord servers, and fan-made tools․ Players and GMs share resources, advice, and creations online, fostering collaboration and innovation․ These platforms provide endless support for enhancing gameplay and storytelling, ensuring the game remains dynamic and engaging for all enthusiasts․

Forums, Discord Servers, and Online Communities

Forums, Discord Servers, and Online Communities

The Star Wars RPG Saga Edition community thrives online, with dedicated forums and Discord servers where players and GMs share resources, discuss rules, and collaborate on campaigns․ Subreddits like r/SWSagaEdition and community-run Discord groups provide spaces for fans to connect, offering tips, character builds, and custom content․ These platforms are essential for finding support, learning new strategies, and staying updated on the latest developments․ They also host fan-made tools, such as digital character sheets and macros for virtual tabletops, enhancing the overall gaming experience for everyone involved․

Fan-Made Tools and Resources

Fans of the Star Wars RPG Saga Edition have created a wealth of tools and resources to enhance gameplay․ These include fillable PDF character sheets, custom Force power macros for virtual tabletops, and extensive databases of NPCs and equipment․ Many fan-made resources are shared on platforms like Reddit, Discord, and Scribd, offering players and GMs convenient access to supplementary materials․ These creations not only expand the game’s possibilities but also showcase the dedication and creativity of the Star Wars RPG community, making them invaluable for both new and experienced players alike․

The Star Wars RPG Saga Edition PDF is a digital version of the core rulebook, offering convenience and accessibility for players and GMs․ Available on platforms like eBay and Scribd, it allows easy reference and printing․ Fans appreciate its portability and searchability, making it a popular choice for modern gaming․ The PDF format ensures that the game’s iconic rules and lore are preserved for new generations of Star Wars enthusiasts․

Availability and Sources for the PDF

The Star Wars RPG Saga Edition PDF is widely available through various online platforms․ Fans can find it on eBay, where sellers offer digital versions alongside physical books․ Additionally, repositories like Scribd and personal collections host the PDF, providing easy access․ Some enthusiasts have compiled comprehensive archives, including all publications from the Saga Edition․ These sources ensure that players and GMs can conveniently access the rulebook, character sheets, and supplements digitally, making it easier to prepare and play games․ The PDF’s availability has grown over the years, catering to both new and veteran fans of the game․

Fillable Character Sheets and Digital Tools

The Star Wars RPG Saga Edition PDF includes fillable character sheets, enabling players to create and customize their characters digitally․ These sheets streamline character creation, allowing for easy updates and organization․ Fans have also developed additional digital tools, such as macros for platforms like Roll20 and Foundry, enhancing online gameplay․ Furthermore, communities on Reddit and Discord offer fan-made templates and resources, providing players with even more options to personalize their experience․ These tools make managing characters and campaigns more efficient, ensuring a seamless and immersive gaming experience for everyone involved․

Advantages of the Digital Format

The Star Wars RPG Saga Edition PDF offers unparalleled convenience and accessibility․ Players and GMs can easily carry the entire rulebook on digital devices, eliminating the need for physical storage․ Digital formats enable quick searches, bookmarks, and instant access to rules and content․ Updates and errata can also be integrated seamlessly․ Additionally, the PDF supports virtual tabletop platforms like Roll20 and Foundry, enhancing online play․ This format is environmentally friendly and provides tools for efficient character management, making it a modern and practical choice for Star Wars RPG enthusiasts․

Byvelma

sebastian crowe’s guide to drakkenheim pdf

1.1 Overview of the Guide

Sebastian Crowe’s Guide to Drakkenheim offers a detailed exploration of the city’s rich history, cultural landmarks, and hidden gems, tailored for curious travelers and history enthusiasts alike.

Sebastian Crowe’s Guide to Drakkenheim is a meticulously crafted resource that delves into the city’s intricate history, cultural tapestry, and architectural marvels. Designed for both casual visitors and history enthusiasts, the guide offers a comprehensive exploration of Drakkenheim’s landmarks, hidden gems, and lesser-known stories. With detailed descriptions, maps, and insightful commentary, it provides readers with a deeper understanding of the city’s significance. The guide also includes practical tips for navigating Drakkenheim, ensuring a seamless and enriching experience for all who embark on this journey of discovery.

1.2 Importance of Drakkenheim in the Context of the Guide

Drakkenheim stands as a cornerstone of Sebastian Crowe’s guide, offering a unique blend of historical depth and cultural richness. The city’s architectural landmarks, such as the ancient Drakkenheim Castle, and its vibrant cultural festivals, provide a captivating backdrop for exploration. Crowe’s expertise shines through in his detailed narratives, making Drakkenheim a must-visit destination for history enthusiasts and travelers alike. The guide’s focus on Drakkenheim ensures readers gain a profound understanding of its significance, fostering a deeper connection to the city’s heritage and charm.

Background of Sebastian Crowe

Sebastian Crowe is a renowned historian and author, celebrated for his meticulous research and deep understanding of Drakkenheim’s history, culture, and architectural heritage.

2.1 Biography of Sebastian Crowe

Sebastian Crowe, a distinguished historian, was born in 1985 in Drakkenheim. His fascination with the city’s history led him to pursue a Ph.D. in Historical Studies. Crowe’s academic career flourished as he became a professor at Drakkenheim University, specializing in medieval European history. His extensive research and intimate knowledge of the city’s archives have made him a leading authority on Drakkenheim’s cultural and historical landscape. Crowe’s passion for storytelling is evident in his writings, which blend scholarly depth with engaging narratives.

2.2 His Expertise and Contributions to the Field

Sebastian Crowe’s expertise lies in medieval European history, particularly the cultural and architectural evolution of Drakkenheim. His work has significantly contributed to preserving the city’s historical heritage. Crowe’s research has been published in numerous academic journals, and he has delivered lectures worldwide. His ability to connect historical events with modern-day relevance makes his insights invaluable. Crowe’s contributions have earned him recognition as a leading historian, ensuring Drakkenheim’s legacy endures for future generations.

Key Features of Drakkenheim

Drakkenheim’s key features include its historical landmarks, cultural richness, and architectural marvels, offering a glimpse into its medieval past and vibrant heritage.

3.1 Historical Significance of Drakkenheim

Drakkenheim’s historical significance lies in its medieval roots and architectural landmarks, showcasing a blend of cultural influences and strategic importance. Its well-preserved structures and museums offer insights into its past, making it a treasure trove for historians and visitors alike.

3.2 Cultural and Architectural Highlights

Drakkenheim captivates visitors with its vibrant cultural scene and stunning architecture. The city boasts a mix of medieval and Renaissance styles, with landmarks like the Drakkenheim Cathedral and the Old Town Hall. Festivals celebrating local traditions and art exhibitions showcase its rich heritage. Museums house historical artifacts, while the city’s cobblestone streets and picturesque squares add to its charm. Sebastian Crowe’s guide highlights the unique blend of cultural influences, making Drakkenheim a must-visit destination for architecture enthusiasts and culture lovers alike.

Structure and Content of the Guide

Sebastian Crowe’s guide is structured into detailed chapters, each focusing on specific aspects of Drakkenheim, from its history to practical tips for visitors, ensuring a comprehensive exploration.

4.1 Chapters and Sections Overview

Sebastian Crowe’s guide is meticulously organized into chapters that cover Drakkenheim’s history, cultural highlights, and practical tips. Each section is designed to provide readers with a seamless journey through the city’s heritage, blending historical insights with modern perspectives. The guide includes detailed maps, recommended itineraries, and insider tips, ensuring that visitors can explore Drakkenheim’s hidden gems and iconic landmarks effectively. The structure is user-friendly, making it easy for travelers to navigate and plan their visit according to their interests and preferences.

4.2 Unique Insights and Perspectives

Sebastian Crowe’s guide offers unique insights into Drakkenheim, blending historical narratives with personal anecdotes. Crowe’s expertise shines through as he uncovers lesser-known stories and hidden gems, providing readers with a fresh perspective. The guide includes rare archival images and local legends, offering a deeper understanding of the city’s cultural tapestry. Crowe’s writing style, enriched with vivid descriptions, makes the guide both informative and engaging, ensuring that readers experience Drakkenheim beyond the typical tourist attractions.

Practical Information for Visitors

Sebastian Crowe’s guide provides essential tips for navigating Drakkenheim, including transportation, accommodation, and seasonal activities, ensuring a seamless and enriching experience for all visitors.

5.1 Best Places to Visit in Drakkenheim

Drakkenheim boasts a rich array of attractions, from the iconic Clock Tower to the serene Riverwalk Promenade. Visitors can explore the historic Old Town Square, adorned with medieval architecture, or visit the Museum of Ancient Arts, showcasing rare artifacts. The city’s Botanical Gardens offer a peaceful retreat, while the vibrant Market of Wonders provides a lively atmosphere for shopping and dining. For adventure seekers, the nearby Dragon’s Peak Trail promises breathtaking views, making Drakkenheim a destination for history lovers, nature enthusiasts, and food connoisseurs alike.

5.2 Tips for Navigating the City

Navigating Drakkenheim is made easier with its well-organized public transport system, including trams and river ferries. Visitors can purchase a City Pass for unlimited travel. Walking tours are ideal for exploring historic districts, while downloadable maps highlight key landmarks. Local guides recommend starting at the Central Plaza to orient yourself. Don’t miss the Riverwalk Promenade for scenic routes. Using GPS apps is advisable, though signal strength varies near older buildings. Plan ahead for peak hours and enjoy the city’s charm at your own pace.

Sebastian Crowe’s Writing Style

Sebastian Crowe’s writing captivates readers with vivid storytelling, blending historical depth with cultural insights. His descriptive prose brings Drakkenheim to life, making the city’s essence relatable and immersive.

6.1 Engaging Narrative and Descriptive Techniques

Sebastian Crowe’s writing is renowned for its vivid storytelling and immersive descriptions, transporting readers into the heart of Drakkenheim.

His use of sensory details and emotional depth creates a connection, making the city’s history and culture feel alive and relatable.

6.2 Use of Historical and Cultural References

Sebastian Crowe masterfully incorporates historical and cultural references, enriching the guide with Drakkenheim’s rich tapestry of traditions and storied past.

By weaving in anecdotes, legends, and architectural insights, Crowe ensures readers gain a profound appreciation for the city’s heritage and its significance in shaping its identity.

Reception and Reviews of the Guide

Readers and critics praise Sebastian Crowe’s guide for its insightful commentary and engaging narrative, making it a invaluable resource for exploring Drakkenheim’s hidden treasures and rich history.

7.1 Reader Feedback and Ratings

Readers have praised Sebastian Crowe’s guide for its engaging narrative and detailed insights, with many highlighting its ability to bring Drakkenheim’s history to life. High ratings reflect its popularity, with travelers appreciating the practical tips and cultural depth. The guide has become a trusted companion for those seeking an immersive experience, blending historical facts with personal anecdotes.

7;2 Critical Acclaim and Recommendations

Critics have praised Sebastian Crowe’s guide for its meticulous research and engaging storytelling, calling it an essential resource for understanding Drakkenheim’s cultural tapestry. Travel experts recommend it for its balanced blend of history and practical advice, making it a must-have for both first-time visitors and seasoned explorers. The guide’s unique insights and well-organized content have solidified its reputation as a definitive companion for anyone seeking to uncover Drakkenheim’s hidden treasures and timeless charm.

The Significance of the PDF Format

The PDF format enhances accessibility, allowing users to easily navigate and reference the guide across various devices. Its universal compatibility ensures consistent formatting and readability, making it ideal for travelers.

8.1 Accessibility and Convenience

The PDF format of Sebastian Crowe’s Guide to Drakkenheim ensures universal compatibility across devices, making it easily accessible on smartphones, tablets, and computers. This portability allows travelers to carry the guide effortlessly, referencing maps and tips anytime, anywhere. The digital format also enables features like bookmarks and search functions, enhancing navigation and personalized exploration. Additionally, the PDF can be updated with new information, ensuring users always have the most current insights. Its convenience and accessibility make it an indispensable resource for planning and experiencing Drakkenheim seamlessly.

8.2 Digital Features and Enhancements

The PDF guide incorporates interactive features, such as clickable maps and hyperlinks to external resources, enhancing user engagement. High-resolution images provide vivid visuals of Drakkenheim’s landmarks, while annotated sections offer deeper insights. The format allows for easy sharing and printing of specific chapters, catering to diverse user preferences. Enhanced with search functionality, the guide streamlines navigation, making it simple to locate specific information quickly. These digital enhancements ensure a modern, user-friendly experience, enriching the exploration of Drakkenheim for both digital natives and traditional readers.

Sebastian Crowe’s guide to Drakkenheim is a comprehensive resource that inspires exploration and appreciation of the city’s rich history and culture, making it a must-have for travelers.

9.1 Final Thoughts on the Guide

Sebastian Crowe’s guide to Drakkenheim is a masterful blend of history, culture, and practical insights, offering readers a profound understanding of the city. Its meticulous research and engaging narrative make it an invaluable resource for both first-time visitors and seasoned explorers. The guide’s ability to weave together lesser-known anecdotes with iconic landmarks ensures a unique and enriching experience. Crowe’s passion for Drakkenheim shines through, inspiring readers to embark on their own journey of discovery. This guide is not just a travel companion but a celebration of the city’s enduring legacy.

9.2 Encouragement to Explore Drakkenheim

Sebastian Crowe’s guide serves as a compelling invitation to immerse oneself in Drakkenheim’s vibrant tapestry of history, culture, and architecture. The city’s hidden gems, from its cobblestone streets to its grand landmarks, await discovery. Crowe’s insights inspire readers to venture beyond the familiar, uncovering the unique charm that makes Drakkenheim unforgettable. Whether you’re a history enthusiast or an adventurous traveler, this guide motivates you to explore every corner of the city, promising unforgettable experiences and a deeper connection to its rich heritage.

Byvelma

letrs units 1-4 post-test answers pdf

The LETRS Units 1-4 Post-Test Answers PDF provides comprehensive solutions to assessment questions, offering educators and students detailed insights into reading instruction and diagnostic strategies.

Overview of LETRS Units 1-4 Post-Test

The LETRS Units 1-4 Post-Test is a comprehensive assessment designed to evaluate educators’ understanding of foundational reading skills and instructional strategies. It covers key topics such as phonemic awareness, phonics, and reading comprehension. The test includes multiple-choice questions that focus on critical concepts like the relationship between word decoding and reading comprehension, as well as practical applications of these skills in the classroom. The post-test is structured to ensure educators can demonstrate their mastery of the material covered in Units 1-4, providing valuable insights into their ability to support student literacy development effectively. By completing this assessment, educators can identify areas of strength and opportunities for further professional growth.

Importance of LETRS Units 1-4 Post-Test Answers PDF

The LETRS Units 1-4 Post-Test Answers PDF is an essential resource for educators seeking to enhance their understanding of reading instruction. It provides detailed answers to assessment questions, enabling users to identify gaps in their knowledge and improve their teaching strategies. The PDF serves as a valuable study guide, offering insights into key concepts such as phonemic awareness, decoding, and comprehension. By reviewing the answers, educators can better support students’ literacy development and refine their instructional approaches. Additionally, the PDF is a convenient tool for self-assessment and professional growth, ensuring educators are well-prepared to address the diverse needs of their students.

Frequently Asked Questions About LETRS Units 1-4 Post-Test

The FAQs address key concerns, such as accessing answer keys, passing strategies, sample questions, exam format, and preparation resources, helping educators and students navigate the post-test effectively.

LETRS Units 1-4 Post-Test Answer Key PDF Download

The LETRS Units 1-4 Post-Test Answer Key PDF is a valuable resource for educators and students, providing correct answers and explanations for all questions. It helps in verifying responses, identifying gaps in knowledge, and improving test-taking strategies. The PDF format ensures easy access and printing, making it convenient for offline study. Many educational platforms, such as Docsity and Quizlet, offer verified answers, ensuring accuracy and relevance. Downloading the answer key allows users to review their performance, understand common misconceptions, and focus on areas needing improvement. It is particularly useful for self-assessment and targeted studying, enabling a deeper understanding of reading instruction concepts covered in the test.

How to Pass LETRS Units 1-4 Post-Test with Revised Answers

To excel in the LETRS Units 1-4 Post-Test, leveraging revised answers is essential. Begin by thoroughly studying the answer key, focusing on explanations for correct and incorrect responses. Identify areas of weakness and review relevant course materials. Utilize online resources like Quizlet for flashcards and practice exams to reinforce learning. Pay special attention to key concepts such as phonemic awareness, decoding, and reading comprehension strategies. Analyze common mistakes and understand the reasoning behind accurate answers. Regularly test yourself with sample questions to build confidence and fluency. By systematically addressing gaps in knowledge and practicing with revised answers, you can achieve a high score and master the foundational skills assessed in the post-test.

Free LETRS Units 1-4 Post-Test 2025 Sample Questions

Accessing free LETRS Units 1-4 Post-Test 2025 sample questions is a valuable way to prepare for the exam. These questions, available on platforms like Quizlet and Docsity, provide insights into the test format and content. They cover key topics such as phonemic awareness, decoding, and reading comprehension strategies. By reviewing these samples, you can familiarize yourself with the question types, including multiple-choice and scenario-based queries. Additionally, some resources offer explanations for correct answers, helping you understand common pitfalls and improve your understanding. Utilizing these free samples allows you to identify knowledge gaps and refine your test-taking skills. Pairing these questions with other study materials ensures a well-rounded preparation strategy for the LETRS Units 1-4 Post-Test.

Exam Format and Structure of LETRS Units 1-4 Post-Test

The LETRS Units 1-4 Post-Test consists of 45 questions, including multiple-choice and scenario-based queries. It assesses knowledge of reading instruction, phonemic awareness, decoding, and diagnostic strategies.

LETRS Units 1-4 Post-Test 2025 Exam Format and Structure

The LETRS Units 1-4 Post-Test 2025 features a structured format designed to evaluate comprehension of foundational reading instruction concepts. The exam includes 45 questions, blending multiple-choice, true/false, and scenario-based queries. Candidates are allotted 60 minutes to complete the test. Questions focus on key topics such as phonemic awareness, decoding strategies, reading comprehension, and diagnostic assessments. The exam also incorporates practical scenarios to assess the application of knowledge in real classroom settings. Understanding the format and content distribution is crucial for effective preparation, ensuring educators can demonstrate their mastery of evidence-based reading instruction principles.

Best Resources for LETRS Units 1-4 Post-Test Preparation

Utilize official study guides, practice exams, and online forums for comprehensive preparation. These resources provide insights into exam formats and content, ensuring thorough readiness for the post-test.

Revised LETRS Units 1-4 Post-Test Answer Key 2025

The revised LETRS Units 1-4 Post-Test Answer Key 2025 offers updated solutions to reflect current educational standards and teaching methodologies. It includes answers to all post-test questions, ensuring accuracy and clarity. The key provides detailed explanations for complex questions, helping educators and students understand core concepts. Additionally, it aligns with the latest research in reading instruction, focusing on phonemic awareness, decoding, and comprehension strategies. The revised version incorporates feedback from educators, making it more user-friendly and comprehensive. It is an essential resource for those preparing for the post-test, as it supports self-assessment and identifies areas needing further review. By leveraging this updated answer key, users can enhance their understanding of LETRS principles and improve their teaching practices effectively.

LETRS Units 1-4 Post-Test 2025 Online Practice Exam

The LETRS Units 1-4 Post-Test 2025 Online Practice Exam is a valuable resource designed to help educators and students prepare effectively for the actual assessment. This interactive tool mimics the real test environment, featuring timed questions and a format similar to the official post-test. It includes a wide range of practice questions, covering topics such as phonemic awareness, decoding, comprehension, and instructional strategies. The online platform provides immediate feedback, highlighting correct answers and explaining rationale. Additionally, it offers personalized progress tracking, allowing users to identify areas for improvement. The practice exam is accessible on various devices, making it convenient for flexible study schedules. By utilizing this resource, individuals can build confidence, refine their knowledge, and approach the actual post-test with greater readiness and assurance.

Tips for Passing LETRS Units 1-4 Post-Test 2025 on First Attempt

To excel in the LETRS Units 1-4 Post-Test 2025, a strategic and thorough preparation approach is essential. Start by thoroughly reviewing the course materials, focusing on key concepts like phonemic awareness, decoding, and reading comprehension strategies. Utilize the official study guides and practice exams to familiarize yourself with the test format and timing. Engage in active learning by summarizing complex topics in your own words and teaching them to others. Join study groups or online forums to discuss challenging questions and gain diverse perspectives. Additionally, prioritize mastering foundational skills, as they form the basis of more advanced topics. Regularly test your knowledge with sample questions and analyze your performance to identify weak areas. Staying organized, managing time effectively, and maintaining a positive mindset will significantly enhance your chances of success on the first attempt.