Yearly Archive November 16, 2024

Byvelma

20 minute guided meditation script pdf

A guided meditation script is a structured format leading users through mindfulness practices‚ promoting relaxation and inner peace. Ideal for 20-minute sessions‚ these scripts offer a gentle‚ focused approach to reduce stress and enhance well-being‚ suitable for both beginners and experienced practitioners.

Structure of a 20-Minute Guided Meditation Script

A 20-minute script typically includes grounding‚ body scan‚ visualization‚ and deep relaxation. Each section transitions smoothly‚ guiding the user from awareness to profound calm and inner balance.

The introduction and grounding section of a 20-minute guided meditation script sets the tone‚ helping participants transition from daily life to a meditative state. This phase‚ lasting about 3-5 minutes‚ often begins with deep breathing exercises to calm the mind and body. Gentle guidance encourages participants to release tension and focus on the present moment. Grounding techniques‚ such as visualizing roots or a safe place‚ help establish stability and readiness for the meditation journey ahead.

2.2. Body Scan Meditation

The body scan meditation is a core component of a 20-minute guided session‚ fostering physical relaxation and awareness. Participants are guided to focus on each body part‚ starting from the toes and moving upwards‚ releasing tension as they go. This 5-7 minute segment encourages deep breaths and mindfulness of sensations without judgment. The practice promotes a sense of calm and connection‚ preparing the body for deeper relaxation and mental clarity in subsequent meditation stages.

2.3. Visualization and Deep Relaxation

Visualization and deep relaxation are pivotal in a 20-minute guided meditation script‚ helping users escape stress and immerse in calming imagery. Guided audio directs the mind to serene environments‚ such as beaches or mountains‚ fostering vivid mental pictures. This segment often includes progressive relaxation techniques‚ where each muscle group is released from tension. Soothing affirmations and breathwork deepen tranquility‚ allowing the body and mind to fully unwind‚ enhancing the meditative experience and promoting profound relaxation.

Benefits of Using a Guided Meditation Script

Guided meditation scripts enhance relaxation‚ reduce stress‚ and improve focus. They offer structured sessions‚ making meditation accessible for newcomers while promoting deep calm and overall well-being.

3.1. Relaxation and Stress Relief

Guided meditation scripts are highly effective for relaxation and stress relief. By focusing on calming visuals and deep breathing‚ they help reduce tension and promote a peaceful mindset. These scripts often incorporate grounding techniques‚ such as imagining a serene environment‚ to create a sense of safety and tranquility. Regular practice can significantly lower stress levels‚ offering a mental escape from daily pressures and fostering a deeper connection to inner calm and well-being.

3.2. Improved Mindfulness and Focus

Guided meditation scripts enhance mindfulness by training the mind to stay present and focused. Through structured exercises like body scans or breath awareness‚ users learn to observe thoughts without judgment. Regular practice improves concentration‚ reducing mind-wandering and mental clutter. This heightened focus extends beyond meditation‚ boosting productivity and clarity in daily life. The scripts act as a mental anchor‚ fostering discipline and awareness that cultivates a more mindful and centered approach to everyday challenges and responsibilities.

3.3. Better Sleep Quality

Guided meditation scripts can significantly improve sleep quality by promoting deep relaxation and calming the mind. Techniques like visualization and breath focus help reduce stress and anxiety‚ common barriers to restful sleep. Regular practice prepares the body for rest‚ making it easier to fall asleep and stay asleep. Scripts often include soothing imagery‚ such as beach or mountain scenes‚ to quiet the mind and create a restorative state‚ leading to more rejuvenating sleep and better overall well-being.

Examples of Guided Meditation Scripts

Popular scripts include beach visualizations‚ mountain meditations‚ and chakra alignment through yoga nidra. These guide listeners through relaxation‚ mindfulness‚ and deep inner calm‚ enhancing overall well-being.

4.1. Beach Visualization

The beach visualization script guides listeners to imagine a serene coastal setting‚ emphasizing sensory details like waves‚ sand‚ and breeze. It promotes deep relaxation‚ helping users release tension and reconnect with calmness. The gentle rhythm of the ocean creates a soothing atmosphere‚ ideal for reducing stress and enhancing mindfulness. This script is particularly effective for those seeking tranquility and a mental escape‚ making it a popular choice for both beginners and experienced practitioners alike.

4.2. Mountain Meditation

The mountain meditation script invites listeners to envision a majestic‚ serene mountain landscape‚ fostering a sense of grounding and resilience. It guides users to imagine standing firmly like a mountain‚ unaffected by external challenges‚ symbolizing strength and stability. This practice enhances mental clarity‚ emotional balance‚ and inner peace. By focusing on the mountain’s steadfastness‚ individuals cultivate resilience and calm‚ making it an ideal choice for those seeking grounding and mental fortitude in their meditation journey.

4.3; Chakra Alignment Through Yoga Nidra

Chakra alignment through Yoga Nidra guides listeners to visualize and balance the body’s seven chakras‚ promoting harmony and energy flow. This script uses deep relaxation techniques to align each chakra‚ fostering emotional and physical well-being. By focusing on breath and visualization‚ individuals release blockages‚ enhancing vitality and mental clarity. This practice is ideal for those seeking spiritual balance‚ stress relief‚ and a deeper connection to their inner self during their 20-minute meditation journey.

How to Choose the Right Guided Meditation Script

Selecting the right guided meditation script involves considering duration‚ personal goals‚ and the narrator’s voice. Opt for a 20-minute script aligned with your intentions‚ ensuring it includes grounding techniques and a soothing tone. Explore free PDF resources to find scripts that resonate with your needs‚ whether for relaxation‚ focus‚ or sleep improvement‚ ensuring a tailored and effective meditation experience.

5.1. Consider the Duration

When selecting a guided meditation script‚ duration is crucial. A 20-minute session is ideal for balancing depth and accessibility‚ suitable for both novices and experienced practitioners. Shorter scripts may not allow for full relaxation‚ while longer ones can be overwhelming. Opt for a 20-minute PDF script that aligns with your schedule and goals‚ ensuring a comprehensive yet manageable experience. This duration often includes grounding‚ body scan‚ and visualization‚ promoting profound relaxation and mindfulness without feeling rushed or prolonged. Explore free resources to find the perfect fit for your daily practice.

5.2. Align with Your Purpose

Choose a guided meditation script that aligns with your goals‚ such as stress relief‚ sleep improvement‚ or mindfulness. Scripts designed for specific purposes‚ like anxiety reduction or deep relaxation‚ ensure a focused experience. A 20-minute PDF script often includes themes like beach visualizations or body scans‚ tailored to promote calm and clarity. Select one that resonates with your intent‚ whether it’s healing‚ self-awareness‚ or simply unwinding. This alignment enhances the meditation’s effectiveness and personal relevance‚ making the practice more meaningful and impactful.

5.3. Select a Soothing Voice and Language

The voice and language in a guided meditation script play a crucial role in creating a calming experience. Opt for a voice that is gentle‚ clear‚ and rhythmic to enhance relaxation. Scripts offered in multiple languages ensure accessibility for diverse audiences. The language should be simple and evocative‚ using imagery that fosters focus and tranquility. A soothing voice and thoughtful phrasing help maintain engagement‚ making the meditation more effective and enjoyable‚ while also catering to personal preferences and cultural backgrounds.

Creating Your Own Personalized Script

Personalizing your meditation script allows you to tailor the experience to your needs‚ ensuring a meaningful and impactful practice. Start by identifying your goals‚ then structure the script to flow naturally‚ incorporating affirmations and imagery that resonate with you. This customization enhances engagement and deepens relaxation‚ making each session uniquely effective for your well-being.

6.1. Identifying Your Goals

Identifying your goals is the first step in creating a personalized meditation script. Consider what you aim to achieve‚ such as reducing stress‚ improving sleep‚ or enhancing focus. Reflect on your current challenges and how meditation can address them. Whether it’s emotional balance‚ physical relaxation‚ or mental clarity‚ clarifying your intentions ensures your script is purposeful and aligned with your needs‚ making your meditation practice more effective and fulfilling. This focus helps guide the structure and content of your script‚ ensuring a meaningful experience.

6.2. Structuring Your Script

Structuring your meditation script is essential for a seamless experience. Start with an introduction to set the tone‚ followed by grounding techniques to calm the mind. Allocate time for body scan‚ visualization‚ or breathwork‚ ensuring a logical flow. Include deep relaxation and affirmations to enhance the practice. Conclude with a gentle transition back to awareness. A well-organized script ensures clarity‚ making it easier for users to follow and achieve a meaningful meditation session. Balance and pacing are key to maintaining engagement throughout the 20-minute practice.

6.3. Incorporating Personal Affirmations

Incorporate personal affirmations to deepen the meditation experience. These positive statements‚ such as “I am calm and present” or “My body is relaxed and healed‚” reinforce self-confidence and mindfulness. Place affirmations during visualization or deep relaxation phases‚ allowing users to absorb their meaning fully. Tailor them to individual goals‚ such as stress relief or better sleep‚ for maximum impact. Personalized affirmations create a meaningful connection‚ enhancing the script’s effectiveness and fostering lasting positive change.

Additional Resources

Explore websites offering free scripts‚ guided meditation apps‚ and workshops for deeper practice. These resources provide diverse scripts and expert guidance for enhanced mindfulness and relaxation journeys.

7.1. Websites Offering Free Scripts

Websites like InsightTimer‚ Calm‚ and Headspace offer free guided meditation scripts. InsightTimer provides a variety of scripts for different durations and purposes‚ while Calm features sleep stories and relaxation guides. Headspace offers free sessions for stress reduction and focus. Additionally‚ some platforms provide scripts tailored for specific needs‚ such as anxiety or sleep improvement. These websites are excellent resources for finding high-quality‚ accessible scripts to enhance your meditation practice and achieve deeper relaxation.

7.2. Guided Meditation Apps

Guided meditation apps like InsightTimer‚ Calm‚ and Headspace offer a wide range of free and premium scripts. These apps provide timers‚ customizable sessions‚ and diverse meditation types‚ such as body scans or visualizations. They cater to both beginners and experienced practitioners‚ offering tailored experiences for stress relief‚ sleep improvement‚ and focus enhancement. With accessible features and soothing voices‚ these apps are excellent tools for incorporating guided meditation into your daily routine‚ ensuring a consistent and enriching practice.

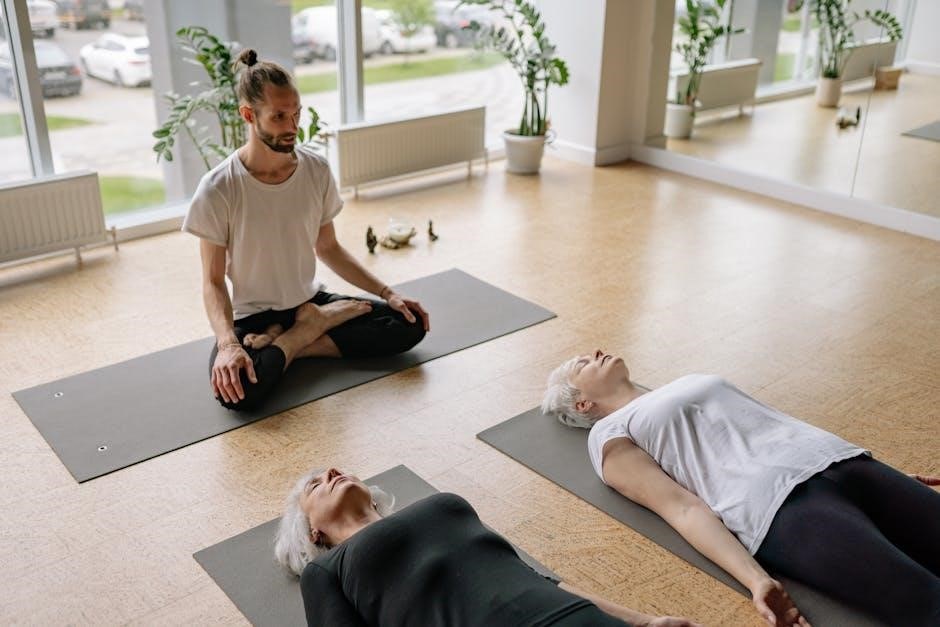
7.3. Workshops and Classes

Workshops and classes offer interactive guided meditation experiences‚ often led by experienced instructors. These sessions provide structured learning‚ group support‚ and personalized feedback. Many workshops focus on specific techniques like body scans‚ visualizations‚ or chakra alignment. They cater to all skill levels‚ helping participants deepen their practice. Workshops may also incorporate yoga nidra or breathing exercises‚ promoting mindfulness and relaxation. These programs are ideal for those seeking hands-on instruction and a supportive environment to enhance their meditation journey.

Guided meditation scripts offer a powerful tool for fostering relaxation‚ mindfulness‚ and emotional well-being. Whether you’re seeking stress relief‚ improved sleep‚ or enhanced focus‚ these scripts provide a structured path to inner peace. With numerous resources available‚ from apps to workshops‚ anyone can explore and benefit from guided meditation. By incorporating these practices into daily life‚ individuals can cultivate lasting calm and self-awareness‚ leading to a more balanced and fulfilling existence.

Byvelma

greenfield mower repair manual download

Greenfield mower repair manuals provide comprehensive guides for maintaining and repairing your equipment. These resources include troubleshooting‚ maintenance schedules‚ and detailed repair procedures to ensure optimal performance.

Official manuals are designed to help users diagnose and fix common issues‚ such as engine problems‚ blade malfunctions‚ and electrical faults. They are available in PDF format for easy access and include model-specific instructions to ensure accuracy.

By following the guidelines in these manuals‚ users can extend the lifespan of their Greenfield mowers‚ reduce repair costs‚ and maintain safety standards. Downloading the correct manual for your model is essential for effective troubleshooting and DIY repairs.

These manuals are a valuable resource for both novice and experienced users‚ offering step-by-step instructions and detailed diagrams. They are available on the official Greenfield website and trusted third-party platforms‚ ensuring accessibility and reliability.

Regular maintenance and timely repairs‚ as outlined in the manuals‚ help prevent major breakdowns and keep your Greenfield mower running efficiently. Always refer to the official manual for your specific model to ensure the best results.

1.1 Overview of Greenfield Mower Repair Manuals

Greenfield mower repair manuals are detailed guides providing troubleshooting‚ maintenance‚ and repair procedures for optimal equipment performance. Available in PDF format‚ these manuals cover common and complex issues‚ ensuring model-specific solutions. They include diagrams‚ parts lists‚ and step-by-step instructions to help users diagnose and fix problems efficiently. Accessible via official and trusted third-party sources‚ these manuals are essential for maintaining and repairing Greenfield mowers effectively.

1.2 Importance of Using Official Repair Manuals

Using official Greenfield mower repair manuals ensures accuracy and reliability when diagnosing and fixing issues; These manuals provide model-specific instructions‚ reducing the risk of errors. They include genuine parts information and safety guidelines‚ essential for maintaining equipment performance and user safety. Official manuals prevent misinformation and ensure compliance with manufacturer standards‚ making them indispensable for effective and safe repairs.

Where to Download Greenfield Mower Repair Manuals

Greenfield mower repair manuals can be downloaded from the official Greenfield website or trusted third-party platforms like ManualsLib. These sources offer model-specific and authentic manuals for easy access.

2.1 Official Greenfield Website

The official Greenfield website is the primary and most reliable source for downloading repair manuals. It offers authentic‚ model-specific manuals in PDF format‚ ensuring accuracy and relevance for your equipment.

Visit the support or downloads section‚ where manuals are categorized by model number or series. If unavailable‚ contact Greenfield’s customer service for assistance. Have your mower’s model and serial numbers ready for quick identification and access to the correct documentation.

2.2 Third-Party Websites and Forums

Third-party websites and forums offer additional sources for Greenfield mower repair manuals. Platforms like ManualsLib and repair-focused forums often host user-submitted manuals‚ providing access to troubleshooting guides and parts diagrams.

When using these sources‚ verify the authenticity of the documents to avoid misinformation. Forums also provide community support‚ where users share experiences and resources. Exercise caution and cross-reference with official materials for accuracy and reliability.

How to Identify Your Greenfield Mower Model

Locate the model number on the mower’s chassis‚ near the engine or under the seat. This unique identifier ensures accurate repair manual downloads and parts compatibility.

3.1 Locating the Model Number

The model number is typically found on a sticker or plate near the engine or under the seat of your Greenfield mower. Check these areas carefully for the unique identifier‚ which is essential for downloading the correct repair manual and ensuring compatibility with your specific model. If the number is faded or unreadable‚ contact Greenfield support for assistance.

3.2 Verifying Model-Specific Information

After locating the model number‚ verify its accuracy by cross-referencing it with the official Greenfield website or the owner’s manual. This ensures you access the correct repair manual and parts for your specific mower model. Even slight variations in the model number can lead to incompatible information‚ so double-checking is essential for accurate repairs and maintenance.

Common Issues Addressed in Greenfield Mower Manuals

Greenfield mower manuals address common issues like engine startup problems‚ blade malfunctions‚ and drive system faults. They provide solutions for cutting deck clogs‚ electrical failures‚ and belt wear‚ ensuring effective troubleshooting and repair.

4.1 Engine and Startup Problems

Greenfield mower manuals address common engine issues‚ such as difficulty starting‚ rough operation‚ or failure to idle. Troubleshooting steps include checking spark plugs‚ air filters‚ and fuel systems. Manuals provide detailed guidance for diagnosing ignition problems‚ fuel flow restrictions‚ and carburetor adjustments. Regular maintenance tips‚ like oil changes and filter cleaning‚ are emphasized to prevent engine-related issues. Addressing these problems early ensures reliable performance and extends mower lifespan.

4.2 Blade and Cutting Deck Issues

Greenfield mower manuals highlight common blade and cutting deck issues‚ such as dull or damaged blades‚ uneven cutting‚ or blade engagement problems. Troubleshooting steps include sharpening or replacing blades‚ adjusting the cutting deck‚ and cleaning debris. Manuals also provide guidance for balancing blades and aligning the deck to ensure even cutting performance. Regular maintenance helps prevent these issues and maintains cutting efficiency.

4.3 Drive System and Electrical Problems

Greenfield manuals address drive system issues like belt slippage or transmission faults‚ and electrical problems such as faulty switches or wiring. Troubleshooting steps include inspecting belts for wear‚ checking connections‚ and testing electrical components. Manuals provide detailed repair procedures to restore mobility and functionality‚ ensuring safe and efficient operation of the mower. Regular inspections help prevent these issues from arising.

Maintenance and Repair Guidelines

Regular maintenance is crucial for optimal performance. Follow guidelines for oil changes‚ blade sharpening‚ and air filter cleaning. Address issues promptly to prevent major repairs and ensure longevity.

5;1 Regular Maintenance Schedule

Regular maintenance is essential for extending the lifespan of your Greenfield mower; Follow the schedule in your manual for tasks like oil changes‚ air filter cleaning‚ and blade sharpening. Clean the mower deck regularly to prevent grass buildup. Check and replace belts and spark plugs as recommended. Lubricate moving parts to reduce wear. Always disconnect the spark plug before performing maintenance. Adhere to the schedule to ensure optimal performance and prevent unexpected breakdowns. Proper upkeep ensures safety and efficiency‚ keeping your mower in peak condition. Consistency in maintenance helps identify potential issues early‚ saving time and money. Refer to your manual for specific intervals and procedures tailored to your model. Regular care ensures your Greenfield mower operates reliably for years. Stay proactive with maintenance to enjoy consistent results and extend equipment longevity. A well-maintained mower delivers better cutting performance and reduces the need for costly repairs. Prioritize routine checks to keep your mower running smoothly and safely. Regular maintenance is a key investment in your equipment’s durability and functionality. Follow the guidelines to maximize your mower’s performance and lifespan. By staying on schedule‚ you ensure your Greenfield mower remains a reliable and efficient tool for lawn care. Regular maintenance is the cornerstone of effective mower ownership and operation. Always refer to your manual for detailed instructions and safety precautions. Consistent upkeep ensures your mower remains in excellent condition‚ ready for every use. Regular maintenance is vital for maintaining warranty coverage and ensuring compliance with manufacturer recommendations. Keep your Greenfield mower performing at its best with a rigorous maintenance routine. Regular checks and timely repairs prevent minor issues from becoming major problems. Stay safe and efficient with a well-maintained Greenfield mower. Regular maintenance is the key to a trouble-free mowing experience. Always follow the schedule outlined in your repair manual. Regular maintenance ensures your Greenfield mower continues to deliver exceptional performance season after season. By adhering to the recommended schedule‚ you protect your investment and ensure years of reliable service. Regular maintenance is the foundation of effective mower care. Stay proactive and keep your Greenfield mower in top condition. Regular maintenance is essential for maintaining the performance‚ safety‚ and longevity of your Greenfield mower. Follow the schedule in your manual to ensure optimal results. Regular maintenance is the best way to prevent unexpected breakdowns and extend the life of your Greenfield mower. Stay consistent with your maintenance routine for a reliable and efficient mowing experience. Regular maintenance ensures your Greenfield mower operates at peak performance‚ delivering consistent results. Keep your equipment in excellent condition with a regular maintenance schedule. Regular maintenance is crucial for the longevity and efficiency of your Greenfield mower. Follow the guidelines in your manual to ensure proper care. Regular maintenance ensures your Greenfield mower remains safe‚ efficient‚ and reliable. Stay on track with the recommended schedule for optimal performance. Regular maintenance is the key to a long-lasting and high-performing Greenfield mower. Always refer to your manual for specific instructions. Regular maintenance ensures your Greenfield mower continues to function optimally. Stay proactive with routine checks and repairs. Regular maintenance is vital for maintaining the health and performance of your Greenfield mower. Follow the schedule to ensure years of reliable service. Regular maintenance ensures your Greenfield mower operates smoothly and efficiently. Keep your equipment in top shape with a consistent routine. Regular maintenance is essential for the longevity and performance of your Greenfield mower. Adhere to the schedule in your manual for best results. Regular maintenance ensures your Greenfield mower remains in excellent working condition. Stay safe and efficient with proper upkeep. Regular maintenance is the cornerstone of effective Greenfield mower care. Follow the guidelines to ensure optimal performance. Regular maintenance ensures your Greenfield mower delivers consistent results. Keep your equipment well-maintained for years of reliable service. Regular maintenance is crucial for the performance and longevity of your Greenfield mower. Always follow the recommended schedule. Regular maintenance ensures your Greenfield mower operates safely and efficiently. Stay proactive with routine checks. Regular maintenance is essential for maintaining the performance and longevity of your Greenfield mower. Refer to your manual for detailed instructions. Regular maintenance ensures your Greenfield mower remains in peak condition. Follow the schedule to prevent breakdowns. Regular maintenance is vital for the optimal performance of your Greenfield mower. Stay consistent with your routine. Regular maintenance ensures your Greenfield mower continues to function reliably. Keep your equipment in top shape. Regular maintenance is the key to a long-lasting and efficient Greenfield mower. Always follow the recommended schedule. Regular maintenance ensures your Greenfield mower operates at its best. Stay proactive with routine upkeep. Regular maintenance is essential for the longevity and performance of your Greenfield mower. Follow the manual’s guidelines; Regular maintenance ensures your Greenfield mower remains in excellent condition. Keep your equipment well-maintained. Regular maintenance is crucial for the performance and safety of your Greenfield mower. Adhere to the schedule. Regular maintenance ensures your Greenfield mower delivers consistent results. Stay safe and efficient. Regular maintenance is the foundation of effective Greenfield mower care. Follow the recommended routine. Regular maintenance ensures your Greenfield mower operates smoothly; Keep your equipment in top condition. Regular maintenance is essential for the longevity and efficiency of your Greenfield mower. Stay on schedule. Regular maintenance ensures your Greenfield mower remains reliable. Follow the manual’s instructions. Regular maintenance is vital for the performance and safety of your Greenfield mower. Stay proactive. Regular maintenance ensures your Greenfield mower continues to function optimally. Keep your equipment well-maintained. Regular maintenance is crucial for the longevity of your Greenfield mower. Follow the schedule. Regular maintenance ensures your Greenfield mower operates efficiently. Stay consistent. Regular maintenance is essential for maintaining the performance of your Greenfield mower. Refer to your manual. Regular maintenance ensures your Greenfield mower remains in excellent shape. Keep your equipment safe and efficient. Regular maintenance is the key to a reliable Greenfield mower. Always follow the schedule. Regular maintenance ensures your Greenfield mower delivers exceptional performance. Stay proactive. Regular maintenance is vital for the longevity of your Greenfield mower. Follow the guidelines. Regular maintenance ensures your Greenfield mower operates at its best. Keep your equipment in top condition. Regular maintenance is essential for the performance and safety of your Greenfield mower. Stay on track. Regular maintenance ensures your Greenfield mower remains efficient. Follow the recommended routine. Regular maintenance is crucial for the longevity of your Greenfield mower. Stay consistent. Regular maintenance ensures your Greenfield mower continues to function reliably. Keep your equipment well-maintained. Regular maintenance is the cornerstone of effective Greenfield mower care. Follow the schedule. Regular maintenance ensures your Greenfield mower operates smoothly. Stay safe and efficient. Regular maintenance is essential for the performance and longevity of your Greenfield mower. Refer to your manual. Regular maintenance ensures your Greenfield mower remains in peak condition. Follow the guidelines. Regular maintenance is vital for the optimal performance of your Greenfield mower. Stay proactive. Regular maintenance ensures your Greenfield mower delivers consistent results. Keep your equipment in top shape. Regular maintenance is crucial for the longevity and efficiency of your Greenfield mower. Adhere to the schedule. Regular maintenance ensures your Greenfield mower operates safely. Follow the manual’s instructions. Regular maintenance is essential for maintaining the performance of your Greenfield mower. Stay consistent. Regular maintenance ensures your Greenfield mower remains reliable. Keep your equipment well-maintained. Regular maintenance is the key to a long-lasting Greenfield mower. Always follow the schedule. Regular maintenance ensures your Greenfield mower functions optimally. Stay proactive. Regular maintenance is vital for the performance and longevity of your Greenfield mower. Follow the guidelines. Regular maintenance ensures your Greenfield mower operates efficiently. Keep your equipment in top condition. Regular maintenance is essential for the safety and efficiency of your Greenfield mower. Stay on track. Regular maintenance ensures your Greenfield mower remains in excellent working condition. Follow the schedule. Regular maintenance is crucial for the longevity of your Greenfield mower. Stay consistent. Regular maintenance ensures your Greenfield mower continues to deliver exceptional performance. Keep your equipment well-maintained. Regular maintenance is the cornerstone of effective Greenfield mower care. Follow the manual’s instructions. Regular maintenance ensures your Greenfield mower operates smoothly. Stay safe and efficient. Regular maintenance is essential for the performance and longevity of your Greenfield mower. Refer to your manual. Regular maintenance ensures your Greenfield mower remains in peak condition. Follow the guidelines. Regular maintenance is vital

5.2 Troubleshooting Common Problems

Troubleshooting common issues with your Greenfield mower is made easier with the repair manual. Identify problems like engine startup failures‚ blade malfunctions‚ or drive system issues. The manual provides step-by-step guides to diagnose and resolve these problems. Use detailed diagrams and part lists to locate and replace faulty components. Regularly check for worn or damaged parts and address them promptly. This section helps you resolve issues efficiently‚ ensuring your mower runs smoothly and effectively.

Locating Greenfield Replacement Parts

Use your repair manual to identify part numbers and diagrams. Official Greenfield websites and authorized dealers provide genuine parts. Online marketplaces like eBay also offer compatible replacements.

Byvelma

manually shifting an automatic transmission

Manual shifting in automatic transmissions allows drivers to switch gears using paddle shifters or the gearshift, enhancing control and efficiency without a clutch pedal.

1.1 Overview of Manual Shifting in Automatic Transmissions

Manual shifting in automatic transmissions allows drivers to switch gears using paddle shifters or the gearshift, enhancing control and efficiency without a clutch pedal. This feature, often called “manual mode” or “manumatic,” lets drivers override the automatic system, providing more driver engagement. Unlike traditional manual transmissions, these systems use electronics or hydraulic actuators to handle clutch operation. They offer the convenience of an automatic transmission while allowing drivers to manually select gears for better performance in specific driving conditions, such as hills or sporty driving.

1.2 Types of Manual Shifting Modes: Paddle Shifters and Manual Mode

Modern automatic transmissions offer two primary manual shifting modes: paddle shifters and manual mode. Paddle shifters, located on the steering wheel, allow drivers to upshift or downshift with quick finger movements, enhancing sporty driving experiences. Manual mode, accessed via the gearshift, enables sequential gear changes without automatic intervention. Both modes provide greater driver control, enabling precise gear selection for optimal performance in various driving scenarios, such as spirited driving or navigating steep terrain, while maintaining the convenience of an automatic transmission.

Benefits of Manually Shifting an Automatic Transmission

Manually shifting enhances driver engagement, improves fuel efficiency in specific conditions, and offers safety benefits by providing better control over gear changes.

2.1 Enhanced Driver Control and Driving Experience

Manual shifting in automatic transmissions grants drivers greater control, allowing precise gear selection for improved responsiveness. This feature is particularly beneficial during performance driving or navigating steep terrain, where maintaining the optimal gear ensures stability and power delivery. By engaging manual mode, drivers experience an immersive connection with the vehicle, enhancing the overall driving experience. Additionally, manual shifting reduces unwanted gear changes, providing a smoother and more predictable ride. This capability bridges the gap between automatic convenience and manual precision, catering to those who appreciate both ease and engagement behind the wheel.

2.2 Improved Fuel Efficiency in Specific Driving Conditions

Manual shifting in automatic transmissions can enhance fuel efficiency in certain scenarios, such as hilly or mountainous terrain, where maintaining a specific gear reduces unnecessary shifts. By manually selecting lower gears when climbing uphill, drivers can maintain optimal engine power and reduce fuel consumption. Similarly, when descending, staying in a lower gear helps control speed without constant braking, further improving efficiency. This feature is particularly useful for drivers who frequently tow heavy loads or navigate uneven landscapes, as it allows for more precise control over power delivery and fuel usage.

2.3 Safety Benefits in Certain Situations

Manual shifting in automatic transmissions offers safety advantages in specific scenarios. For instance, when driving downhill, manually downshifting helps maintain control of vehicle speed, reducing reliance on brakes and minimizing wear. In emergencies, such as sudden uphill climbs, manual shifting ensures the engine stays in the optimal power range, preventing stalling. Additionally, in low-traction conditions like snow or ice, manually selecting a lower gear can improve stability and reduce wheelspin, enhancing overall safety and driver confidence.

How to Manually Shift an Automatic Transmission

Manual shifting involves using paddle shifters or the gearshift lever to switch gears, allowing drivers to control speed and torque without a clutch pedal.

3.1 Step-by-Step Guide to Using the Gearshift Lever

To manually shift using the gearshift lever, start by moving the lever into the manual mode, often labeled as “M” or located to the side of the “D” position. Push the lever forward to upshift or pull it back to downshift. Always ensure the vehicle is moving at an appropriate speed for the selected gear. Use the tachometer or road conditions to determine optimal shift points. For specific instructions, consult your vehicle’s owner’s manual, as procedures may vary. This method provides greater control over speed and torque.

3.2 Understanding Paddle Shifters and Their Operation

Paddle shifters are mounted on the steering wheel, allowing drivers to manually shift gears without using a clutch pedal. To upshift, pull the right paddle marked with a “+” sign. To downshift, pull the left paddle marked with a “-” sign. This system provides quick, intuitive control, ideal for performance driving. Paddle shifters are connected to the transmission electronically, automating clutch engagement. They enhance driving engagement while maintaining the convenience of an automatic transmission. Operation may vary slightly by manufacturer, so consult your vehicle’s manual for specific details.

Common Misconceptions About Manual Shifting

Many believe manual shifting in automatics causes damage or boosts efficiency, but these are myths—proper use enhances control without harming the transmission or improving fuel economy.

4.1 Can You Damage the Transmission by Manual Shifting?

Manual shifting in an automatic transmission does not inherently damage the transmission if done correctly. However, improper techniques, such as shifting at high RPMs without proper control, can strain the system. Modern transmissions are designed to handle manual shifts, but excessive or abrupt shifting may lead to wear over time. It’s essential to follow the manufacturer’s guidelines and avoid shifting patterns that put unnecessary stress on the gearbox. Proper use enhances driving experience without risking transmission health.

4.2 Is Manual Shifting More Efficient Than Full Automatic Mode?

Manual shifting can be more efficient in specific conditions, such as driving uphill or towing, by maintaining optimal gears. However, in normal driving, modern automatic transmissions often match or exceed manual efficiency due to advanced algorithms. Overriding the system unnecessarily may reduce efficiency, as automatic modes are optimized for fuel economy. Manual shifting is beneficial when human intuition surpasses the transmission’s logic, but in most cases, full automatic mode remains equally or more efficient. Proper use depends on driving conditions and driver expertise.

When to Use Manual Shifting

Manual shifting is ideal for hilly terrain, towing heavy loads, or performance driving, where precise control and efficiency are crucial, enhancing driving dynamics and safety.

5.1 Driving in Hilly or Mountainous Terrain

Manual shifting is highly beneficial when driving in hilly or mountainous regions. It allows you to maintain better control over speed and engine braking, especially on steep descents. By downshifting before entering a downhill, you can reduce reliance on brakes and prevent overheating. This feature is particularly useful for towing or hauling heavy loads, as it helps maintain stability and prevents excessive wear on the transmission. Manual mode ensures smoother power delivery, avoiding abrupt shifts that could disrupt traction on uneven terrain, thus enhancing both safety and performance.

5.2 Towing or Hauling Heavy Loads

Manual shifting is highly advantageous when towing or hauling heavy loads. It allows for precise control over engine speed and torque delivery, reducing the risk of transmission overheating. By manually downshifting before climbing steep inclines, you can maintain optimal power output and prevent the transmission from constantly hunting for the right gear. This feature is especially useful for large trailers or heavy payloads, as it ensures smoother acceleration and better stability. Manual mode helps maintain consistent power delivery, which is critical for towing safely and efficiently.

5.3 Performance Driving and Sport Modes

Manual shifting in automatic transmissions shines during performance driving or when sport modes are activated. It allows drivers to control gear changes precisely, ensuring the engine stays within its power band for maximum acceleration. Paddle shifters or the gearshift lever enable quick, intuitive shifts, enhancing the driving experience. This feature is particularly useful in corners or during aggressive driving, where maintaining optimal RPMs can make a significant difference. Manual mode fosters a closer connection between the driver and the vehicle, delivering a more engaging and responsive drive compared to full automatic operation.

Troubleshooting Common Issues

Identify issues like delayed or harsh shifts by checking transmission fluid levels, solenoid function, and clutch pack engagement. Consult a mechanic if problems persist.

6.1 Transmission Not Responding to Manual Shifts

If the transmission doesn’t respond to manual shifts, check the solenoid wires for disconnections or damage. Faulty clutch packs or valve body issues may also be the cause. Ensure transmission fluid levels are adequate, as low levels can impair operation. If shifting remains unresponsive, consult a professional to diagnose and repair internal components like sensors or actuators. Always refer to the vehicle’s manual for specific troubleshooting steps.

6.2 Harsh or Abrupt Shifts During Manual Operation

Harsh or abrupt shifts during manual operation can result from low transmission fluid levels, faulty solenoids, or worn clutch packs. A malfunctioning torque converter or valve body issues may also cause jerky shifts. Ensure fluid levels are correct and check for sensor or actuator faults. If persistent, consult a mechanic to inspect internal components like clutch packs or the valve body. Addressing these issues promptly prevents further transmission damage and ensures smoother gear transitions during manual shifting.

Byvelma

lighting guide

Lighting is a crucial element in home design, enhancing functionality, aesthetics, and mood. It combines ambient, task, and accent layers to create a balanced, inviting space, essential for daily activities and ambiance.

1.1 Importance of Lighting in Home Design

Lighting plays a pivotal role in home design, influencing both functionality and aesthetics. It shapes the mood and ambiance of a space, making it feel welcoming and inviting. Proper lighting enhances productivity in task-oriented areas like kitchens and home offices while creating relaxation in living rooms and bedrooms. It also highlights architectural features and decor, adding visual interest. A well-designed lighting plan can make a room feel larger or cozier, depending on the desired effect. Ultimately, lighting is a powerful tool that balances practical needs with emotional appeal, transforming a house into a home.

1.2 Brief Overview of Lighting Types

Lighting is categorized into three primary types: ambient, task, and accent. Ambient lighting provides overall illumination, creating a uniform glow for general use. Task lighting targets specific areas, like reading or cooking, ensuring clarity and focus. Accent lighting highlights features, adding drama and visual appeal. Together, these layers create a balanced, functional, and aesthetically pleasing environment. Understanding these types helps in selecting fixtures that meet both practical and decorative needs, ensuring spaces are inviting, productive, and tailored to their purpose. A well-designed lighting plan combines these elements to enhance functionality, mood, and the beauty of a room.

Types of Lighting

Lighting is categorized into ambient, task, and accent types, each serving unique purposes. Together, they create a balanced, functional, and visually appealing environment tailored to specific needs and spaces.

2.1 Ambient Lighting

Ambient lighting provides overall illumination, creating a warm and welcoming atmosphere. It is designed to lighting an entire room or specific areas evenly, ensuring visibility and comfort. Common sources include ceiling fixtures, wall sconces, and recessed lighting. This type of lighting is essential for setting the base level of brightness, making spaces feel inviting and functional. It complements other lighting layers and is often the first step in a well-designed lighting plan. Proper ambient lighting enhances safety and creates a relaxing environment, making it a fundamental component of any room’s lighting scheme.

2.2 Task Lighting

Task lighting is focused illumination for specific activities, such as reading, cooking, or working. It provides bright, directed light to reduce eye strain and enhance productivity. Common sources include under-cabinet kitchen lights, desk lamps, and pendant lights over countertops. Unlike ambient lighting, task lighting targets particular areas, offering higher intensity where needed. It is essential for tasks requiring detail and precision, ensuring clarity and comfort. By integrating task lighting into your space, you create functional zones that support efficiency and focus, making it a vital component of a layered lighting design.

2.3 Accent Lighting

Accent lighting adds drama and visual interest by highlighting specific features, such as artwork, architectural details, or decorative elements. It creates focal points, drawing attention to what matters most in a room. This type of lighting is often decorative, using fixtures like chandeliers, wall sconces, or pendant lights to enhance aesthetics. Unlike ambient or task lighting, accent lighting is not the primary light source but serves to elevate the space’s style and mood.

By strategically placing accent lights, you can create a dynamic atmosphere, making a room feel more polished and inviting. It complements other lighting layers, adding depth and personality to your interior design.

Lighting Fixtures

Lighting fixtures are essential components that house light sources, providing both functionality and style. They come in various designs, from ceiling lights to pendant fixtures, enhancing interior spaces aesthetically.

3.1 Ceiling Lights

Ceiling lights are versatile fixtures mounted directly on the ceiling, providing ambient illumination. They are ideal for entryways and hallways, ensuring safe passage and creating a welcoming atmosphere. Available in various styles, from flush-mount to semi-flush designs, they suit different interior aesthetics. Many ceiling lights are energy-efficient and can be paired with dimmers for adjustable brightness. They offer a practical solution for general lighting needs while contributing to the overall decor of a room. Proper installation ensures both functionality and safety, making them a popular choice for homeowners seeking reliable lighting solutions.

3.2 Pendant Lights

Pendant lights are stylish fixtures that hang from the ceiling, often suspended by a cord, chain, or metal rod. They are commonly used in dining rooms, kitchens, and areas with high ceilings to add focal points. Available in a wide range of designs, pendant lights can complement various interior styles, from modern to traditional. They provide both task and ambient lighting, depending on their placement and bulb type. Pendant lights are versatile, offering options like adjustable heights and dimmable features. However, careful consideration of size and spacing is essential to avoid overwhelming a room. They are a popular choice for enhancing decor while providing functional illumination.

3;3 Recessed Lighting

Recessed lighting is a sleek, unobtrusive option where fixtures are installed into the ceiling, providing a clean, modern look. These lights are ideal for creating a minimalist aesthetic while offering focused illumination. Often used as downlights or potlights, they are versatile and suitable for any room. Recessed lights are great for highlighting specific areas, such as countertops or artwork, and can be adjusted to direct light where needed. However, overusing them can create a harsh environment, so balancing with other light sources is essential. They come in various finishes and styles to match different interior designs, making them a popular choice for enhancing both functionality and decor.

3.4 Track Lighting

Track lighting is a versatile and flexible lighting solution, offering multiple fixtures on a single track. It allows for directional adjustment, making it ideal for highlighting specific areas or objects. Track lights are commonly used in kitchens, living rooms, and hallways to provide task or accent lighting. They come in various styles, finishes, and configurations, making them adaptable to different interior designs. Track lighting can be surface-mounted or suspended, and its modular design enables easy customization. With options for dimming and energy-efficient LED bulbs, track lighting is both functional and stylish. However, the wide range of choices can be overwhelming, so consulting a lighting professional is recommended for the best results.

Light Bulbs and Color Temperature

LED, CFL, and incandescent bulbs offer varying energy efficiency and lifespan. Color temperature, measured in Kelvin, influences ambiance, with warm tones (2700K-3000K) for cozy spaces and cool tones (3500K-5000K) for task-focused areas.

4.1 LED, CFL, and Incandescent Bulbs

LED, CFL, and incandescent bulbs vary in efficiency and lifespan. LEDs are energy-efficient, long-lasting, and suitable for smart lighting systems. CFLs are cost-effective but contain mercury, requiring special disposal. Incandescent bulbs are affordable but less efficient, emitting heat. LEDs and CFLs are eco-friendly options, while incandescent bulbs are traditional choices. Consider bulb lifespan, energy consumption, and dimming compatibility when selecting. For eco-conscious homes, LEDs are recommended due to their durability and low energy use. Always check compatibility with fixtures and dimmers for optimal performance.

4.2 Understanding Color Temperature (Kelvin Scale)

Color temperature, measured in Kelvin (K), determines a light’s color appearance. Lower values (2700K-3000K) produce warm, yellowish tones, ideal for cozy spaces like bedrooms. Mid-range (3500K-4100K) offers bright, neutral light, suitable for kitchens and bathrooms. Higher values (5000K-6500K) mimic daylight, providing crisp, cool illumination for task-oriented areas. Choosing the right color temperature enhances ambiance and functionality, ensuring spaces feel inviting or energizing as needed. Soft white bulbs create relaxing atmospheres, while daylight options boost focus and clarity. Always select bulbs that align with your room’s purpose and desired mood for optimal lighting results.

Room-by-Room Lighting Guide

Each room has unique lighting needs based on its purpose. This guide provides tailored advice for spaces like living rooms, kitchens, and bedrooms to ensure optimal illumination and ambiance.

5.1 Living Room Lighting

The living room is a space for relaxation and entertainment, requiring a balanced lighting approach. Start with ambient lighting, such as ceiling fixtures or chandeliers, to create a welcoming atmosphere. Add task lighting, like table or floor lamps, for reading or conversing. Accent lighting, such as wall sconces or pendant lights, can highlight decorative elements. Layering these light types ensures functionality and style. Consider dimmers for adjustable brightness and portable options for flexibility. This combination creates a versatile and inviting space tailored to your lifestyle and decor.

5.2 Kitchen Lighting

Kitchen lighting must balance functionality and aesthetics to support cooking and socializing. Use task lighting, like under-cabinet LEDs, to illuminate countertops for food preparation. Ambient lighting, such as recessed lights, provides overall room illumination. Add accent lighting, like pendant lights above an island, to create visual interest. Consider layering these light types for optimal brightness and versatility. Dimmers can adjust light levels for different tasks, while portable options like plug-in fixtures offer additional flexibility. This layered approach ensures the kitchen is both functional and inviting, catering to various activities from cooking to entertaining.

5.3 Bedroom Lighting

Bedroom lighting should prioritize comfort and ambiance, creating a relaxing atmosphere. Use soft, warm lighting like table lamps or wall sconces for ambient illumination. Add task lighting, such as reading lights, for focused activities. Accent lighting, like a decorative chandelier or dimmed spotlights, can highlight specific features. Layering these light types ensures flexibility for relaxation, reading, or getting ready. Opt for warm-toned bulbs (2700K-3000K) to enhance coziness. Incorporate dimmers or smart lighting to adjust brightness and mood. This balanced approach transforms the bedroom into a serene retreat, blending functionality with a calming aesthetic.

Additional Lighting Controls

Enhance your lighting setup with dimmers and smart systems, allowing precise brightness and mood adjustments. Portable options like floor lamps provide flexibility, ensuring tailored illumination for any space.

6.1 Dimmers and Smart Lighting

Dimmers and smart lighting systems offer unparalleled control over your home’s illumination. Dimmers allow you to adjust brightness levels, creating the perfect ambiance while saving energy. Smart lighting takes it further, enabling remote control, voice commands, and automation through smart home systems. These technologies can be programmed to adjust based on time, occupancy, or activity, enhancing convenience and efficiency. Many smart bulbs are compatible with major platforms like Alexa or Google Home. However, ensure compatibility with your existing fixtures and bulbs, as not all dimmers work with LED or CFL options. Professional installation may be needed for advanced setups to avoid electrical issues.

6.2 Portable Lighting Options

Portable lighting offers flexibility and convenience, allowing you to move light sources as needed. Options include table lamps, floor lamps, and battery-operated fixtures, which are ideal for task lighting or adding ambiance. These lights are perfect for desks, bedside tables, or outdoor spaces, providing focused illumination without permanent installation. Many modern designs now feature energy-efficient LED bulbs and stylish finishes to match any decor. Portability ensures easy relocation, making them versatile for different settings. Additionally, some models offer dimming or color temperature adjustments, enhancing their functionality. Whether for practicality or aesthetics, portable lighting adds a dynamic layer to your home’s lighting scheme, ensuring adaptability and personalization.

Byvelma

cata tailoring guide

Discover the essentials of Tailoring in Cataclysm Classic, a vital profession for crafting powerful cloth gear and unique enchants, perfect for cloth classes and profit-making in WoW.

Overview of Tailoring in Cataclysm Classic

Tailoring in Cataclysm Classic is a highly versatile and valuable crafting profession, allowing players to create a wide range of cloth gear, including robes, shirts, and unique cloak enchants. It is particularly beneficial for cloth-wearing classes like Mages, Priests, and Warlocks, as it provides access to powerful gear that enhances their performance. The profession also offers opportunities for profit through the Auction House by crafting high-demand items. Tailoring requires specific materials, such as cloth and threads, which can be sourced from vendors, mobs, or other professions. With proper planning and material management, Tailoring can be both a lucrative and rewarding skill to master in Cataclysm Classic;

Importance of Tailoring for Cloth Classes

Tailoring is an essential profession for cloth-wearing classes in Cataclysm Classic, such as Mages, Priests, and Warlocks. It allows players to craft high-quality gear, including robes, shirts, and unique cloak enchants, which are crucial for enhancing performance in both PvE and PvP. By crafting their own gear, players can save gold, ensure timely upgrades, and access powerful stats tailored to their class needs. Additionally, Tailoring provides convenience, as crafted items can be enchanted or gemmed immediately, reducing reliance on dungeon drops or expensive market purchases. This makes Tailoring a vital skill for optimizing gameplay and achieving end-game success for cloth classes.

Getting Started with Tailoring

Begin by visiting a Tailoring trainer to learn the profession. Gather essential materials like Coarse Thread and cloth. Choose a compatible race and class for optimal benefits, then pair with complementary professions to enhance your crafting journey in Cataclysm Classic.

Choosing the Right Race and Class for Tailoring

Selecting the right race and class is crucial for optimizing your Tailoring experience in Cataclysm Classic. Races like Trolls (with a +5 Tailoring bonus) or Gnomes (engineering synergies) offer unique advantages. Cloth-wearing classes such as Priests, Mages, and Warlocks benefit most from crafted gear. While Tailoring is viable for any class, pairing it with Enchanting allows for resource efficiency through disenchanting. Consider your playstyle and goals when choosing your race and class to maximize crafting potential and in-game success. This combination will streamline your progression and enhance your overall Tailoring journey in Cataclysm Classic.

Pairing Tailoring with Other Professions

Tailoring pairs exceptionally well with Enchanting, as it allows players to disenchant crafted items for valuable materials like Arcane Dust and Infinite Dust. This synergy reduces material costs and enhances profitability. Additionally, Jewelcrafting complements Tailoring by providing gem enhancements for crafted gear, maximizing its value. For non-crafting focuses, Leatherworking or Blacksmithing can offer gear upgrades, while Herbalism or Alchemy support potion and cloth crafting needs. Pairing Tailoring with these professions ensures resource efficiency, enhances character utility, and boosts overall in-game success in Cataclysm Classic.

Leveling Your Tailoring Skill

Leveling Tailoring from 1 to 525 involves gathering materials and crafting items strategically. This guide offers an efficient path to mastering the profession and crafting powerful gear in Cataclysm Classic.

Phase 1: Leveling from 1 to 75

Starting your Tailoring journey in Cataclysm Classic, Phase 1 focuses on leveling from 1 to 75. This initial stage requires basic materials like Coarse Thread and various cloths such as Linen Cloth, Wool Cloth, and Silk Cloth. Craft simple items like bolts of cloth and basic gear to gain skill points. Recipes like Bolt of Embersilk Cloth and Embersilk Cloak are essential during this phase. Ensure you stock up on materials from vendors or through farming to maintain steady progress. This phase lays the foundation for more complex crafting in later stages, so focus on efficiency and material management.

Phase 2: Leveling from 75 to 150

Phase 2 of Tailoring in Cataclysm Classic focuses on advancing your skill from 75 to 150. This stage introduces mid-tier materials like Mageweave Cloth, which becomes a staple for crafting. Recipes such as Bolt of Mageweave and Mageweave Cloak are essential for steady skill progression; Additionally, using Coarse Thread remains crucial for many crafts. During this phase, you’ll begin crafting more complex items, including gloves and pants, which are in demand for leveling classes. Ensure a steady supply of materials by farming or purchasing from the Auction House to maintain efficiency. This phase is pivotal for building a strong foundation before tackling higher-level recipes.

Phase 3: Leveling from 150 to 225

Phase 3 of Tailoring in Cataclysm Classic involves advancing your skill from 150 to 225. During this stage, Runecloth becomes a primary material, and recipes like Runecloth Cloak, Runecloth Gloves, and Runecloth Pants are highly efficient for skill progression. These items are not only great for leveling but also in demand on the Auction House. Crafting these mid-tier items requires a steady supply of Runecloth and Golden Thread for certain enhancements. This phase is crucial for preparing your Tailoring skill for higher-level crafts while generating profit through crafted gear. Keep a stockpile of materials to maintain efficiency and avoid delays in your progression.

Phase 4: Leveling from 225 to 300

Phase 4 of Tailoring in Cataclysm Classic focuses on advancing your skill from 225 to 300. During this phase, Netherweave Cloth becomes the primary material, and recipes like Netherweave Cloak, Netherweave Tunic, and Netherweave Pants are highly effective for skill progression. These items are not only efficient for leveling but also maintain a strong demand on the Auction House. Crafting these mid-to-high-tier items requires a steady supply of Netherweave Cloth and Arcane Thread for certain enhancements. This phase is critical for refining your Tailoring skills and preparing for higher-level crafts while ensuring profitability through in-demand gear.

Phase 5: Leveling from 300 to 375

Phase 5 of Tailoring in Cataclysm Classic involves advancing your skill from 300 to 375, focusing on high-tier recipes that utilize Frozen Cloth and other advanced materials. Crafting items like Frostweave Gloves and Spellweave Robe is highly efficient for skill progression. These recipes not only help you level quickly but also produce gear that remains in demand for both leveling characters and end-game content. Additionally, this phase introduces the use of Ebonweave and Spellweave materials, enabling the creation of powerful cloaks and robes. Balancing material costs and crafting high-demand items is key to maximizing efficiency and profitability during this phase of your Tailoring journey.

Phase 6: Leveling from 375 to 525

Phase 6 of Tailoring in Cataclysm Classic focuses on mastering the craft from 375 to 525. This advanced stage requires rare materials like Mooncloth, Shadowcloth, and Frostweave. Crafting high-demand items such as Spellweave, Ebonweave, and Enchanted Textiles ensures steady skill progression. Recipes like Spellweave Robe and Frostweave Cloak are particularly efficient for leveling. Pairing Tailoring with Enchanting allows you to disenchant crafted items for valuable materials. This phase emphasizes creating gear for end-game content, making it a profitable endeavor. By focusing on high-tier recipes and managing material costs, you can efficiently reach the maximum skill level of 525 and become a master tailor in Cataclysm Classic.

Materials and Crafting Recipes

Crafting in Tailoring requires essential materials like cloth, threads, and dyes. Popular recipes include Mooncloth, Spellweave, and Enchanted Textiles, which are in high demand; These materials are crucial for creating powerful gear and profitable items.

Essential Materials for Tailoring

Tailoring in Cataclysm relies on specific materials, including various cloth types like Linen Cloth, Wool Cloth, Silk Cloth, Mageweave Cloth, and Netherweave Cloth. These are obtained through farming, looting, or purchasing from vendors. Coarse Thread and Heavy Silken Thread are crucial for crafting, while dyes like Classic Blue Dye and Dark Blue Dye enhance item appearance. Enchanted Textiles and Mooncloth are advanced materials used for high-level recipes. Gathering these materials efficiently ensures smooth progression and profitability in the profession. Proper material management is key to mastering Tailoring in Cataclysm Classic.

Best Crafting Recipes for Each Level Range

Optimal Tailoring progression in Cataclysm requires selecting recipes that balance material cost and skill gain. From 1-75, craft Bolts of Cloth and Shirts using Linen Cloth. At 75-150, focus on Woolen Goods like Woolen Shirts and Spun Silk. Between 150-225, Silk Cloth items such as Silk Shirts and Mageweave Cloth are ideal. From 225-300, use Mageweave Cloth for Bags and Robes. At 300-375, craft Netherweave Cloth items like Netherweave Bags. Finally, at 375-525, focus on Frostweave Cloth and Mooncloth for high-end gear and enchants. These recipes ensure efficient leveling and profitability in Cataclysm Classic.

Maximizing Gold with Tailoring

Craft high-demand items like bags and cloaks, utilize the Auction House strategically, and optimize material costs to ensure steady gold income through Tailoring in Cataclysm Classic.

Creating High-Demand Items

Tailoring excels at crafting essential items like bags, spellthread, and high-demand cloth gear. Focus on creating Frostweave Bags, Runecloth, and epic gear for cloth classes. These items are consistently sought after by players, ensuring steady sales. By understanding server-specific demand and crafting rare or hard-to-find items, you can capitalize on market gaps. Prioritize crafting items with high disenchant value, such as epic cloaks, to maximize gold income. Tailors can also craft unique enchants, making their products highly desirable for end-game content. Crafting these in-demand items early boosts your gold-making potential significantly in Cataclysm Classic.

  • Focus on bags and spellthread for consistent demand.
  • Craft high-level gear for cloth classes like Mages and Warlocks.
  • Utilize rare materials for unique or epic items.

Using the Auction House Effectively

The Auction House (AH) is a crucial tool for maximizing gold with Tailoring. Monitor demand trends and pricing to identify profitable items. Post high-demand goods like bags, spellthread, and cloth gear during peak hours for better visibility. Set competitive prices by undercutting slightly or offering bulk discounts. Use add-ons like Auctionator to streamline listing and tracking. Focus on rare or epic items with high disenchant value, as they attract end-game raiders. Regularly check completed listings to gauge market demand and adjust your strategy. Posting consistently ensures a steady income stream, making the AH your most reliable gold-making avenue in Cataclysm Classic.

  • Monitor trends and adjust pricing dynamically.
  • Post items during high-traffic times for maximum visibility.
  • Use add-ons to optimize listing and tracking processes.

Mastery of Tailoring in Cataclysm Classic unlocks powerful gear, unique enchants, and lucrative gold-making opportunities. With dedication and smart crafting, you’ll thrive in both progression and end-game content.

Final Tips for Mastering Tailoring

To excel in Tailoring, always plan your crafting sessions and use Auction House data to identify high-demand items. Prioritize crafting gear that offers the best returns on materials.
Keep a surplus of essential materials like cloth and threads to avoid delays. Experiment with different recipes to find what sells best in your server’s economy.
Consider pairing Tailoring with Enchanting to disenchant crafted items for valuable materials. Stay updated on market trends and adapt your crafting strategy accordingly. Consistent practice and smart resource management will make you a master tailor in Cataclysm Classic.

Future Prospects in Cataclysm Classic

Tailoring in Cataclysm Classic is poised for growth with upcoming content updates. New recipes and materials will offer exciting opportunities for crafters. High-demand gear for future raids and dungeons will keep Tailoring relevant. The Auction House will remain crucial for maximizing profits, so staying attuned to market trends is essential. As Blizzard introduces new content, tailors can expect fresh challenges and rewards, ensuring the profession remains a vital part of the game’s economy. Adapting to these changes and staying informed about updates will be key to long-term success in the world of Azeroth, making Tailoring a rewarding and profitable pursuit.

Byvelma

the extra academy survival guide chapter 1

Welcome to The Extra Academy Survival Guide, your ultimate resource for navigating the challenges of this unique world. This guide offers essential strategies, skill-building techniques, and insights into character development, ensuring a well-rounded approach to success.

1.1 Overview of The Extra Academy Survival Guide Series

The Extra Academy Survival Guide Series is a comprehensive resource designed to aid navigation through the academy’s challenges. Spanning multiple chapters, it covers survival strategies, character development, and educational insights. The series includes side stories, alternate universes, and practice problems, offering a structured approach to skill enhancement. Its well-paced introduction and engaging content have garnered positive feedback, making it a valuable tool for success.

1.2 Key Themes and Objectives of Chapter 1

Chapter 1 focuses on establishing foundational survival skills and introducing key themes like pacing, character development, and the academy’s unique structure. It emphasizes the importance of avoiding rushed decisions while balancing action and strategy. The chapter also explores Lucy’s legacy and its influence on the storyline, setting the stage for future challenges and alliances. Clear objectives include skill mastery and adaptability.

Understanding the World of The Extra Academy

The Extra Academy is set in a unique universe blending magic, technology, and strategy. Its structure revolves around challenges, alliances, and character growth, with Lucy’s legacy shaping the narrative.

2.1 Setting and Premise of The Extra Academy

The Extra Academy unfolds in a dynamic, alternate universe where magic and technology coexist. The premise revolves around Lucy’s legacy, as she navigates a reality where the main character perished during a pivotal battle. This setting blends strategic challenges, character development, and intricate alliances, creating a rich, immersive world for both newcomers and seasoned participants.

2.2 Rules and Structure of The Extra Academy

The Extra Academy operates within a structured environment, governed by clear rules that emphasize strategy and skill mastery. Challenges are organized into chapters, each focusing on specific abilities, while practice problems enhance learning. Pacing is crucial, as rushed decisions often lead to setbacks, encouraging participants to balance action with thoughtful planning to navigate the academy’s intricate system effectively.

Essential Skills for Survival in The Extra Academy

Mastering combat strategies and academic proficiency are vital for success. Develop problem-solving abilities and adapt quickly to challenges, ensuring a balanced approach to thrive in this dynamic environment.

3.1 Combat and Defense Strategies

Combat and defense strategies are crucial for survival in The Extra Academy. Emphasizing adaptability and precision, these techniques ensure students can navigate both physical and mental challenges. Practice problems and real-world scenarios refine skills, while Lucy’s legacy offers unique approaches to mastering these strategies effectively in diverse situations.

3.2 Academic and Problem-Solving Skills

Academic and problem-solving skills are vital for thriving in The Extra Academy. The guide emphasizes the importance of critical thinking and analytical abilities, supported by practice problems and real-world applications. These skills enable students to tackle complex challenges effectively, ensuring academic success and adaptability in dynamic situations, aligning with Lucy’s legacy of strategic excellence and skill enhancement.

Navigating Relationships and Alliances

Building alliances and understanding social dynamics are crucial for success. Trust, communication, and mutual respect form strong bonds, while avoiding pitfalls ensures stability in collaborations and friendships.

4.1 Building Strong Alliances

Building strong alliances requires trust, clear communication, and shared goals. Collaborate with like-minded individuals, fostering reliability and mutual support. Open dialogue ensures alignment of interests, while respecting boundaries strengthens bonds. A strong alliance becomes a powerful network, enhancing collective growth and resilience in overcoming challenges together.

4.2 Avoiding Common Social Pitfalls

Avoiding social pitfalls requires awareness and tact. Overcommitting, miscommunication, and misunderstandings can strain relationships. Be mindful of others’ boundaries and avoid unnecessary conflicts. Foster trust by being reliable and transparent. Listen actively and address issues promptly to prevent resentment. By maintaining a positive and respectful demeanor, you can build a supportive social network and avoid common pitfalls that hinder success.

Managing Challenges and Obstacles

Mastering resilience and adaptability is crucial. Challenges test physical and mental limits, requiring strategic thinking and quick decision-making. Stay focused, prioritize tasks, and maintain composure under pressure.

5.1 Overcoming Physical and Mental Challenges

Physical and mental challenges demand resilience and adaptability. Prioritize rest, training, and strategic planning to build endurance. Mental fortitude is equally crucial; stay focused, maintain composure, and embrace growth through adversity. Balancing action with strategy ensures long-term success in overcoming obstacles.

5.2 Adapting to Unexpected Situations

Adapting to unexpected situations requires quick thinking and flexibility. Stay calm, assess the scenario, and prioritize proactive solutions. Leveraging past experiences and feedback helps refine decision-making. Cultivate a mindset open to change, ensuring readiness for unforeseen challenges. Contingency planning and resourcefulness are key to navigating unpredictability effectively in The Extra Academy.

Side Stories and Character Development

Side stories enrich the narrative, offering deeper insights into characters and their arcs. These tales enhance the main plot, providing context and emotional depth to key figures like Lucy, whose legacy shapes the story’s direction and alternate universes, making the world of The Extra Academy even more compelling and immersive.

6.1 The Role of Side Stories in Chapter 1

In Chapter 1, side stories play a pivotal role by introducing secondary characters and subplots that enhance the main narrative. These stories provide background information on key figures like Lucy, whose legacy influences the alternate universe plotlines. They also offer emotional depth, revealing character motivations and relationships that shape the overall storyline, making the world more engaging and complex for readers.

6.2 Key Character Arcs and Development

Chapter 1 focuses on the growth of main characters, exploring their motivations and transformations. Lucy’s influence is central, as her legacy shapes the narrative. Characters face challenges that test their abilities and alliances, leading to significant personal growth. Their interactions and decisions drive the story, showcasing how they adapt to the academy’s demands and uncover hidden truths about their world.

Strategies for Long-Term Success

Plan meticulously, optimize resources, and adapt to challenges. Continuous skill enhancement and strategic decision-making ensure sustained growth and readiness for future obstacles in The Extra Academy.

7.1 Planning for the Future

Effective future planning involves setting clear objectives, managing resources wisely, and staying adaptable. Regular practice and skill enhancement ensure readiness for upcoming challenges, while continuous learning and strategic decision-making foster long-term success in The Extra Academy.

7.2 Resource Management and Optimization

Efficient resource management is crucial for survival in The Extra Academy. By prioritizing tasks, minimizing waste, and utilizing available tools, students can optimize their progress. Strategic allocation of time and energy ensures they remain competitive while balancing academic and combat challenges effectively.

The Importance of Pacing and Timing

Pacing and timing are critical in The Extra Academy, ensuring decisions are well-thought-out and actions are strategically balanced to avoid unnecessary setbacks and maintain progress effectively.

8.1 Avoiding Rushed Decisions

Avoiding rushed decisions is crucial in The Extra Academy, as hasty choices often lead to costly mistakes. Taking time to reflect and evaluate options ensures better outcomes and minimizes risks. Proper planning and thoughtful consideration are key to maintaining control and achieving long-term goals effectively.

8.2 Balancing Action and Strategy

Balancing action and strategy is vital for success in The Extra Academy. Timing and coordination are key to maintaining momentum without overwhelming the narrative. This balance ensures that the story remains engaging, with neither action nor strategy overshadowing the other, creating a harmonious flow that keeps readers invested and eager for more.

The Role of Mentors and Guidance

Mentors provide invaluable wisdom, guiding students through challenges and sharing knowledge to enhance skills and decision-making, ensuring a strong foundation for growth and success in The Extra Academy.

9.1 Finding Reliable Mentors

Finding reliable mentors is crucial for success in The Extra Academy. Seek individuals with proven expertise, a willingness to guide, and alignment with your goals. Identify mentors through their track record, wisdom, and ability to provide tailored advice. Their insights can help navigate challenges, refine strategies, and enhance skill development, ensuring you receive constructive feedback and support tailored to your needs.

9.2 Learning from Mistakes and Feedback

Learning from mistakes and feedback is vital for growth in The Extra Academy. Analyze errors to identify patterns and areas for improvement. Use mentor feedback to refine strategies and enhance skills. Embrace constructive criticism as a tool for development, fostering resilience and adaptability. Regular self-reflection and openness to feedback ensure continuous progress toward overcoming challenges and achieving long-term success in the Academy.

The Impact of Alternate Universes and Plot Twists

Alternate universes and plot twists in The Extra Academy add depth and unpredictability, shaping character arcs and story dynamics. Lucy’s legacy across realities highlights the importance of adaptability and strategic thinking, keeping readers engaged with unexpected narrative shifts.

10.1 Navigating Alternate Realities

Navigating alternate realities in The Extra Academy requires adaptability and strategic thinking. Characters like Lucy face complex challenges as they move between divergent universes, each with unique rules and consequences. These shifts often reveal hidden strengths and weaknesses, while also deepening the story’s emotional and thematic layers. Mastering these transitions is crucial for long-term survival and understanding the broader narrative.

10.2 Anticipating and Preparing for Plot Twists

Anticipating plot twists in The Extra Academy requires keen observation and foresight. Characters must analyze patterns, dialogue, and environmental clues to predict unexpected turns. Lucy’s legacy, for instance, hints at alternate realities and hidden threats. Staying adaptable and mentally prepared allows characters to respond effectively, turning potential setbacks into opportunities for growth and strategic advancement within the story’s dynamic framework.

The Role of Lucy’s Legacy in Chapter 1

Lucy’s legacy deeply influences the storyline, shaping character motivations and plot dynamics. Her alternate universe journey highlights the consequences of pivotal decisions, leaving a lasting impact on the academy’s world.

11.1 Lucy’s Influence on the Storyline

Lucy’s actions and decisions significantly shape the narrative, particularly in her journey to an alternate universe where the main character’s fate diverges. Her legacy influences character arcs, driving motivations and conflicts that resonate throughout the academy, while her alternate reality explores the consequences of pivotal choices, enriching the story’s depth and complexity.

11.2 The Significance of Lucy’s Alternate Universe

Lucy’s alternate universe presents a compelling divergence in the storyline, exploring a reality where the main character perishes during the Divine Dragon battle. This parallel narrative highlights the ripple effects of pivotal decisions, offering deeper insights into character motivations and the academy’s dynamics; It serves as a testament to the complexity of Lucy’s legacy and its enduring impact on the overarching plot.

The Role of Practice and Preparation

Regular practice and preparation are crucial for mastering skills and building confidence. Utilizing practice problems enhances problem-solving abilities, ensuring readiness for challenges within The Extra Academy.

12.1 The Importance of Regular Practice

Regular practice is essential for skill mastery and adaptability in The Extra Academy. Consistent training sharpens reflexes, improves decision-making, and enhances problem-solving abilities. By dedicating time to practice, students build a strong foundation, allowing them to tackle challenges with confidence and efficiency. This routine ensures they stay prepared for both expected and unexpected obstacles.

12.2 Using Practice Problems for Skill Enhancement

Practice problems are a cornerstone of skill enhancement in The Extra Academy. They provide structured challenges that simulate real-world scenarios, helping students refine their abilities. By tackling these problems, learners can identify weaknesses, improve critical thinking, and develop efficient strategies. Regular engagement with practice problems ensures continuous growth and better preparation for the academy’s rigorous demands.

13.1 Recap of Key Survival Strategies

  • Master pacing to avoid rushed decisions and maintain strategic balance.
  • Utilize practice problems for skill enhancement and problem-solving refinement.
  • Leverage alliances and mentorship for guidance and support.
  • Navigate alternate realities and anticipate plot twists with adaptability.
  • Embrace character development and side stories for deeper insights.
  • Focus on resource management and long-term planning for sustained success.

13.2 Preparing for Future Chapters

Anticipate upcoming challenges by refining strategies and skills learned in Chapter 1. Focus on building strong alliances and seeking mentorship to enhance your readiness. Stay adaptable to navigate alternate realities and unexpected twists. Regular practice and resource management will be crucial for long-term success. Embrace character growth and side stories to deepen your understanding and prepare effectively for future chapters.

Byvelma

lexile level guided reading level

Lexile levels measure reading ability and text complexity, providing a standardized scale to match readers with appropriate materials. They range from below 0L for early readers to above 1600L for advanced texts.

1.1 What Are Lexile Levels?

Lexile levels are a quantitative measure of reading ability and text complexity. They range from below 0L for early readers to above 1600L for advanced texts. Lexile scores are based on sentence length, word frequency, and complexity, providing a standardized way to match readers with appropriate materials. Higher Lexile levels indicate greater reading difficulty.

1.2 How Lexile Levels Are Measured

Lexile levels are determined through a quantitative evaluation of sentence length and word frequency. Texts are analyzed for complexity, with longer sentences and less common words resulting in higher Lexile scores. Readers are assessed through standardized tests, yielding a Lexile measure that reflects their ability to comprehend texts of varying difficulty.

1.3 Importance of Lexile Levels in Education

Lexile levels are crucial for tailoring reading instruction to individual needs. They help educators match students with appropriate texts, ensuring comprehension and growth. By aligning materials to students’ abilities, Lexile levels support differentiated instruction, fostering a more effective and engaging learning environment.

Understanding Guided Reading Levels

Guided Reading Levels categorize texts based on complexity, supporting teachers in selecting materials for small-group instruction. They help differentiate instruction, ensuring students read appropriately challenging texts.

2.1 Definition of Guided Reading Levels

Guided Reading Levels are a framework for categorizing texts based on their difficulty, helping teachers select appropriate materials for students. They assess factors like vocabulary, sentence structure, and content to determine readability. This system supports differentiated instruction, allowing educators to match texts to students’ reading abilities effectively. It is widely used in educational settings to promote literacy development.

2.2 Key Characteristics of Guided Reading Levels

Guided Reading Levels emphasize qualitative text analysis, focusing on vocabulary complexity, sentence structure, and overall narrative or informational demands. They also consider a reader’s ability to comprehend and interpret the text. This system is teacher-centric, allowing for hands-on instruction tailored to student needs. Levels are often divided into grades or benchmarks, providing a clear progression for skill development.

Differences Between Lexile and Guided Reading Levels

Lexile levels measure text complexity numerically, while Guided Reading Levels focus on qualitative aspects like vocabulary and structure. Lexile is widely used, including in libraries, whereas Guided Reading is primarily classroom-based.

3.1 Focus and Measurement Criteria

Lexile levels focus on quantitative measures of text complexity, such as sentence length and word frequency, while Guided Reading Levels emphasize qualitative factors like vocabulary and text structure. Lexile scores range from below 0L to above 1600L, providing a broad spectrum for assessing reading materials. Guided Reading Levels, often categorized by letters (A-Z), offer a more nuanced approach to matching texts to reader skills, emphasizing comprehension and instructional support.

3.2 Application in Educational Settings

Lexile levels are widely used to align reading materials with student abilities, facilitating personalized instruction. They are integral in classrooms for benchmarking progress and selecting texts. Guided Reading Levels, on the other hand, are often employed for small-group instruction, allowing teachers to differentiate lessons based on individual reading proficiency and comprehension skills, ensuring targeted support and fostering growth in literacy.

Correlation Between Lexile and Guided Reading Levels

Lexile and Guided Reading Levels are often correlated to help educators align reading materials with student abilities. While not exact, they provide a framework to match texts to readers effectively, supporting instruction and progress monitoring across various educational settings.

4.1 Direct Correlations and Conversion Charts

Direct correlations between Lexile and Guided Reading Levels are approximated through conversion charts, helping educators align texts with student abilities. For example, a Lexile range of 600L-700L often correlates with Guided Reading Level N. These charts provide a framework to match readers with appropriate materials, though they should be used as a guide rather than an exact measure. They facilitate instructional decisions and ensure students engage with suitably challenging texts.

4.2 Using Correlation Charts for Instructional Decisions

Correlation charts bridge Lexile and Guided Reading Levels, enabling educators to make informed decisions about student placements and materials. Teachers use these tools to identify appropriate texts, plan differentiated instruction, and monitor progress. By aligning reading levels, charts help ensure students engage with challenging yet manageable content, fostering growth in reading proficiency and supporting personalized learning strategies across diverse classroom settings.

Significance of Reading Level Assessments

Reading level assessments, like Lexile and Guided Reading Levels, help tailor instruction, track student progress, and ensure proper text alignment, fostering growth in reading proficiency and engagement.

5.1 Importance of Lexile Levels in Reading Instruction

Lexile levels are crucial in reading instruction as they provide a quantitative measure of a student’s reading ability and text complexity. This allows educators to match students with appropriate materials, ensuring comprehension and engagement. Lexile scores help identify skill gaps, track progress, and inform differentiated instruction, enabling personalized learning experiences that cater to individual needs and promote literacy growth effectively.

5.2 Role of Guided Reading Levels in Student Progress

Guided Reading Levels play a vital role in monitoring student progress by providing educators with insights into reading accuracy, fluency, and comprehension. These levels help teachers group students for targeted instruction, plan lessons tailored to class needs, and track growth over time. Regular assessment of Guided Reading Levels ensures students receive appropriate challenges, fostering continuous improvement and a deeper understanding of reading skills.

Practical Applications for Educators

Lexile and Guided Reading levels enable educators to differentiate instruction, match students with appropriate texts, and use conversion charts for effective classroom planning and assessment.

6.1 How to Use Lexile Levels in the Classroom

Lexile levels help educators match students with appropriate texts, ensuring proper challenge and comprehension. Teachers can use Lexile scores to create personalized reading plans, track progress, and differentiate instruction. By aligning texts with students’ Lexile ranges, educators promote independent reading and skill development. Conversion charts can also guide the integration of Lexile levels with other systems, enhancing classroom flexibility and effectiveness.

6.2 Implementing Guided Reading Levels for Differentiated Instruction

Guided Reading levels enable teachers to group students by reading ability, facilitating targeted instruction. By assessing each student’s level, educators can select texts that align with their skills, fostering growth. This approach supports differentiated instruction, allowing teachers to address individual needs and promote literacy development effectively in diverse classrooms through tailored strategies and resources.

Tools and Resources for Reading Level Assessment

Various tools, such as Lexile Find a Book and Fountas & Pinnell Benchmark Assessment, help educators determine reading levels. These resources provide accurate measurements and recommendations for appropriate texts, ensuring students receive tailored reading materials that align with their abilities and promote literacy growth effectively in the classroom.

7.1 Popular Reading Level Correlation Charts

Popular reading level correlation charts, such as those provided by Learning A-Z and Benchmark Education, help align Lexile, Guided Reading, DRA, and AR levels. These tools offer approximate conversions, enabling educators to match students with suitable texts across different systems. Widely used charts include the Fountas & Pinnell Benchmark Assessment and the Lexile Grade Level Chart, which provide clear guidelines for instructional planning and differentiated instruction.

7.2 Digital Tools for Assessing and Converting Reading Levels

Digital tools like Lexile’s Find a Book and Learning A-Z’s Leveling Tool streamline reading level assessment and conversion. These platforms provide instant level matching, progress tracking, and access to leveled texts. They support educators in identifying student levels and converting between systems, ensuring accurate and efficient instructional planning. Many tools also offer interactive features for engaging students in their reading growth.

Best Practices for Educators

Educators should combine assessments, monitor progress, and adjust levels to ensure accurate placement and personalized instruction, fostering a tailored learning experience for all students.

8.1 Combining Multiple Assessments for Accurate Placement

Combining Lexile levels with guided reading assessments provides a comprehensive understanding of a student’s reading ability, ensuring accurate placement and personalized instruction. This integrated approach addresses both quantitative and qualitative measures, offering educators a holistic view of reading proficiency. By leveraging both systems, teachers can identify strengths, gaps, and growth areas more effectively, tailoring strategies to meet individual learning needs.

8.2 Monitoring Student Progress and Adjusting Levels

Regularly monitoring student progress using Lexile and guided reading levels ensures personalized learning. Educators assess improvements, identify gaps, and adjust levels to keep students appropriately challenged. This dynamic approach fosters growth, prevents frustration, and aligns instruction with individual needs, ensuring continuous improvement in reading skills and comprehension abilities over time.

The Role of Technology in Reading Level Management

Technology streamlines reading level management through software, apps, and online tools, enabling efficient assessment, conversion, and tracking of Lexile and guided reading levels for personalized learning.

9.1 Software and Apps for Reading Level Assessment

Software and apps like Learning A-Z, Accelerated Reader, and digital tools offer robust solutions for assessing reading levels. They provide Lexile and guided reading level conversions, track progress, and offer leveled texts for differentiated instruction, supporting educators and parents in personalized learning strategies.

9.2 Online Resources for Teachers and Parents

Online resources such as Lexile Find, Reading A-Z, and Corwin offer comprehensive tools for teachers and parents. These platforms provide conversion charts, reading level guides, and instructional materials, enabling effective support for students’ literacy development. They also include interactive charts and progress-monitoring features to aid in personalized learning plans.

Lexile and Guided Reading levels are essential tools for assessing reading abilities, guiding instruction, and fostering literacy growth. Their strategic use ensures personalized learning experiences, benefiting students, educators, and parents alike.

10.1 The Future of Reading Level Assessments

The future of reading level assessments lies in integrating advanced technologies, such as AI-driven tools, to provide more accurate and personalized measurements. Lexile and Guided Reading levels will likely evolve to incorporate dynamic, real-time data, enabling educators to tailor instruction more effectively. These advancements will foster a more inclusive and adaptive approach to literacy education, ensuring students receive targeted support at every stage of their learning journey.

10.2 Final Thoughts on Lexile and Guided Reading Levels

Lexile and Guided Reading levels are invaluable tools for tailoring reading instruction to individual needs. While Lexile provides a quantitative measure of text complexity, Guided Reading offers a qualitative approach to instructional planning. Together, they empower educators to create personalized learning experiences, ensuring students progress effectively in their literacy journey. Their complementary nature makes them essential for modern education.

Byvelma

dixell controller manual pdf

Welcome to the Dixell Controller Manual PDF‚ your essential guide for understanding and operating Dixell digital controllers. This comprehensive resource covers installation‚ programming‚ and troubleshooting‚ ensuring optimal performance for refrigeration applications.

1.1 Overview of Dixell Controllers

Dixell controllers are advanced‚ microprocessor-based devices designed for refrigeration and heating applications. Models like XR77CH‚ XR03CX‚ and XR60CX offer features such as relay outputs‚ defrost management‚ and compatibility with NTC/PTC probes. These controllers are built for efficiency‚ with options for electric or hot gas defrost and independent settings for multiple evaporators. The Dixell Controller Manual PDF provides detailed guidance on installation‚ programming‚ and troubleshooting‚ ensuring users can optimize performance for their specific needs. Whether for high‚ medium‚ or low-temperature units‚ Dixell controllers deliver precise temperature regulation and reliable operation.

1.2 Importance of the Manual for Users

The Dixell Controller Manual PDF is indispensable for users‚ providing clear instructions for installation‚ programming‚ and troubleshooting. It ensures safe operation and optimal performance‚ covering essential functions like defrost cycles and relay outputs. The manual acts as a quick reference guide‚ helping users navigate the controller’s interface and customize settings. By following the manual‚ users can avoid errors‚ maintain efficiency‚ and extend the lifespan of their Dixell controller‚ making it a crucial resource for both novice and experienced operators.

Key Features and Components of Dixell Controllers

Dixell controllers feature advanced microprocessor technology‚ offering precise temperature regulation‚ defrost management‚ and multiple probe inputs. Models like XR77CH and XR03CX include relay outputs for compressors‚ fans‚ and defrost systems‚ ensuring efficient operation and versatility in refrigeration applications.

2.1 Controller Faceplate and Its Functions

The Dixell controller faceplate is designed for intuitive operation‚ featuring buttons for key functions like ON/OFF‚ defrost initiation‚ and light control. The faceplate includes a display for temperature settings and system status‚ enabling easy monitoring. Dedicated buttons allow users to toggle between modes and adjust parameters‚ while LED indicators provide visual feedback. This user-friendly interface ensures seamless interaction with the controller‚ making it easy to manage refrigeration systems efficiently. The faceplate’s layout is optimized for quick access to essential functions‚ enhancing overall system control and performance.

2.2 Relay Outputs and Probe Configurations

Dixell controllers feature multiple relay outputs to control essential functions such as compressors‚ defrost cycles‚ and evaporator fans. These outputs can be configured to handle both electric and hot gas defrost systems. The controllers support NTC or PTC probes for precise temperature monitoring. Probe configurations enable accurate sensing and control‚ ensuring optimal performance. Customizable settings allow users to adapt the system to specific applications‚ while relay outputs provide reliable operation for various refrigeration needs. Proper configuration of these elements is key to maintaining efficient and precise temperature management.

2.3 Defrost Cycle Management

Dixell controllers offer advanced defrost cycle management‚ supporting both electric and hot gas defrost systems. The controller automatically initiates defrost cycles based on time or ice buildup‚ ensuring efficient operation. For systems with twin evaporators‚ independent defrost control is available‚ allowing customized settings for each. The 4th (AUX) relay and probe 3 (Pb3) manage the second evaporator’s defrost‚ ensuring both evaporators complete their cycles before resuming refrigeration. This feature enhances performance and flexibility for diverse applications;

Installation and Setup Guidelines

Ensure proper installation by verifying power supply and environmental conditions. Mount the controller securely and connect electrical components carefully. Programming via Hot Key ensures accurate setup and operation.

3.1 Pre-Installation Checks and Safety Precautions

Before installing the Dixell controller‚ ensure the power supply voltage matches the controller’s requirements. Verify environmental conditions‚ avoiding exposure to water or moisture. Disconnect all electrical connections before maintenance. Never attempt to open the controller‚ as this voids the warranty. Ensure proper grounding and follow all safety guidelines to prevent electrical hazards. Refer to the manual for detailed pre-installation checks and safety precautions to ensure a safe and successful setup.

3.2 Mounting and Electrical Connections

Mount the Dixell controller in a secure‚ well-ventilated area‚ avoiding direct sunlight and moisture. Use screws to fix the controller firmly to the panel‚ ensuring stability. Connect the power supply wires to the designated terminals‚ verifying polarity to prevent damage. Attach sensor probes and relay outputs according to the manual’s wiring diagram. Ensure all connections are tight and insulated to avoid electrical hazards. Proper mounting and wiring ensure reliable operation and longevity of the controller.

3.3 Programming the Controller Using Hot Key

Programming the Dixell controller with the Hot Key ensures customized settings for your refrigeration system. Insert the Hot Key into the controller and power it on. Press the SET key to initiate programming; The display will show “uP” followed by a flashing “En.” Navigate through parameters using arrow keys and confirm changes with SET. Once done‚ remove the Hot Key‚ turn the controller off‚ and restart to apply settings. This method ensures precise configuration for optimal performance and defrost management.

Understanding the Front Panel Commands

The front panel commands enable easy control of the Dixell controller‚ with dedicated buttons for light‚ defrost‚ and ON/OFF functions. The manual explains interface navigation and command customization for optimal performance.

4.1 Basic Operations: ON/OFF‚ Defrost‚ and Light Control

The Dixell controller’s basic operations include ON/OFF functionality‚ defrost cycles‚ and light control. The ON/OFF button powers the unit‚ while the defrost button initiates defrost manually. The light button toggles illumination. The manual details these commands‚ ensuring straightforward operation. The defrost cycle can be programmed or triggered manually‚ while light control enhances visibility. These features streamline management‚ ensuring efficient refrigeration system operation. The manual provides clear instructions for mastering these essential functions‚ making it easy to control and monitor your system effectively.

4.2 Navigating Through the Controller’s Interface

Navigating the Dixell controller’s interface is intuitive‚ with clear buttons and logical menu structures. The faceplate features dedicated buttons for ON/OFF‚ defrost‚ and light control‚ while navigation keys allow easy scrolling through settings. The manual provides step-by-step guidance for accessing and adjusting parameters‚ ensuring users can efficiently manage operations. The interface is designed for simplicity‚ making it easy to monitor and adjust settings‚ defrost cycles‚ and system status. This user-friendly design ensures seamless control and monitoring of refrigeration systems.

Defrost Management in Dixell Controllers

This section covers the Dixell controller’s defrost management‚ including electric and hot gas defrost cycles‚ customization options for different evaporators‚ and automatic defrost initiation for efficient operation.

5.1 Types of Defrost Cycles: Electric and Hot Gas

The Dixell controller supports two primary defrost cycles: electric and hot gas. Electric defrost uses heating elements to melt ice‚ offering simplicity and reliability. Hot gas defrost‚ meanwhile‚ circulates hot refrigerant through the evaporator‚ providing faster and more energy-efficient results. The controller automatically initiates defrost based on temperature and time settings‚ ensuring optimal performance. Users can customize defrost parameters to suit specific applications‚ making it adaptable for various refrigeration needs. This dual capability ensures efficient ice management in different operational environments.

5.2 Customizing Defrost Settings for Different Evaporators

The Dixell controller allows precise customization of defrost settings for multiple evaporators‚ ensuring tailored operation. Independent parameters enable specific control for each evaporator‚ optimizing performance. The AUX relay and probe 3 (Pb3) manage the second evaporator’s defrost cycle‚ allowing independent operation. Customizable defrost durations‚ intervals‚ and types (electric or hot gas) ensure flexibility for diverse applications. This feature enhances efficiency by adapting defrost cycles to the unique needs of each evaporator‚ reducing energy consumption and maintaining optimal refrigeration performance across different systems.

Troubleshooting Common Issues

Identify and resolve issues quickly with guidelines for alarm signals‚ diagnostic procedures‚ and controller resets‚ ensuring smooth operation and minimizing downtime for your Dixell controller.

6.1 Identifying and Addressing Alarm Signals

The Dixell controller manual provides detailed guidance on interpreting alarm signals‚ which indicate issues like temperature deviations or sensor malfunctions. Users can identify specific alarms through the controller’s display or documentation. To address these‚ refer to the manual’s troubleshooting section‚ which outlines steps such as checking connections‚ verifying sensor functionality‚ and resetting the controller if necessary. For persistent issues‚ contacting Dixell support is recommended. Regular checks and maintenance can help prevent alarms and ensure smooth operation. This section is essential for resolving common problems efficiently.

6.2 Resetting the Controller and Diagnostic Procedures

To reset the Dixell controller‚ turn it off‚ remove the Hot Key‚ and then power it back on. This process clears temporary glitches. For diagnostics‚ check connections‚ sensors‚ and alarm history. If issues persist‚ refer to the manual’s troubleshooting guide or contact Dixell support. Regular maintenance‚ like updating firmware and checking probes‚ helps prevent errors. The manual provides detailed steps for advanced diagnostics‚ ensuring optimal performance and minimizing downtime. Follow these procedures carefully to resolve issues effectively.

Maintenance and Upkeep

Regular maintenance ensures optimal performance. Check connections‚ update firmware‚ and clean the controller to prevent issues. Refer to the manual for detailed upkeep instructions.

7.1 Regular Checks to Ensure Optimal Performance

Performing regular checks is crucial for maintaining your Dixell controller’s efficiency. Verify all electrical connections to ensure they are secure and free from corrosion. Clean the faceplate and internal components to prevent dust buildup‚ which can interfere with functionality. Check the probe connections and ensure they are accurately calibrated for precise temperature control. Additionally‚ review alarm history to identify recurring issues and address them promptly. Regular software updates are also essential to maintain optimal performance and access new features.

7.2 Updating Controller Firmware and Software

Regular firmware and software updates ensure your Dixell controller operates with the latest features and improvements. To update‚ power off the controller‚ insert the HOTKEY‚ and turn it on. The update process will initiate automatically. Once complete‚ test the controller to confirm all functions work correctly. Always refer to the PDF manual for specific update instructions‚ as procedures may vary by model. Keeping your controller updated guarantees optimal performance and compatibility with new technologies.

Resources and Support

For assistance‚ access the Dixell Controller Manual PDF online or contact Dixell Support via email at dixell@dixell.com. Visit their official website for additional resources and troubleshooting guides.

8.1 Accessing the PDF Manual Online

To access the Dixell Controller Manual PDF‚ visit the official Dixell website at www.dixell.com. Navigate to the “Support” section‚ where you can search for your specific controller model‚ such as XR60CX or XR03CX. Download the PDF directly from their database. Ensure you have the correct model number‚ like XR06CX‚ to find the right manual. This resource provides detailed installation guides‚ technical specifications‚ and troubleshooting tips for optimal controller performance.

8.2 Contacting Dixell Support for Assistance

For any inquiries or technical support‚ contact Dixell directly via email at dixell@dixell.com. Visit their official website for regional contact details‚ ensuring prompt assistance. Describe your issue clearly‚ including controller model and serial number‚ to expedite support. Dixell’s dedicated team offers troubleshooting‚ repair‚ and software updates‚ maintaining your system’s efficiency and performance. Their support ensures minimal downtime and optimal operation of your Dixell controller.

Byvelma

nj transit route 76 bus schedule pdf

The NJ Transit Route 76 Bus Schedule PDF provides essential information for planning trips, including timetables, key stops, and service updates. This two-page document is available online, offering a convenient way to view departure times, route details, and any temporary adjustments; It is a vital resource for commuters relying on Route 76, ensuring seamless travel between destinations like Newark and Hackensack. The PDF format allows easy access on both desktop and mobile devices, making it ideal for quick reference or offline use. Regular updates ensure accuracy, helping passengers stay informed about their travel options.

How to Access the NJ Transit Route 76 Bus Schedule PDF

Access the NJ Transit Route 76 Bus Schedule PDF by visiting the official NJ Transit website. Download the PDF directly or view it on mobile devices using compatible browsers or apps like Adobe Acrobat for offline access.

Steps to Download the Schedule

To download the NJ Transit Route 76 Bus Schedule PDF, visit the official NJ Transit website. Navigate to the “Schedules & Maps” section, select “Bus” from the menu, and choose Route 76. Click the “Download PDF” option to save the document. Ensure you have a PDF reader installed, such as Adobe Acrobat, to view the file. The schedule is also mobile-friendly, allowing you to access it on-the-go. Save the PDF for offline use to plan your trips efficiently.

Mobile-Friendly Viewing Options

The NJ Transit Route 76 Bus Schedule PDF is optimized for mobile viewing, ensuring easy access on smartphones and tablets. The document’s layout adjusts automatically to fit smaller screens, maintaining readability without compromising content. Users can zoom in and out for better visibility and navigate through the PDF using built-in search and scroll features. Additionally, the NJ Transit mobile app offers a seamless way to view schedules on the go, making it convenient for passengers to plan their trips anytime, anywhere.

Understanding the NJ Transit Route 76 Bus Schedule

The NJ Transit Route 76 Bus Schedule PDF provides a clear and organized timetable, helping passengers plan their trips efficiently with essential route details and updates.

Reading the Timetable

The timetable is structured in columns, listing timepoints, directions, and stops. Each row represents a specific bus departure, showing arrival times at key locations. Symbols like arrows indicate travel direction. Footnotes explain variations in service, such as limited stops or holiday schedules. Understanding the layout helps passengers identify their desired route and plan trips accurately. Regular updates ensure the timetable reflects current service conditions, making it a reliable tool for commuters. Always check for the latest version to stay informed.

Key Symbols and Notations

Key symbols and notations in the NJ Transit Route 76 Bus Schedule PDF are crucial for understanding the timetable. Arrows indicate the direction of travel, while footnotes explain service variations like limited stops or holiday schedules. Symbols denote specific stop types or service alerts. These elements help passengers quickly identify their route details and avoid missing stops. Always refer to the legend provided in the document for a clear understanding of all symbols and notations used.

Service Alerts and Updates

Service alerts and updates are highlighted in the NJ Transit Route 76 Bus Schedule PDF to keep passengers informed about disruptions or changes. Symbols or footnotes often indicate delays, detours, or special events affecting the route. The PDF may include dedicated sections for alerts, ensuring riders are aware of any modifications to schedules or stops. Always check the latest version of the document for the most current information to plan your journey accurately and avoid unexpected issues during travel.

Route Details and Coverage

The NJ Transit Route 76 Bus Schedule PDF outlines the complete route, covering key areas between Newark and Hackensack. It details service frequency and reliability, ensuring efficient travel across its network.

Key Stops and Destinations

The NJ Transit Route 76 Bus Schedule PDF highlights major stops, including Newark Penn Station, Hackensack Bus Terminal, and key destinations in Hudson and Essex counties. It ensures connectivity to commercial centers, residential areas, and transit hubs, providing efficient travel options for commuters. The schedule details service frequency at each stop, helping passengers plan their journeys effectively. Regular updates guarantee accurate information, making it a reliable resource for daily travel needs.

Connecting Routes and Transfers

The NJ Transit Route 76 Bus Schedule PDF details connections to other routes, enabling seamless transfers. Passengers can link to routes like 144, 145, and 148, as well as access major hubs such as Newark Penn Station and Hackensack Bus Terminal. The schedule provides transfer points, ensuring easy transitions between services. It also highlights overlapping routes for convenient travel across Bergen, Passaic, and Hudson counties. This connectivity enhances flexibility for commuters, making it easier to reach destinations beyond Route 76’s coverage. Regular updates ensure accurate transfer information, supporting efficient travel planning.

Service Frequency and Reliability

The NJ Transit Route 76 Bus Schedule PDF outlines the frequency of service, ensuring reliable travel options. Buses operate with consistent intervals during peak and off-peak hours, providing commuters with predictable arrival times. Recent updates reflect a 76% increase in daily weekday boardings, demonstrating improved service efficiency. The schedule is designed to maintain punctuality, with real-time updates available for unexpected disruptions. This focus on reliability makes Route 76 a dependable choice for travelers across its coverage area. Regular service adjustments ensure optimal performance and passenger satisfaction.

Frequently Asked Questions (FAQs)

Common questions include availability offline, mobile viewing options, and trip planning tips. The PDF schedule addresses these, ensuring easy access and practical guidance for commuters.

Is the Schedule Available Offline?

The NJ Transit Route 76 Bus Schedule PDF can be downloaded and saved for offline access, ensuring availability without an internet connection. This feature is particularly useful for planning trips in areas with limited or no Wi-Fi coverage. By saving the PDF to your device, you can easily access timetables, route maps, and service alerts anytime, making it a convenient option for commuters who need reliable information on the go.

How to Plan Your Trip Using the Schedule

To plan your trip using the NJ Transit Route 76 Bus Schedule PDF, identify your starting and ending points. Locate the relevant timetable section, noting departure times from your origin and arrival times at your destination. Check for any service alerts or updates that may affect your journey. Use the key stops listed to determine the most convenient boarding and alighting points. Additionally, review connecting routes if transferring to another line is necessary for your trip. This ensures a smooth and efficient travel experience.

What to Do if the Schedule is Unavailable

If the NJ Transit Route 76 Bus Schedule PDF is unavailable, visit the official NJ Transit website for alternative access. Check their mobile app for real-time updates and timetables. Look for service alerts or notifications on their site for temporary resources. Visit a local NJ Transit station for printed schedules or assistance from staff. Contact NJ Transit customer service for direct help or email requests. Explore third-party transit apps for alternative schedule access, ensuring reliability. Join local transit forums for shared resources or workarounds. Utilizing these options ensures uninterrupted access to essential travel information.

Downloading and Using the PDF

The NJ Transit Route 76 Bus Schedule PDF is easily downloadable, offering a convenient trip-planning resource. Save it for offline access and view it on any device.

Tips for Saving and Printing

Save the NJ Transit Route 76 Bus Schedule PDF to your device for offline access. Use “Save As” to organize it in a dedicated folder. When printing, select “Fit to Page” to ensure proper formatting. Adjust settings to use less ink and avoid unnecessary pages. Print in portrait orientation for better readability. Use standard paper size (8.5×11 inches) for clear viewing; Consider printing only the pages with your most frequent routes or times to save paper. For digital use, ensure your PDF viewer is updated for smooth navigation.

Navigating the PDF Document

Navigate the NJ Transit Route 76 Bus Schedule PDF using bookmarks or a table of contents, if available. Use page numbers to quickly locate specific times or stops. Zoom in for better readability of small text. Ensure your PDF viewer is updated for smooth scrolling. Use the search function to find specific destinations or times. Familiarize yourself with the layout, as timetables are typically organized by direction and time of day. Hyperlinks, if present, can provide additional route details. Save bookmarks for frequently used pages to access them faster later.

Using the Schedule for Trip Planning

Use the NJ Transit Route 76 Bus Schedule PDF to plan your trips efficiently. Identify your starting and ending stops, then match them with the corresponding timetables. Check the service frequency to determine the best departure time. Plan ahead by noting peak hours and potential delays. Use the PDF to identify connecting routes for transfers. Ensure you account for any temporary service adjustments or alerts. This tool helps you navigate seamlessly, making your commute stress-free and well-organized. Regular updates ensure the information remains accurate and reliable for your travel needs.

Recent Updates and Changes

NJ Transit has introduced updates to Route 76, including new stops and adjusted timetables to improve service reliability. Temporary service changes due to operational adjustments have been implemented. Riders are advised to check the latest PDF schedules for up-to-date information. These changes aim to enhance connectivity and address growing commuter demands. Stay informed through official NJ Transit announcements or mobile app notifications for the most current updates on Route 76.

New Route Additions or Modifications

NJ Transit has expanded Route 76 to include additional stops in Hudson and Essex counties, enhancing connectivity. Previously operated by private carriers, these routes now fall under NJ Transit, ensuring consistent service. The updated schedule reflects these changes, maintaining the same fares and frequencies. New additions aim to improve coverage and reduce gaps in service, benefiting commuters. The modifications are part of NJ Transit’s efforts to streamline operations and provide reliable transportation options across the region.

Temporary Service Adjustments

NJ Transit occasionally implements temporary service adjustments for Route 76 to accommodate construction, special events, or operational needs. These changes may include detours or modified schedules. Passengers are advised to check the latest PDF schedules or sign up for service alerts to stay informed. Temporary adjustments ensure continued service reliability while addressing external factors. Updates are reflected in the downloadable PDF to help commuters plan accordingly and minimize disruptions to their travel plans. Stay informed for smooth transit experiences.

How to Stay Informed About Updates

To stay informed about updates on NJ Transit Route 76, sign up for service alerts via the official website or mobile app. Follow NJ Transit on social media for real-time notifications. Regularly check the PDF schedule for revisions, as updates are reflected in new versions. Additionally, monitor local transit news or subscribe to email newsletters. Staying connected ensures you receive timely information about route changes, service adjustments, or special alerts, helping you plan your trips efficiently and avoid disruptions.

The NJ Transit Route 76 Bus Schedule PDF is a valuable resource for commuters, offering clear and accessible information to plan trips efficiently. By staying updated with the latest timetables, service alerts, and route details, passengers can navigate their journeys with confidence. The PDF’s availability online and offline ensures flexibility, while regular updates from NJ Transit maintain its accuracy. This guide empowers users to make informed decisions, ensuring a smooth and reliable travel experience on Route 76.

Byvelma

safety 1st grow and go sprint manual

Welcome to the Safety 1st family! This manual provides essential guidance for the safe installation and use of the Grow and Go Sprint 3-in-1 car seat‚ ensuring your child’s protection and comfort across all growth stages. Designed for rear-facing‚ forward-facing‚ and booster modes‚ it supports children from 5 to 100 pounds. Follow the instructions carefully to maximize safety and ease of use.

1.1 Overview of the Safety 1st Grow and Go Sprint Car Seat

The Safety 1st Grow and Go Sprint is a versatile 3-in-1 car seat designed for children from 5 to 100 pounds‚ adapting to rear-facing‚ forward-facing‚ and booster modes. It features a lightweight design‚ machine-washable covers‚ and a QuickFit harness for easy adjustments. The seat supports children up to 52 inches tall‚ ensuring long-term use. Its ergonomic design prioritizes comfort and safety‚ making it a practical choice for growing families. Proper installation and use‚ as outlined in the manual‚ are crucial for optimal protection.

1.2 Importance of Following the Manual

Adhering to the Safety 1st Grow and Go Sprint manual is critical to ensure your child’s safety. Improper installation or misuse can lead to serious injury or death. The manual provides precise guidelines for weight (5-100 lbs) and height (19-52″) limits‚ harness adjustments‚ and installation steps. It also highlights potential hazards‚ such as recalls‚ like the headrest foam issue‚ which could pose a choking risk. Failure to follow instructions may result in inadequate protection. Always verify manufacturer updates and guidelines to ensure proper use and maximum safety for your child.

Key Features of the Safety 1st Grow and Go Sprint

The Safety 1st Grow and Go Sprint features a 3-in-1 convertible design‚ accommodating children from 5-100 lbs and 19-52 inches. It includes adjustable harness and headrest for growth‚ machine-washable covers‚ and lightweight design for easy transport.

2.1 3-in-1 Convertible Design

The Safety 1st Grow and Go Sprint features a versatile 3-in-1 convertible design‚ accommodating children through three stages: rear-facing (5-40 lbs)‚ forward-facing (22-65 lbs)‚ and belt-positioning booster (40-100 lbs). This adaptability ensures long-term use‚ from infancy to approximately 10 years old. The seat transitions smoothly between modes‚ providing a secure and comfortable fit as your child grows. Its lightweight construction and machine-washable covers add convenience‚ making it a practical choice for families seeking a durable‚ all-in-one car seat solution.

2.2 Weight and Height Limits

The Safety 1st Grow and Go Sprint accommodates children across a wide range of sizes. For rear-facing mode‚ it supports 5-40 lbs (19-40″) and forward-facing mode‚ 22-65 lbs (34.4-49″). The belt-positioning booster mode is suitable for 40-100 lbs (43.4-52″). These limits ensure proper fit and safety throughout your child’s growth. Always verify the weight and height of your child aligns with the manual’s specifications to ensure optimal protection and compliance with safety standards.

2.3 Adjustable Harness and Headrest

The Safety 1st Grow and Go Sprint features an adjustable harness and headrest‚ ensuring a proper fit as your child grows. The QuickFit harness system allows for one-hand adjustment of both the harness and headrest‚ eliminating the need to rethread straps. This feature provides a secure and comfortable fit‚ adapting to your child’s size and position. The adjustable headrest supports your child’s neck and head‚ while the harness ensures correct shoulder positioning for safety. Regular adjustments are essential to maintain optimal protection and comfort.

Installation and Setup

This section guides you through preparing your vehicle‚ installing the car seat‚ and securing your child safely. Ensure proper fit and adherence to vehicle seat belt requirements.

3.1 Preparing Your Vehicle

Before installing the Safety 1st Grow and Go Sprint‚ ensure your vehicle is ready. Consult your vehicle’s manual to identify approved seating positions and seat belt types. Check for compatibility with the car seat’s LATCH system or seat belt installation. Ensure the vehicle seat is flat and free from obstructions. Secure the car seat tightly to prevent movement. Always follow the manufacturer’s guidelines for your specific vehicle and car seat model to ensure a safe and proper fit.

3.2 Step-by-Step Installation Guide

Place the car seat in your vehicle‚ ensuring it is in the correct mode (rear-facing‚ forward-facing‚ or booster). 2. Use the LATCH system or vehicle seat belt to secure the seat. 3. Tighten the harness by pulling the belt strap until the seat is firmly in place. 4. Check the seat’s stability; it should not move more than one inch in any direction. 5. Adjust the car seat as needed for your child’s size and vehicle configuration. Always refer to your vehicle’s manual and the car seat’s guidelines for specific installation requirements.

3.3 Securing the Child

Place your child in the car seat‚ ensuring they are properly positioned with their back against the seat and knees bent comfortably. 2. Adjust the harness to fit snugly‚ with the shoulder straps at or below your child’s shoulders. 3. Buckle the harness and tighten it by pulling the strap until it fits firmly against your child’s body. 4. Ensure the headrest is at the correct height to support your child’s head and neck. 5. Regularly check that the harness is snug and your child remains properly secured during trips. Always follow the manual’s guidelines to ensure your child’s safety.

Safety Guidelines

Always follow the manual’s instructions to ensure your child’s safety. Properly secure the harness‚ check weight limits‚ and avoid loose clothing. Regular inspections are crucial for safe use.

4.1 Proper Use of Harness

The harness must be snugly fitted to ensure your child’s safety. Shoulder straps should be at or below shoulder level in rear-facing mode and at or above in forward-facing mode. The chest clip should be positioned at armpit level. Tighten the harness until no extra material is between the child and the straps. Regularly check the fit and tighten as needed. Never loosen the harness while the child is seated‚ and avoid adding any aftermarket padding or accessories that could compromise safety.

4.2 Vehicle Seat Belt Requirements

Ensure your vehicle’s seat belt is compatible with the Grow and Go Sprint. Consult both your vehicle and car seat manuals for proper routing and positioning. The seat belt must be securely fastened to hold the car seat firmly in place. For forward-facing and booster modes‚ the vehicle’s shoulder belt should be correctly positioned across the child’s shoulder and chest. Always verify that the seat belt is not twisted or loose. Proper use of the vehicle’s seat belt is crucial for the car seat’s effectiveness and your child’s safety. Follow all manufacturer guidelines for installation.

4.3 Avoiding Common Mistakes

Avoid common mistakes such as incorrect seat belt routing‚ loose harness adjustments‚ or improper belt positioning. Ensure the car seat is securely installed and level. Never overlook recalls or fail to register your product. Always check for updates and follow the manual’s guidelines. Improper use can compromise safety‚ so double-check installations and adjustments. Regularly inspect the seat for damage or wear. By adhering to these precautions‚ you can ensure optimal safety and performance for your child. Always refer to the manual for specific guidance on avoiding potential errors.

Maintenance and Cleaning

Regularly inspect the car seat for wear and tear. Machine-washable covers simplify cleaning. Use mild detergent‚ avoid harsh chemicals‚ and ensure proper drying before reuse. Store in a cool‚ dry place when not in use to maintain integrity and safety.

5.1 Cleaning the Car Seat

Regular cleaning is essential for maintaining the safety and comfort of the Safety 1st Grow and Go Sprint. Remove and machine wash the seat covers using mild detergent. Avoid bleach or harsh chemicals‚ as they may damage materials. For stubborn stains‚ spot clean with a soft cloth and gentle soap. Allow all parts to air dry completely before reuse. Never submerge the seat in water or use abrasive cleaners‚ as this could compromise its structural integrity. Proper cleaning ensures the car seat remains safe and hygienic for your child;

5.2 Storing the Car Seat

When storing the Safety 1st Grow and Go Sprint‚ ensure it is kept in a dry‚ cool place away from direct sunlight. Use the original packaging if possible to protect it from dust and damage. Avoid storing in extreme temperatures or humid environments‚ as this may degrade materials. Before reusing‚ inspect for any wear or damage and ensure it meets current safety standards. Always check for recalls prior to reinstalling. Proper storage helps maintain its safety and longevity for future use.

Troubleshooting Common Issues

Addressing recalls‚ fixing harness malfunctions‚ and resolving common issues ensures optimal performance and safety. Refer to the manual for detailed solutions to maintain your car seat’s functionality and integrity.

6.1 Addressing Recalls

A voluntary recall was issued for certain Safety 1st Grow and Go Sprint models due to the headrest foam posing a choking hazard. Affected models include CC321GYU and CC321GYUD‚ among others. The manufacturer provides free repair kits to secure the foam. To address recalls‚ check your seat’s model number against the recall list and contact Safety 1st customer service for assistance. Ensure your child’s safety by adhering to the recall instructions and verifying your seat’s manufacture date meets the manual’s guidelines. Prompt action is crucial to prevent potential risks.

6.2 Fixing Harness Malfunctions

If the harness on your Safety 1st Grow and Go Sprint malfunctions‚ ensure your child’s safety by addressing the issue promptly. Check the shoulder straps for proper tightness and alignment. Adjust the harness by pulling the strap end in front of the seat to tighten it. Use the push lever at the lower front of the seat to secure it. If the harness remains loose or misaligned‚ refer to the manual or contact Safety 1st customer service for assistance. Proper harness function is critical for your child’s protection.

Recall Information

The Safety 1st Grow and Go Sprint has a recall due to a choking hazard from loose foam. Models CC321GYU and CC321GYUD are affected. Dorel Juvenile Group issued the recall. Check the manual or contact customer service for more information.

7.1 Identifying Affected Models

Specific models of the Safety 1st Grow and Go Sprint‚ such as CC321GYU and CC321GYUD‚ are affected by the recall due to the headrest foam pad issue. The recall‚ issued by Dorel Juvenile Group‚ impacts seats manufactured between May 20‚ 2019‚ and August 30‚ 2022. The National Highway Traffic Safety Administration (NHTSA) assigned recall number 20C001. Users should check their car seat for the model number and production date to determine if it is affected. Contact Safety 1st customer service for further assistance and repair options to ensure your child’s safety.

7.2 How to Check for Recalls

To verify if your Safety 1st Grow and Go Sprint is part of a recall‚ locate the model number (e.g.‚ CC321GYU or CC321GYUD) and manufacture date on the seat’s label. Visit the Safety 1st website or contact their customer service directly. You can also check the National Highway Traffic Safety Administration (NHTSA) website using recall number 20C001. Ensure your car seat is not affected by the foam pad issue. If it is‚ follow the provided repair instructions to resolve the issue and maintain your child’s safety.

Resources and Support

Safety 1st offers comprehensive support through their website‚ including downloadable PDF manuals and customer service contact options. Visit www.safety1st.com for assistance or call their support team for inquiries.

8.1 Downloading the Manual

The Safety 1st Grow and Go Sprint manual is available for download on the official Safety 1st website. Users can access the PDF or text file versions‚ ensuring easy reference. The manual covers all modes: rear-facing (5-40 lbs)‚ forward-facing (22-65 lbs)‚ and booster (40-100 lbs). Specific models like CC138‚ CC226‚ and CC413 are detailed. Visit www.safety1st.com to download the most up-to-date version for your car seat‚ ensuring proper installation and use. This resource is essential for safe and effective utilization of your Safety 1st Grow and Go Sprint car seat.

8.2 Contacting Customer Service

For assistance with the Safety 1st Grow and Go Sprint car seat‚ contact customer service via phone at 317-274-6565 or email at safestoriu.edu. Support is available to address questions‚ concerns‚ or recalls. Visit the official Safety 1st website for additional resources and direct links to customer service. Ensure your inquiries include your car seat’s model number (e.g.‚ CC138‚ CC226) for efficient support. Representatives are prepared to help with installation‚ maintenance‚ or troubleshooting‚ ensuring your child’s safety and your peace of mind.