Monthly Archive June 30, 2024

Byvelma

canadian army cadet uniform guide

The Canadian Army Cadet Uniform Guide outlines standards for wearing the Royal Canadian Army Cadet (RCAC) uniform, emphasizing proper dress, pride, and adherence to CATO 46-01 regulations․

1․1 Overview of the Royal Canadian Army Cadet (RCAC) Uniform

The Royal Canadian Army Cadet (RCAC) uniform consists of two primary types: the dress uniform and the field training uniform (FTU)․ The dress uniform is ceremonial, featuring formal attire, while the FTU is practical for training exercises․ Cadets are issued these uniforms and must wear them correctly, adhering to CATO 46-01 regulations․ Customization is limited to authorized items, ensuring consistency and professionalism․ Proper wear reflects pride and respect for the Cadet Program and its traditions․

1․2 Importance of Proper Uniform Wear

Proper uniform wear is essential for promoting discipline, unity, and professionalism within the Royal Canadian Army Cadets․ A well-maintained uniform reflects personal pride and respect for the organization․ Cadets represent not only themselves but also their unit and the Cadet Program as a whole․ Adhering to dress standards outlined in CATO 46-01 ensures consistency and fosters a sense of belonging․ Correct uniform wear is a fundamental aspect of cadet training and public appearances․

Types of Canadian Army Cadet Uniforms

The Royal Canadian Army Cadets utilize two primary uniforms: the Dress Uniform for ceremonial events and the Field Training Uniform (FTU) for practical training activities․

2․1 Dress Uniform

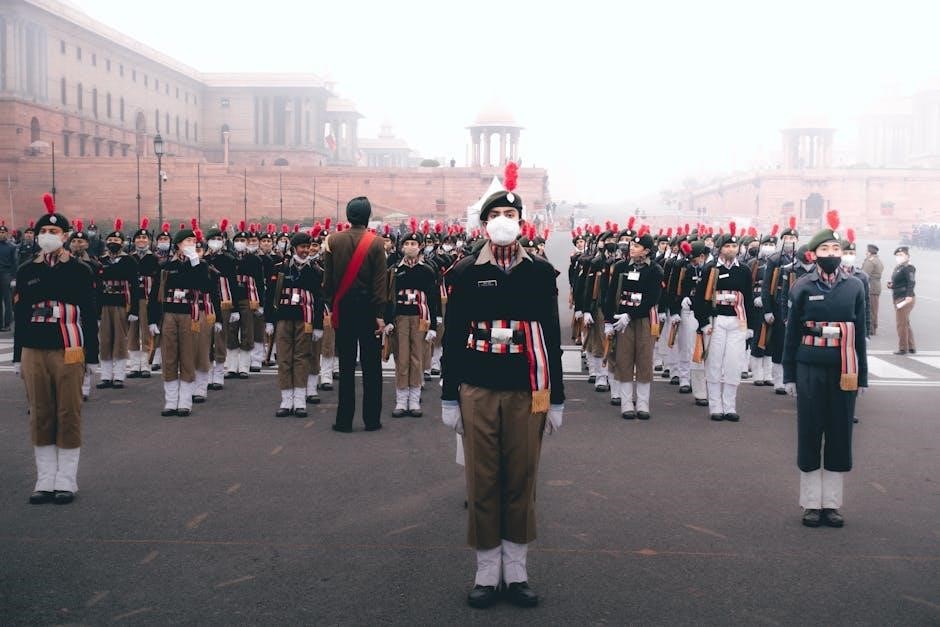
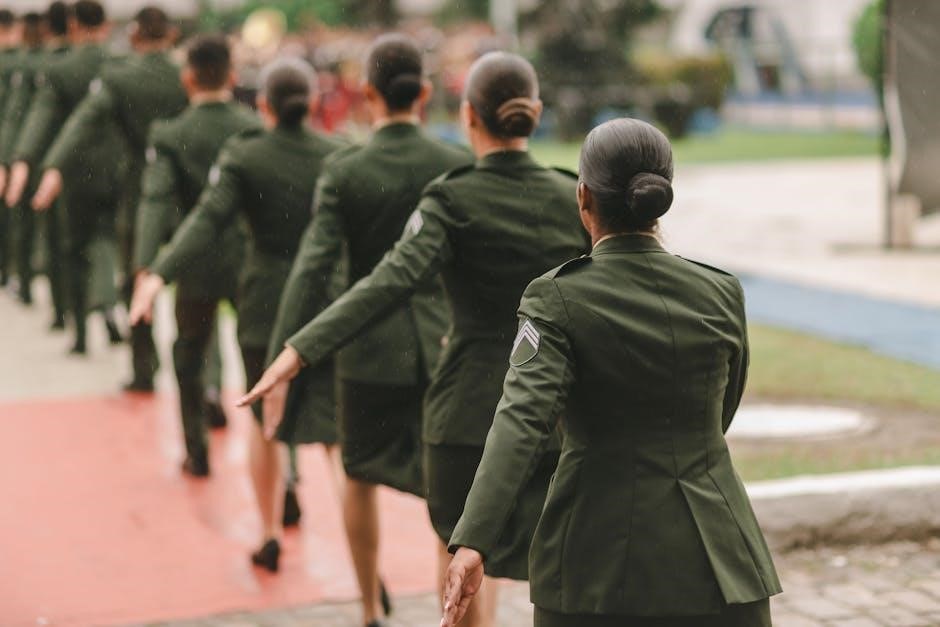
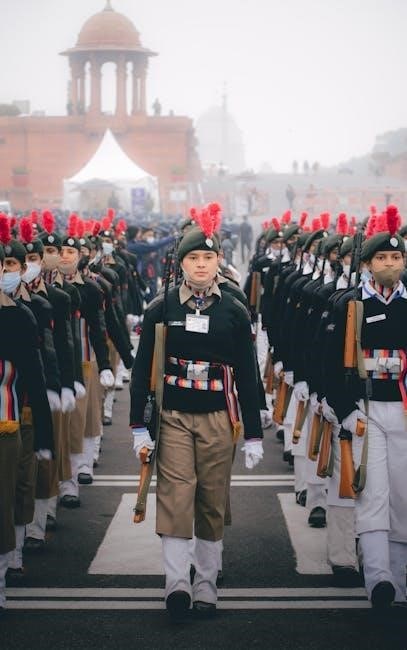
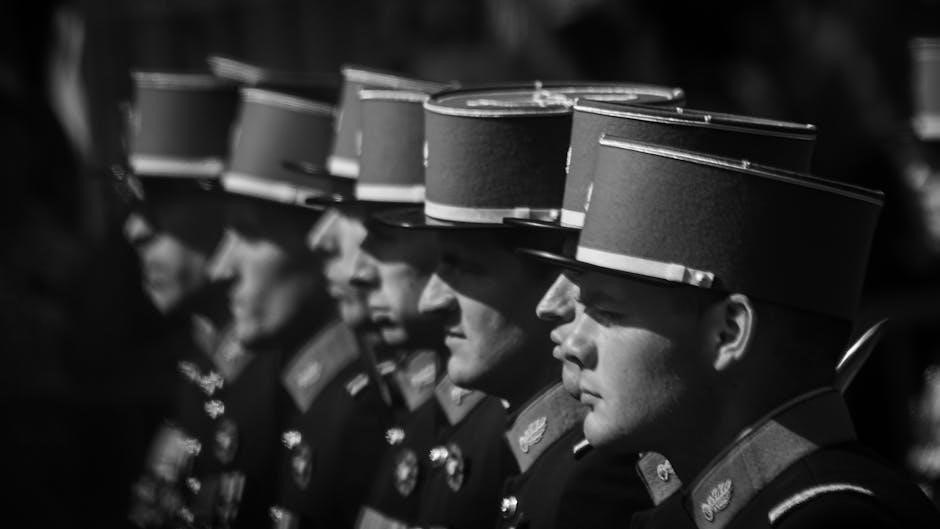
The Dress Uniform is worn during ceremonial events, parades, and formal occasions, showcasing the cadet’s professionalism and pride․ It typically includes a navy blue tunic, light-blue shirt, black tie, and oxford shoes․ Insignia and headdress, such as the wedge cap, are also part of this uniform․ Properly polished and fitted, it reflects the cadet’s commitment to excellence and respect for tradition․

2․2 Field Training Uniform (FTU)

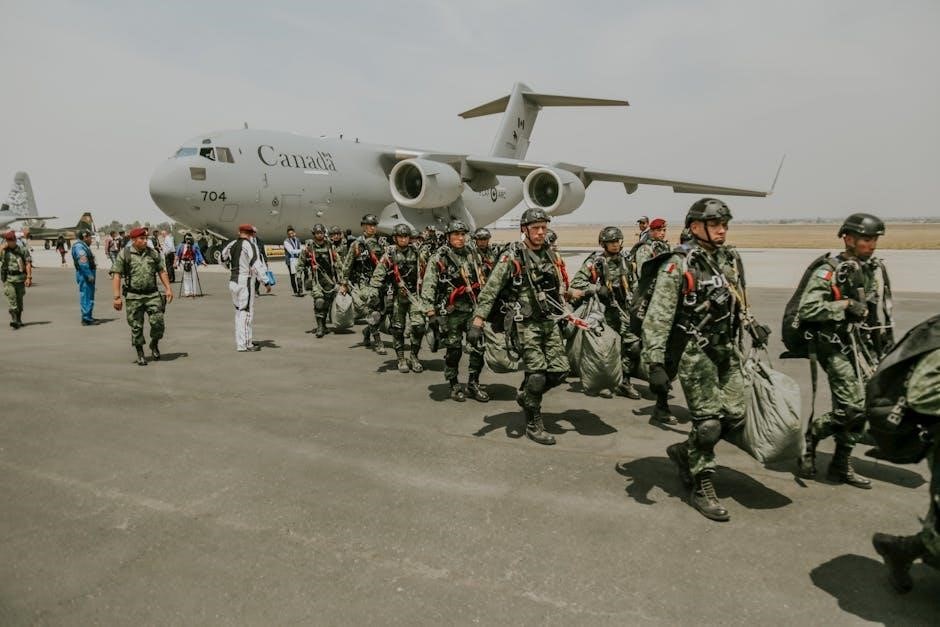
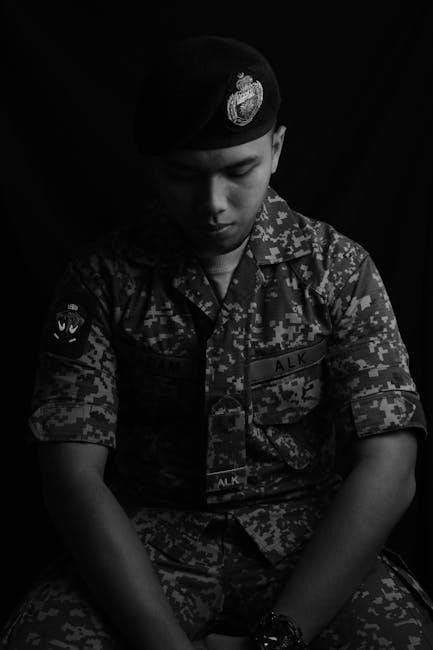
The Field Training Uniform (FTU) is designed for practicality during outdoor exercises and training․ It consists of sturdy, camouflage-patterned pants and jacket, along with combat boots and a beret․ This uniform emphasizes functionality while maintaining a professional appearance․ Cadets are expected to wear it correctly, ensuring all components are clean and properly fitted․ The FTU reflects readiness for field activities while upholding the standards of the Canadian Army Cadet program;

Uniform Care and Maintenance

Proper cleaning, storage, and repair of uniforms ensure longevity and adherence to CATO 46-01 standards, reflecting pride and professionalism in the Canadian Army Cadet program․

3․1 Proper Cleaning and Storage

Uniforms must be cleaned and stored according to CATO 46-01 standards․ Hand washing with mild detergent is recommended for delicate items, while others may be machine washed․ Avoid using bleach or harsh chemicals․ Dry cleaning is reserved for specific materials․ Uniforms should be hung or folded neatly and stored in a cool, dry place to prevent damage․ Regular inspections ensure items remain in good condition, reflecting pride in appearance and adherence to regulations․

3․2 Repair and Replacement Guidelines

Uniform items showing wear or damage should be repaired promptly to maintain standards․ Cadets must report damaged items to their unit for assessment․ Repairs are typically handled by the Cadet Corps or squadron’s supply section․ If an item is beyond repair, a replacement request must be submitted through the proper chain of command․ Replacements are issued to ensure cadets maintain a professional appearance, adhering to CATO 46-01 regulations․

Customization and Accessories

Customization of the uniform includes authorized accessories like headdress, insignia, and regimental items, reflecting the cadet’s identity and unit affiliations while adhering to dress regulations․

4․1 Regimental Affiliations and Authorized Items

Cadets may wear dress items from their affiliated units, such as headdress, regimental buttons, and other authorized accessories, fostering unit identity and pride․ These items must be approved and worn according to specific guidelines to maintain uniformity and adherence to dress standards․ Properly integrating these elements ensures the cadet’s appearance reflects both personal and regimental heritage while upholding the overall integrity of the uniform․

4․2 Headdress and Insignia

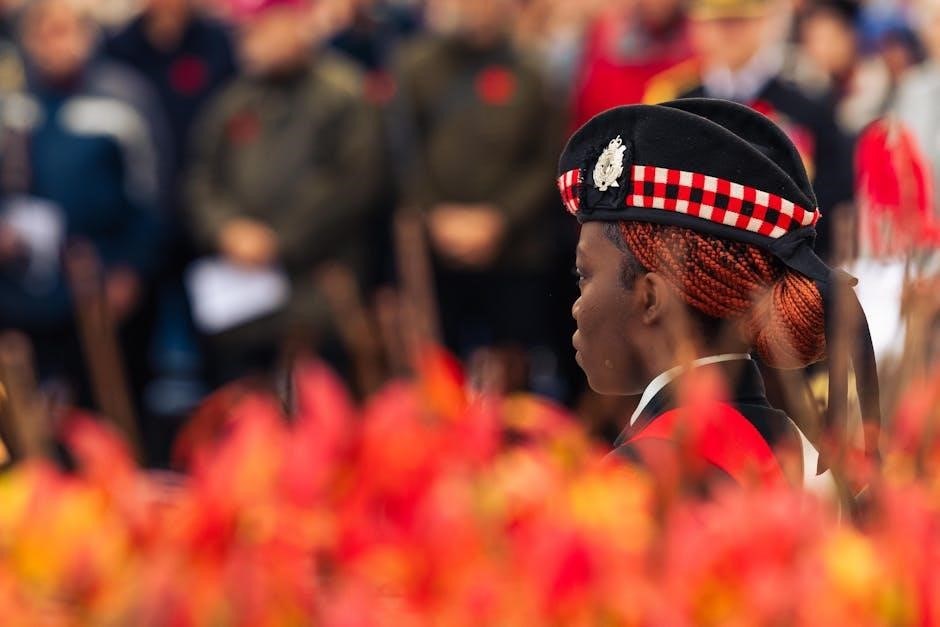
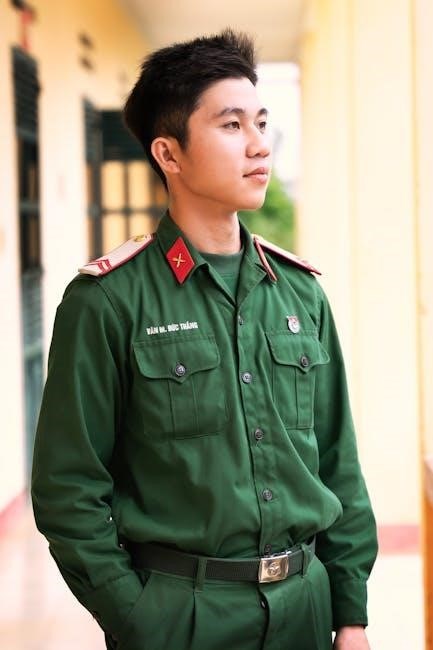
Headdress and insignia are essential components of the uniform, serving to identify rank, qualifications, and affiliations․ Cadets wear specific headdress, such as berets or caps, depending on the uniform type․ Insignia, including badges and rank slides, must be properly positioned to reflect accuracy and professionalism․ These elements not only enhance the uniform’s appearance but also uphold traditions and standards, ensuring cadets present a cohesive and respectful image while in uniform․

Understanding Dress Standards

Dress standards for cadets are governed by CATO 46-01 and CJCR policies, ensuring safety, inclusion, and professionalism․ Proper uniform wear reflects respect for the cadet program and its traditions․

5․1 CATO 46-01 Regulations

CATO 46-01 outlines detailed standards for Royal Canadian Army Cadet uniforms, ensuring proper wear and adherence to dress protocols․ It specifies requirements for both dress and field training uniforms, emphasizing cleanliness, fit, and correct insignia placement․ Compliance with these regulations is mandatory, as they promote professionalism, respect, and unity within the cadet program․ Cadets are expected to familiarize themselves with these guidelines to maintain high dress standards during all authorized activities․

5․2 CJCR Policy on Appearance

The CJCR Policy on Appearance emphasizes safety, inclusion, and reflection of societal norms, guiding cadets on proper uniform wear․ It ensures uniforms are practical, respectful, and adaptable while maintaining tradition․ The policy promotes a balance between ceremonial and operational dress standards, ensuring cadets present a professional image․ Adherence to these guidelines fosters unity and pride, reflecting the values of the Royal Canadian Army Cadets and the broader Canadian Armed Forces․

The History of the Canadian Army Cadet Uniform

The Canadian Army Cadet uniform has evolved over decades, reflecting national identity and military traditions․ Its design draws from historical patterns while adapting to modern needs and standards․

6․1 Evolution of the Uniform Design

The Canadian Army Cadet uniform has undergone significant transformations, blending historical military influences with modern practicality․ Initially reflecting British Army traditions, the design gradually incorporated distinct Canadian motifs․ Over the years, updates have balanced ceremonial requirements with functional needs for field training․ The evolution ensures the uniform remains a symbol of national pride and military heritage while adapting to contemporary standards and cadet needs․

6․2 Historical Significance

The Canadian Army Cadet uniform holds deep historical roots, reflecting the nation’s military legacy and cultural identity․ Inspired by British Army traditions, it incorporates uniquely Canadian elements, symbolizing the country’s evolution․ The uniform connects cadets to the history of the Canadian Armed Forces, fostering pride and a sense of continuity with past generations who served․

Wearing the Uniform with Pride

Wearing the Canadian Army Cadet uniform with pride involves respect, adherence to standards, and meticulous care; It reflects personal dedication and honors the program’s legacy․

7․1 Occasions for Uniform Wear

The Canadian Army Cadet uniform is worn during parades, ceremonies, community events, and formal training exercises․ It is also required for inspections, competitions, and other official activities․ Cadets must wear their uniform when representing the program publicly, ensuring it is clean, well-maintained, and properly accessorized․ The uniform symbolizes dedication and pride in the Cadet Program and should be worn with respect and professionalism at all designated events․

7․2 Behavior and Etiquette in Uniform

While in uniform, cadets must maintain proper posture, address seniors respectfully, and avoid inappropriate behavior․ Uniforms should not be worn for personal errands or in casual settings․ Cadets are expected to represent the program with dignity, adhering to CATO 46-01 standards․ This includes no use of electronic devices in public view and ensuring all interactions reflect professionalism and respect for the uniform and the organization it represents․

Compliance and Regulations

Compliance involves adhering to CATO 46-01 and CJCR policies, ensuring safety, inclusion, and proper uniform wear, aligned with training readiness and appearance regulations․

8․1 Training Readiness Standards

Adhering to training readiness standards ensures cadets are properly equipped and dressed for activities, aligning with CATO 46-01 guidelines․ Proper uniform wear enhances safety, functionality, and professionalism, reflecting the cadet’s commitment to the program’s values and operational requirements․

8․2 Consequences of Non-Compliance

Failure to adhere to uniform standards may result in administrative or disciplinary actions, impacting a cadet’s participation in activities․ Non-compliance can compromise safety, professionalism, and team cohesion, reflecting poorly on the individual and the program․ Ensuring proper uniform wear is essential to maintaining training readiness and upholding the standards of the Royal Canadian Army Cadets․

Thank you for following this guide․ Proper uniform wear reflects pride, discipline, and commitment․ By adhering to these standards, cadets honor the Royal Canadian Army Cadet Program․

9․1 Final Tips for Cadets

Always adhere to CATO 46-01 standards and ensure your uniform is clean, well-maintained, and worn with pride․ Pay attention to proper fit and alignment of insignia․ Inspect your uniform before events to avoid discrepancies․ Seek guidance from instructors if unsure about dress standards․ Remember, your uniform represents the Royal Canadian Army Cadet Program and its legacy․ Take pride in your appearance and behavior while in uniform․

9․2 Resources for Further Guidance

For detailed guidance, cadets should refer to CATO 46-01 and the CJCR Dress Instructions․ Additional resources include the Cadet and Junior Canadian Rangers (CJCR) policies, official cadet handbooks, and instructional guides provided by local units․ Cadets are encouraged to consult their instructors for clarification on uniform standards and maintenance․ Online platforms and official military websites also offer supplementary information to ensure compliance with dress regulations․

Byvelma

armstrong ultra sx 80 furnace manual pdf

Welcome to the Armstrong Ultra SX 80 Furnace Manual‚ your essential guide for optimal performance‚ safety‚ and efficiency. This manual provides detailed instructions for installation‚ operation‚ and maintenance‚ ensuring your furnace runs smoothly and reliably. Discover key features‚ troubleshooting tips‚ and maintenance schedules to maximize heating efficiency and extend system lifespan. Refer to this guide for a comprehensive understanding of your furnace’s functionality and care.

Overview of the Manual and Its Importance

The Armstrong Ultra SX 80 Furnace Manual is a comprehensive guide designed to help users understand and maintain their heating system effectively. It covers essential aspects such as installation‚ operation‚ troubleshooting‚ and regular maintenance‚ ensuring optimal performance and safety. This manual is crucial for homeowners to familiarize themselves with the furnace’s components‚ features‚ and best practices for energy efficiency. By following the instructions‚ users can address common issues‚ reduce energy costs‚ and extend the lifespan of their furnace. Keeping this manual accessible ensures quick reference for DIY fixes and professional interventions when needed.

Locating Your Armstrong Ultra SX 80 Furnace Manual

The Armstrong Ultra SX 80 Furnace Manual can be found in the product packaging or downloaded as a PDF from Armstrong’s official website. Ensure you have easy access for future reference.

Where to Find Physical and Digital Copies

Your Armstrong Ultra SX 80 Furnace Manual is typically included in the product packaging upon purchase. For digital access‚ visit Armstrong’s official website‚ where you can download the PDF version directly. Additionally‚ authorized dealers and retailers often provide digital copies or can direct you to the appropriate resources. If you no longer have the physical manual‚ search online for “Armstrong Ultra SX 80 Furnace Manual PDF” to find downloadable versions on trusted platforms like ManualsLib or ManualsOnline. Ensure you verify the source for authenticity to avoid incorrect or outdated information.

Understanding Your Furnace’s Key Components

Welcome to understanding your Armstrong Ultra SX 80 Furnace. Key components include the heat exchanger‚ blower motor‚ and control board. The heat exchanger converts gas combustion into heat‚ while the blower motor circulates warm air. The control board manages system operations‚ ensuring efficient and safe heating. These components work together to provide reliable and efficient home heating‚ making your furnace a vital part of your home’s comfort system. Regular maintenance of these parts ensures optimal performance and longevity.

Breakdown of Main Parts and Their Functions

Your Armstrong Ultra SX 80 Furnace consists of several essential components‚ each serving a critical role in its operation. The heat exchanger transfers heat from combustion gases to the air‚ ensuring warm air circulation. The blower motor propels air through the ductwork‚ distributing heat evenly. The control board acts as the system’s brain‚ managing startup‚ operation‚ and safety features. The inducer motor vents combustion gases safely outside‚ while the gas valve regulates fuel flow for ignition. These parts work together to deliver efficient and reliable heating‚ ensuring your home stays comfortable while maintaining safety and energy efficiency. Understanding their functions helps in troubleshooting and maintaining your furnace effectively.

Operating Your Armstrong Ultra SX 80 Furnace

Start by ensuring the thermostat is set to “heat.” Turn the power on and check the ignition. Monitor the burners for proper lighting. Adjust the temperature as needed using the thermostat. For shutdown‚ switch the thermostat to “off” and ensure all components cool down. Regularly check filters and vents for optimal performance. Follow the manual’s guidelines for safe and efficient operation.

Step-by-Step Instructions for Startup‚ Shutdown‚ and Temperature Adjustment

To start your Armstrong Ultra SX 80 Furnace‚ ensure the power is on and the thermostat is set to “heat.” Check that the area around the furnace is clear of obstructions. Press the ignition button and listen for the burner to light. Once lit‚ monitor the flames to ensure they burn steadily and evenly. For shutdown‚ turn the thermostat to “off” and allow the system to cool completely before switching off the power. To adjust the temperature‚ use the thermostat to set your desired heating level. Always refer to the manual for specific instructions tailored to your model. Regularly check and clean filters to maintain efficiency and performance.

Troubleshooting Common Issues

Identify and resolve frequent problems with your Armstrong Ultra SX 80 Furnace‚ such as ignition failures or intermittent operation. Check for dirty filters‚ verify gas supply‚ and ensure proper ventilation. Refer to the manual for DIY fixes and professional intervention when necessary to maintain efficiency and safety.

Identifying and Resolving Frequent Problems

Common issues with the Armstrong Ultra SX 80 Furnace include ignition failures‚ intermittent operation‚ and error codes. Check for dirty air filters‚ blocked vents‚ or a malfunctioning igniter. Ensure the gas supply is stable and verify proper ventilation. If the furnace shuts off frequently‚ inspect the flame sensor or pressure switch. For error codes‚ consult the manual for specific solutions. Regularly cleaning components and ensuring proper installation can prevent many issues. If problems persist‚ contact a certified technician to avoid further complications. Always refer to the manual for detailed troubleshooting steps and safety guidelines to maintain efficiency and reliability.

Armstrong Ultra SX 80 Furnace Parts Diagram

The Armstrong Ultra SX 80 Furnace Parts Diagram provides a clear visual representation of the furnace’s layout and key components‚ aiding in maintenance and repairs. Key components include the inducer motor‚ heat exchanger‚ blower assembly‚ and control board‚ which are essential for proper functionality.

Overview of Key Components and Their Layout

The Armstrong Ultra SX 80 Furnace Parts Diagram highlights essential components like the heat exchanger‚ blower motor‚ control board‚ gas valve‚ and inducer motor. These parts are strategically positioned to ensure efficient airflow‚ combustion‚ and system control. The heat exchanger is central‚ transferring heat to the air while isolating combustion gases. The blower motor‚ located near the furnace’s base‚ circulates heated air through ducts. The control board‚ often mounted on the furnace’s exterior‚ manages operational settings and safety features. The gas valve and inducer motor are positioned near the burner assembly‚ facilitating combustion and venting processes. Understanding this layout aids in troubleshooting and maintenance‚ ensuring optimal performance and safety.

Maintenance and Care Tips

Regularly clean filters‚ inspect venting systems‚ and replace worn parts. Schedule annual professional tune-ups to ensure efficiency and safety. Always refer to the manual for specific instructions.

Regular Maintenance for Optimal Performance

Regular maintenance is crucial for the Armstrong Ultra SX 80 furnace to operate efficiently and safely. Clean or replace air filters monthly to ensure proper airflow and prevent strain on the system. Inspect the venting system annually for blockages or damage‚ ensuring it’s clear to avoid carbon monoxide risks. Check the blower motor and belts for wear and tear‚ replacing them as needed. Schedule professional tune-ups yearly to inspect ignition systems‚ heat exchangers‚ and gas valves. Lubricate moving parts annually to reduce friction and noise. Refer to the manual for detailed steps and safety precautions to maintain optimal performance and extend the furnace’s lifespan.

Common Repair and Replacement Scenarios

Common repairs include replacing the ignitor‚ flame sensor‚ or gas valve. DIY fixes are possible for minor issues‚ but complex problems require professional expertise to ensure safety and efficiency.

DIY Fixes and When to Call a Professional

For minor issues like faulty ignition or sensor problems‚ DIY fixes such as cleaning the flame sensor or replacing the ignitor can resolve the problem. However‚ complex issues like internal component failures or gas valve malfunctions require professional expertise. Always refer to your Armstrong Ultra SX 80 furnace manual for guidance. DIY repairs should only be attempted if you are confident in your abilities and safety. For critical system failures or persistent problems‚ contact a certified HVAC technician to ensure proper repair and avoid potential safety hazards. Regular maintenance can prevent many common issues‚ but know when to seek professional help to maintain efficiency and safety.

Accessing Official Armstrong Literature

Access official Armstrong Ultra SX 80 furnace manuals‚ brochures‚ and technical specifications on Armstrong’s website. These resources provide detailed installation‚ operation‚ and troubleshooting guides in PDF format for easy reference.

Manuals‚ Brochures‚ and Technical Specifications

Access official Armstrong Ultra SX 80 furnace manuals‚ brochures‚ and technical specifications on Armstrong’s website. These resources provide essential information for installation‚ operation‚ and maintenance. Manuals detail safety guidelines‚ operating instructions‚ and troubleshooting tips‚ while brochures offer an overview of features and benefits. Technical specifications ensure compatibility and proper installation. Downloadable in PDF format‚ these documents are readily available for easy reference‚ helping homeowners and technicians maintain optimal furnace performance and address any issues efficiently.

Byvelma

dental instruments pictures and names pdf

A comprehensive guide to dental instruments, featuring detailed pictures and names, aids professionals and students in identifying tools essential for various dental procedures and practices.

Overview of Dental Instruments

Dental instruments are specialized tools used in various dental procedures, including diagnostics, surgery, restoration, and prevention. They range from basic handheld devices like mirrors and probes to complex equipment like drills and ultrasonic scalers. A dental instruments pictures and names pdf resource provides visual and textual identification, aiding learning and professional practice.

Importance of Knowing Dental Tools

Understanding dental instruments is crucial for effective diagnosis, treatment, and patient safety. Familiarity with tools enhances procedural efficiency and accuracy. A dental instruments pictures and names pdf serves as a valuable resource, aiding professionals and students in identifying and mastering the use of essential equipment for optimal dental care outcomes.

Classification of Dental Instruments

Dental instruments are categorized into diagnostic, surgical, restorative, and preventive tools, each serving specific functions. A dental instruments pictures and names pdf helps organize and identify these essential tools.

Diagnostic Instruments

Diagnostic instruments, such as mouth mirrors, explorers, and probes, are essential for examining patients and identifying issues like cavities or periodontal pockets. A dental instruments pictures and names pdf provides visual and textual identification, helping professionals and students recognize these tools and their roles in clinical diagnostics.

Surgical Instruments

Surgical instruments, including forceps, elevators, and periosteal elevators, are vital for procedures like extractions and implants. A dental instruments pictures and names pdf offers detailed visuals and descriptions, enabling professionals to accurately identify and utilize these tools for precise surgical interventions and effective patient care.

Restorative Instruments

Restorative instruments, such as amalgam carriers and composite filling tools, are essential for procedures like fillings and crowns. A dental instruments pictures and names pdf provides clear images and names, helping dentists and students identify and use these tools effectively for precise restorative dental work and achieving optimal patient outcomes.

Preventive Instruments

Preventive instruments, such as ultrasonic scalers and fluoride applicators, are crucial for maintaining oral hygiene and preventing conditions like tooth decay and gum disease. A dental instruments pictures and names pdf guide helps identify these tools, ensuring proper use in routine cleanings and preventive care to promote long-term oral health and patient well-being.

Dental Instruments in Surgical Procedures

A dental instruments pictures and names pdf guide outlines essential tools like forceps, elevators, and drills, aiding professionals in identifying and understanding their use in surgical tasks effectively.

Forceps and Elevators

Dental forceps and elevators are crucial for surgical procedures, aiding in tooth extraction and bone handling. The dental instruments pictures and names pdf provides visual guides, naming each tool, such as dental forceps and periosteal elevators, ensuring accurate identification and use in various surgical tasks efficiently.

Surgical Burs and Drills

Surgical burs and drills are essential for precise bone shaping and tissue removal. The dental instruments pictures and names pdf details various types, such as diamond and carbide burs, and their specialized uses in surgical procedures, ensuring clear identification and proper application in dental operations.

Periosteal Elevators

Periosteal elevators are surgical tools used to carefully lift and retract the periosteum, a fibrous membrane covering bones. The dental instruments pictures and names pdf highlights various types, such as straight and curved elevators, providing clear visuals and descriptions for proper identification and use in dental surgical procedures.

Essential Dental Diagnostic Tools

Dental diagnostic tools, such as X-ray machines and intraoral cameras, are crucial for accurate patient assessments. A dental instruments pictures and names pdf provides visual guides to identify and understand these tools.

Dental X-ray Machines

Dental X-ray machines are essential for diagnosing oral health issues, providing detailed images of teeth and gums. A dental instruments pictures and names pdf guide includes specifications, functionalities, and brand recommendations, helping professionals identify and select the right X-ray equipment for accurate patient assessments and effective treatment planning in modern dentistry.

Intraoral Cameras

Intraoral cameras capture high-quality images of the mouth, aiding in precise diagnoses and patient education. A dental instruments pictures and names pdf guide highlights their features, such as LED lighting and high-resolution imaging, ensuring professionals can identify and utilize these tools effectively for accurate dental assessments and enhanced patient communication.

Explorers and Probes

Explorers and probes are essential tools for diagnosing dental conditions, such as detecting caries or measuring pocket depths. A dental instruments pictures and names pdf guide provides visual identification, helping professionals and students recognize and use these instruments effectively in clinical and educational settings for accurate assessments and proper patient care.

Restorative Dental Instruments

Restorative dental instruments, including amalgam, composite tools, and polishing devices, are crucial for repairing teeth. A dental instruments pictures and names pdf guide aids in identifying and understanding these tools for effective dental restoration.

Amalgam and Composite Instruments

Amalgam and composite instruments are essential for restorative dentistry, used in filling and repairing teeth. These tools include amalgam carriers, condensers, and composite resin molders. A dental instruments pictures and names pdf guide provides clear visuals and descriptions, helping professionals and students identify and understand these instruments for precise restorations.

Crowns and Bridges Tools

Crowns and bridges tools are specialized instruments for prosthetic dentistry, used to prepare and place dental restorations. These include crown removers, impression trays, and polishing wheels. A dental instruments pictures and names pdf guide provides detailed visuals, helping professionals identify tools like crimpers and acrylic trimmers for precise crown and bridge procedures.

Polishing and Finishing Tools

Polishing and finishing tools are essential for smoothing dental surfaces and enhancing restoration aesthetics. These include polishing burs, wheels, brushes, and abrasive pastes. A dental instruments pictures and names pdf guide helps identify tools like diamond burs and polishing disks, ensuring precise surface finishing in clinical and laboratory settings.

Dental Hygiene and Preventive Instruments

Dental hygiene tools, such as ultrasonic scalers and hand instruments, are crucial for removing plaque and tartar, ensuring preventive care. A dental instruments pictures and names pdf guide helps identify these tools, aiding professionals in maintaining oral health through effective cleaning and preventive treatments.

Ultrasonic Scalers

Ultrasonic scalers are essential tools for dental hygiene, using high-frequency vibrations to remove plaque and tartar. A dental instruments pictures and names pdf guide provides clear visuals and descriptions, helping professionals identify these devices. They are crucial for preventive care, ensuring effective cleaning and maintaining oral health through advanced technology and precision.

Hand Instruments for Scaling

Hand instruments for scaling are manual tools used to remove plaque and tartar. A dental instruments pictures and names pdf guide details curettes and scalers, highlighting their stainless steel construction and specific uses in periodontal pockets. These tools are essential for precise, manual cleaning, ensuring effective oral hygiene and preventive dental care.

Fluoride Application Tools

Fluoride application tools include trays, brushes, and applicator tips. A dental instruments pictures and names pdf guide identifies these tools, detailing their use in preventive dental care. They are designed to apply fluoride gels or varnishes, promoting enamel strength and cavity prevention, essential for maintaining oral health and hygiene.

Specialized Dental Instruments

Specialized dental instruments encompass a variety of advanced tools for specific dental disciplines. A dental instruments pictures and names pdf guide helps identify and categorize them, ensuring precision in complex procedures. These tools are essential for modern dental practices, offering detailed insights through high-quality images and descriptions.

Orthodontic Instruments

Orthodontic instruments are specialized tools used to correct misalignments and improve dental structure. Common instruments include ligature cutters, archwire benders, and pliers. A dental instruments pictures and names pdf provides visual and descriptive guidance, helping professionals identify and master these tools for precise orthodontic procedures and treatments.

Implantology Instruments

Implantology instruments are crucial for dental implant placement and related surgeries. Key tools include drills, bone mills, and surgical guides; A dental instruments pictures and names pdf offers detailed visuals and descriptions, aiding professionals in identifying and utilizing these specialized instruments for precise implant placement and osseointegration procedures.

Endodontic Instruments

Endodontic instruments are specialized tools used in root canal treatments to remove infected pulp and prepare the canal for filling. Common instruments include files, reamers, and obturation tools. A dental instruments pictures and names pdf provides clear visuals and descriptions, helping professionals and students identify and master these essential tools for successful endodontic procedures.

Dental Instruments Pictures and Names

A dental instruments pictures and names pdf offers high-quality images and detailed descriptions, aiding professionals and students in identifying and understanding the use of essential dental tools.

Visual Identification Guide

A visual identification guide provides high-quality images and detailed descriptions of dental instruments, enabling quick and accurate recognition. It includes photos of tools like forceps, elevators, and ultrasonic scalers, along with their names and functions, aiding professionals and students in easy identification and understanding of essential dental equipment.

Matching Names to Pictures

This section provides a structured list of dental instruments, pairing each tool’s name with its corresponding image. Detailed descriptions and numbered visuals help users match names like forceps, elevators, and scalers to their pictures, enhancing understanding and identification skills for dental professionals and students alike.

PDF Resources for Learning

Detailed PDF guides provide comprehensive lists of dental instruments, including names, pictures, and descriptions. These resources are invaluable for students and professionals, offering visual identification and organizational tools to enhance learning and clinical practice. They cover essential equipment across various dental specialties, ensuring a thorough understanding of instruments used in modern dentistry.

Setting Up a Dental Clinic

Setting up a dental clinic requires essential instruments, proper organization, and sterility. Referencing PDF guides helps in selecting the right tools and ensuring efficient workspace setup.

Essential Equipment List

  • Dental chair and X-ray machine for diagnostics.
  • Drills, forceps, and surgical burs for procedures.
  • Hand instruments for scaling and polishing.
  • Ultrasonic scalers for hygiene practices.
  • Periosteal elevators and explorers for precise examinations.

Brands and Suppliers

Trusted brands like Satlec and Wellcare Surgicals provide high-quality dental instruments. Suppliers play a crucial role in ensuring the reliability and durability of tools. Reputable brands offer comprehensive product ranges, from diagnostic to surgical tools, catering to diverse dental needs. Choosing the right supplier enhances clinical efficiency and patient care outcomes.

Clinic Setup and Organization

Organizing a dental clinic involves creating functional zones for treatment, sterilization, and storage. Essential instruments, such as mouth mirrors and trays, should be easily accessible. A well-planned layout enhances efficiency, ensuring seamless patient care. Visual guides and PDF resources help in identifying and arranging tools systematically, optimizing clinic workflow and productivity.

Maintenance and Sterilization

Proper cleaning and sterilization of dental instruments are crucial for patient safety. Regular maintenance ensures longevity, while following safety protocols prevents contamination and maintains instrument functionality.

Cleaning and Sterilizing Instruments

Cleaning and sterilizing dental instruments are critical for preventing contamination and ensuring patient safety. Instruments must be thoroughly cleaned before sterilization, using methods like ultrasonic cleaners or manual scrubbing. Autoclaving is a common sterilization technique, while chemical disinfection may be used for heat-sensitive tools. Proper protocols ensure instrument longevity and effectiveness.

Instrument Longevity Tips

To extend the life of dental instruments, proper cleaning and sterilization are essential. Store instruments in dry, protective cases to prevent rust. Avoid using abrasive materials that can damage surfaces. Regular maintenance, such as sharpening cutting tools, ensures optimal performance. Following manufacturer guidelines and handling instruments with care can significantly prolong their usability.

Safety Protocols

Adhering to safety protocols is crucial when handling dental instruments. Always wear protective gear like gloves and masks. Ensure proper sterilization before and after use to prevent cross-contamination. Handle sharp instruments with care to avoid injuries. Follow manufacturer guidelines for equipment operation and maintain a clean, organized workspace to enhance safety standards.

Dental instruments are vital tools for effective oral care, with resources like PDF guides providing essential names and pictures for identification and proper utilization in dental practices.

Dental instruments are categorized into diagnostic, surgical, restorative, and preventive tools. PDF resources provide detailed names, pictures, and functions, aiding professionals and students in identifying and utilizing equipment effectively for various dental procedures and maintaining high standards of oral care and education.

Future of Dental Instrumentation

Dental instrumentation is evolving with advancements in technology and materials. AI-driven tools, 3D printing, and eco-friendly designs are reshaping the industry. Future instruments will prioritize efficiency, precision, and sustainability, enhancing patient care and streamlining procedures for dental professionals. Digital integration and innovative manufacturing will drive the next generation of dental tools.

Final Thoughts

Dental instruments, supported by detailed pictures and names in PDF guides, are indispensable for modern dentistry. These resources enhance learning, ensure accurate identification, and promote effective use of tools, ultimately improving patient care. They serve as invaluable references for professionals and students, fostering continuous improvement in dental practices and education.

Byvelma

aqa a level psychology textbook pdf

The AQA A Level Psychology Textbook is a comprehensive resource approved by AQA, written by leading experts like Cara Flanagan, Matt Jarvis, and Rob Liddle.

It covers the latest 2023 specifications, ensuring students engage deeply with the curriculum through clear explanations and practice questions, making it an essential tool for exam success.

1.1 Overview of the AQA A Level Psychology Course

The AQA A Level Psychology course introduces students to core areas of psychology, including research methods, biological, cognitive, social, and developmental psychology. Designed to align with AQA specifications, it emphasizes critical thinking, practical applications, and theoretical knowledge. The course structure promotes deep understanding, preparing students for rigorous exams and fostering a lifelong interest in psychological concepts and research methodologies.

1.2 Importance of Using the AQA Textbook for Exam Preparation

The AQA A Level Psychology textbook is crucial for exam preparation due to its alignment with the latest specifications. It provides detailed explanations, practice questions, and exam-style tasks, helping students familiarize themselves with the exam format. Regular use enhances understanding, retention, and confidence, ensuring students are thoroughly prepared to achieve their best in their A Level Psychology exams.

Key Features of the AQA A Level Psychology Textbook

The AQA A Level Psychology textbook is approved by AQA, covering the latest specifications with comprehensive content, practice questions, and exam-style tasks to enhance learning and preparation.

2.1 Structure and Content of the Textbook

The AQA A Level Psychology textbook is meticulously structured to align with the latest specifications, offering detailed coverage of core topics like research methods, biological psychology, and social psychology. Each chapter includes clear explanations, practical examples, and revision tips, ensuring a comprehensive understanding of the subject matter. The textbook is divided into sections that mirror the exam syllabus, making it easy for students to navigate and study effectively.

2.2 Practice Questions and Exam-Style Tasks

The textbook includes a wide range of practice questions and exam-style tasks at the end of each topic, allowing students to test their understanding and prepare effectively for exams. These questions cover the 2023 exam questions and are designed to help students apply their knowledge to real exam scenarios, ensuring they are well-prepared for assessment;

Core Topics Covered in the Textbook

The textbook covers core topics such as research methods, biological psychology, social psychology, cognitive psychology, and developmental psychology, aligning with the latest AQA specifications and including practice questions.

3.1 Research Methods in Psychology

The textbook thoroughly explains research methods in psychology, including experimental designs, correlation studies, and qualitative approaches. It provides detailed guidance on data analysis, ethical considerations, and research report writing, ensuring students grasp essential methodologies for AQA A Level Psychology exams. Practice questions reinforce understanding, helping students apply concepts effectively in exam scenarios.

3.2 Biological Psychology

The textbook explores biological psychology, focusing on neural structures, hormones, and brain functions. It delves into biological explanations of behavior, mental processes, and disorders, providing detailed insights into the nervous system and neurotransmitters. Practical examples and diagrams enhance understanding, while practice questions help students apply biological concepts effectively in AQA A Level Psychology exams.

3.3 Social Psychology

The textbook thoroughly covers social psychology, exploring key concepts like conformity, obedience, and social norms. It examines how group behavior influences individuals and discusses real-world applications of social psychological theories. Practice questions and case studies help students critically analyze topics, preparing them for AQA A Level Psychology exams with confidence and a deep understanding of human behavior.

3.4 Cognitive Psychology

The textbook delves into cognitive psychology, focusing on memory, perception, and problem-solving. It explores theories like the multi-store model of memory and the cognitive approach to treating mental health issues. Students gain insights into how cognitive processes shape behavior, supported by practical examples and exam-style questions to reinforce their understanding of this core topic in AQA Psychology.

3.5 Developmental Psychology

The textbook explores developmental psychology, focusing on human development across the lifespan. It covers key theories, such as Bowlby’s attachment and Piaget’s cognitive stages, alongside topics like social and gender development. Practical examples, including case studies, help students understand how psychological processes evolve over time, aligning with the AQA specification and enhancing exam preparation.

Additional Resources and Support

The AQA A Level Psychology Textbook offers online companion materials, including a glossary of key terms and additional practice questions, to enhance learning and revision.

Students can access a downloadable PDF version, ensuring flexibility and convenience for studying both at home and on the go.

4.1 Online Companion Materials

The AQA A Level Psychology Textbook is accompanied by online resources, including practice questions, revision guides, and interactive activities, to supplement learning.

These materials, accessible in digital formats, provide students with additional tools to reinforce concepts, revise effectively, and prepare for exams with confidence.

4.2 Glossary and Key Terms

The textbook includes a detailed glossary of key terms, providing clear definitions and explanations for essential psychological concepts.

This resource aids students in understanding complex terminology, enhancing their learning experience and preparation for exams, while also serving as a quick reference guide.

Importance of the Textbook for Exam Success

The textbook aligns with AQA specifications, providing expert-authored content and practice questions, ensuring students are thoroughly prepared for exams with trusted, high-quality resources.

5.1 Alignment with the AQA Specification

The AQA A Level Psychology Textbook is meticulously aligned with the latest AQA specifications, ensuring comprehensive coverage of all required topics and learning objectives for the 2023 and beyond syllabus.

It incorporates practice questions and exam-style tasks, mirroring the format of actual AQA exams, helping students familiarize themselves with the assessment structure and content effectively.

5.2 Author Expertise and Trustworthiness

The AQA A Level Psychology Textbook is authored by Cara Flanagan, Matt Jarvis, and Rob Liddle, who are leading psychologists and educators with extensive experience in AQA specifications.

Their expertise ensures the content is accurate, engaging, and tailored to student needs, making the textbook a reliable resource for exam preparation and understanding complex psychological concepts effectively.

Format and Accessibility

The AQA A Level Psychology Textbook is available in PDF format for easy digital access and can also be purchased in print, ensuring flexibility for all learners.

Its clear layout and digital options make it accessible on multiple devices, catering to diverse learning preferences and needs, while maintaining high-quality content delivery.

6.1 PDF Version Availability

The AQA A Level Psychology Textbook is available as an instant download in PDF format, offering flexibility and convenience for digital learners. This version covers the latest 2023 specifications in detail, ensuring students have up-to-date content for effective learning and revision. The PDF format allows easy access on multiple devices, making it a popular choice for modern studying needs.

Additionally, the PDF version includes practice questions at the end of each topic, aiding in exam preparation and reinforcing key concepts. Its digital accessibility ensures that students can engage with the material anytime and anywhere, promoting efficient and flexible studying.

6.2 Digital and Print Options

The AQA A Level Psychology Textbook is available in both digital and print formats, catering to diverse student preferences. The digital version offers interactive features and accessibility on multiple devices, while the print edition provides a traditional learning experience. Both formats ensure comprehensive coverage of the curriculum, supporting varied study habits and learning styles effectively.

Students can choose between the formats or use them in combination, enhancing their learning flexibility and engagement with the material. This dual availability ensures that all learners have access to high-quality resources tailored to their individual needs.

Updates and Editions

The AQA A Level Psychology Textbook is updated annually to align with the latest specifications, ensuring relevance for 2025 and 2026 exams with 2023 updates included.

7.1 Latest Specification Updates (2023 and Beyond)

The 2023 updates to the AQA A Level Psychology Textbook include revised content to reflect changes in the curriculum, ensuring students are well-prepared for exams in 2025 and beyond. The textbook now incorporates new research methodologies and updated case studies, aligning closely with the AQA specification to provide a comprehensive learning experience. Additionally, practice questions have been refreshed to mirror recent exam formats, enhancing students’ ability to apply their knowledge effectively.

7.2 Relevance to 2025 and 2026 Exams

The AQA A Level Psychology Textbook is tailored to support students preparing for the 2025 and 2026 exams. Updated with the latest 2023 specification, it includes relevant practice questions and detailed content aligned with upcoming exam formats. The textbook ensures students are equipped with the knowledge and skills needed to excel in their 2025 and 2026 assessments, reflecting AQA’s curriculum updates.

Author Contributions

The textbook is authored by Cara Flanagan, Matt Jarvis, and Rob Liddle, renowned psychology experts. Their contributions ensure high-quality, trustworthy content aligned with AQA specifications, benefiting students.

8.1 Leading Psychology Authors

Cara Flanagan, Matt Jarvis, and Rob Liddle are prominent psychology experts. Their expertise and AQA approval ensure the textbook’s accuracy and relevance, making it a trusted resource for students. Flanagan’s extensive experience in psychology education, combined with Jarvis’s and Liddle’s contributions, provides a comprehensive understanding of the subject, aligning perfectly with the AQA curriculum requirements and exam preparation needs.

8.2 Cara Flanagan, Matt Jarvis, and Rob Liddle

Cara Flanagan, Matt Jarvis, and Rob Liddle are renowned psychology educators. Their collaborative work on the AQA A Level Psychology Textbook ensures it aligns with the latest specifications. Flanagan’s expertise in curriculum design, Jarvis’s exam-focused insights, and Liddle’s teaching experience make the textbook a trusted resource. Together, they provide comprehensive coverage, practice questions, and accessible explanations, aiding students in achieving exam success.

Student Feedback and Reviews

Students praise the textbook for its clear explanations and structured format, making complex concepts accessible. Many highlight its effectiveness in exam preparation and deep understanding of topics.

Reviewers emphasize its trustworthiness, with many recommending it as an essential resource for AQA Psychology studies, particularly for its alignment with the curriculum and practice questions.

9.1 Effectiveness for Learning

The AQA A Level Psychology Textbook is highly regarded for its ability to break down complex concepts into clear, engaging explanations. Students consistently report improved understanding and retention of key topics due to its structured approach and accessible language.

The inclusion of practice questions at the end of each section further enhances learning, allowing students to test their knowledge and prepare effectively for exams. This has made it a trusted resource for achieving academic success in psychology studies.

9.2 Ease of Understanding

The AQA A Level Psychology Textbook is renowned for its clear and accessible layout, making complex psychological concepts easy to grasp. The structured approach ensures that students can navigate through topics seamlessly, with concise explanations that enhance comprehension without overwhelming learners.

Comparison with Other A Level Psychology Resources

The AQA A Level Psychology Textbook stands out for its approval by the exam board, comprehensive coverage of specifications, and inclusion of practice questions, making it a top choice over other resources like CGP or Oxford materials.

10.1 Unique Selling Points

The AQA A Level Psychology Textbook is uniquely approved by AQA, ensuring complete alignment with the specification. Written by renowned authors like Cara Flanagan, Matt Jarvis, and Rob Liddle, it offers trustworthy content tailored to student needs. The textbook includes practice questions at the end of each topic, latest specification updates (2023 and beyond), and is available in PDF and digital formats for easy access, making it a standout resource for A Level Psychology students.

10.2 How It Stands Out

The AQA A Level Psychology Textbook is distinguished by its engaging layout and interactive digital features, making complex concepts accessible. It provides supplementary resources like glossaries and online companions, enhancing learning. The textbook’s clear structure and exam-focused tasks ensure students are well-prepared, setting it apart as a premier study aid for A Level Psychology.

The AQA A Level Psychology Textbook is an essential resource for students, offering comprehensive coverage and expert guidance. Its alignment with the AQA specification ensures focused learning and exam success.

11.2 Recommendations for Students

Students are encouraged to utilize this textbook alongside online resources for a well-rounded understanding of the curriculum and to achieve outstanding exam results.

11.1 Final Thoughts on the Textbook

The AQA A Level Psychology Textbook is a trusted and comprehensive resource that aligns perfectly with the AQA specification. Its clear structure, expert authorship, and inclusion of practice questions make it an invaluable tool for students aiming to excel in their exams. The PDF availability enhances accessibility, ensuring learners can engage with the material anytime, anywhere, making it a cornerstone for successful preparation and understanding of A Level Psychology.

Students are advised to regularly use the AQA A Level Psychology Textbook for structured learning. Utilize the practice questions to test understanding and review the glossary for key terms. The PDF version ensures accessibility, allowing learners to study anytime. Pair the textbook with online resources for a well-rounded preparation. Consistent use will enhance comprehension and confidence, leading to exam success.

Byvelma

personal finance pdf free download

Personal finance is the foundation of financial stability, helping individuals manage money wisely, achieve goals, and secure their future. It includes budgeting, saving, investing, and debt management. Free PDF resources offer valuable tools for learning these essential skills, empowering everyone to take control of their financial well-being effectively.

Why Personal Finance Matters

Personal finance is crucial for achieving financial independence and security. Managing money effectively helps individuals meet daily needs, save for emergencies, and plan for long-term goals like retirement.Poor financial decisions can lead to debt, stress, and limited opportunities. By understanding personal finance, one can make informed choices about earning, saving, and investing, ensuring a stable future. It also empowers individuals to avoid financial pitfalls and build wealth over time. Free PDF resources provide accessible tools for learning these essential skills, making financial literacy attainable for everyone. Mastering personal finance is key to living a secure and fulfilling life, allowing individuals to navigate life’s uncertainties with confidence and achieve their aspirations.

Key Principles of Financial Literacy

Financial literacy revolves around essential principles that guide individuals in managing their money effectively. These include creating a realistic budget, prioritizing emergency savings, and understanding the importance of debt management. Saving and investing are also critical, with strategies like allocating 5-10% of income toward retirement accounts. Living below your means and avoiding unnecessary expenses are fundamental to long-term financial health. Understanding credit scores and loans is another vital aspect, as it impacts major life decisions like buying a home or securing loans. Free PDF resources often emphasize these principles, providing practical tools for implementing them. By mastering these basics, individuals can build a strong financial foundation, reduce stress, and achieve their goals. These principles serve as the cornerstone for making informed decisions and securing a stable financial future.

Top Personal Finance PDFs for Free Download

Discover the best free PDFs on personal finance, offering comprehensive guides on budgeting, saving, investing, and retirement planning. These resources provide practical tools and expert advice to enhance your financial knowledge and skills.

Best Resources for Budgeting and Saving

The best resources for budgeting and saving include free PDF guides that provide step-by-step strategies for managing finances effectively. These resources often feature budgeting templates, savings challenges, and practical tips to help individuals prioritize their spending. Many PDFs focus on the 50/30/20 rule, which allocates 50% of income to necessities, 30% to discretionary spending, and 20% to savings and debt repayment. Additionally, some workbooks offer exercises to identify financial goals, track expenses, and create actionable plans for building an emergency fund. Tools like savings calculators and debt repayment plans are also commonly included, making these resources invaluable for anyone looking to improve their financial health. By leveraging these free PDFs, individuals can gain the knowledge and tools needed to achieve long-term financial stability and security.

Free Workbooks for Managing Debt

Free workbooks for managing debt offer practical strategies to help individuals regain control of their finances. These resources often include step-by-step plans to create a budget, prioritize expenses, and tackle debt systematically. Many workbooks emphasize the importance of understanding the root causes of debt and provide tools to track spending habits. Some popular approaches include the debt snowball method, which focuses on paying off smaller debts first, and the debt avalanche method, which targets high-interest debts. These workbooks also offer tips on negotiating with creditors, improving credit scores, and avoiding common financial pitfalls. By following the structured exercises and plans provided, users can develop a clear roadmap to becoming debt-free and achieving long-term financial health. These free PDFs are invaluable for anyone seeking to overcome debt and build a stronger financial future.

Building a Strong Financial Foundation

Building a strong financial foundation involves mastering essential skills like budgeting, saving, and investing. Free PDF guides provide practical tools to help individuals create a budget, manage debt, and secure their future.

How to Create a Simple Budget

Creating a simple budget is a cornerstone of personal finance. Start by assessing your income and expenses, then categorize them into needs, wants, and savings. Set realistic spending limits for each category and prioritize essential expenses like housing and utilities. Use free PDF workbooks or budgeting templates to streamline the process. Track your spending regularly to ensure you stay on target. Adjust your budget as needed to reflect changes in income or expenses. Automating savings can help you build a financial cushion. Many free resources, such as Dave Ramsey’s budgeting workbook or the Church’s financial planning guide, offer step-by-step instructions and practical tips. By following these steps, you can create a budget that aligns with your financial goals and helps you achieve long-term stability. Remember, consistency and flexibility are key to making your budget effective and sustainable over time.

Strategies for Saving and Investing

Saving and investing are critical for building wealth and securing your financial future. Start by setting clear goals, such as emergencies, retirement, or major purchases. Automate your savings by setting up regular transfers to a dedicated account. Consider investing in retirement accounts like 401(k)s or IRAs to reduce taxes and grow your money over time. Diversify your investments to minimize risk, including stocks, bonds, and mutual funds. Free PDF guides and workbooks, such as those by Dave Ramsey, offer practical tips for creating a savings plan and understanding investment options. Avoid unnecessary expenses and focus on long-term growth. Consistency is key—start small and gradually increase your contributions. Educate yourself on market trends and seek advice from trusted resources to make informed decisions. By combining disciplined saving and strategic investing, you can achieve financial independence and create a lasting legacy.

Advanced Personal Finance Topics

Explore complex strategies like retirement investing, tax optimization, and advanced credit management. Free PDF guides offer insights into maximizing returns and minimizing risks for long-term financial stability and growth.

Investing in Retirement Accounts

Investing in retirement accounts is crucial for securing your financial future. Free PDF guides provide detailed strategies for maximizing contributions to 401(k)s, IRAs, and other retirement vehicles. They often include tips on diversifying investments, understanding tax benefits, and avoiding common pitfalls. Many resources emphasize the importance of starting early to leverage compound interest, ensuring a sustainable income stream in retirement. These workbooks also cover portfolio management, risk assessment, and balancing stocks, bonds, and other assets. Additionally, they offer insights into Roth IRA conversions, employer matching, and long-term care planning. By utilizing these free resources, individuals can make informed decisions to optimize their retirement savings and achieve financial independence. Retirement investing requires careful planning, and these PDFs serve as invaluable tools for creating a tailored strategy that aligns with personal goals and risk tolerance.

Understanding Credit and Loans

Understanding credit and loans is essential for making informed financial decisions. Free PDF guides offer insights into managing credit scores, securing loans, and avoiding debt traps. They explain how to improve creditworthiness, navigate interest rates, and choose the right loan types. These resources also cover strategies for repaying loans efficiently and avoiding high-interest debt. By learning about credit utilization and loan terms, individuals can make smarter financial choices. These workbooks often include practical tips on negotiating loan conditions and understanding the fine print. Additionally, they provide guidance on building a positive credit history and avoiding common pitfalls. Whether you’re applying for a mortgage, personal loan, or student loan, these free resources empower you to manage credit and loans effectively, ensuring financial stability and peace of mind.

Mastering personal finance is a lifelong journey. Free PDF resources provide essential tools and strategies to achieve financial stability. Start your path to prosperity with these valuable guides today.

Final Tips for Financial Success

Achieving financial success begins with education and consistent action. Utilize free PDF resources to gain insights into budgeting, saving, and investing. Start by assessing your financial situation and setting clear goals. Prioritize needs over wants to build savings and reduce debt. Automate your savings and investments to ensure consistency. Educate yourself on retirement planning and understand the importance of emergency funds. Avoid high-interest loans and credit card debt by living within your means. Regularly review and adjust your financial plan to stay on track. Leveraging free workbooks and guides can provide practical steps to regain control of your finances. Remember, financial success is a marathon, not a sprint—stay disciplined and patient for long-term prosperity.

Byvelma

ratchet and clank trophies guide

Ratchet and Clank: Rift Apart features a diverse trophy set, including 1 Platinum, 3 Gold, 7 Silver, and 36 Bronze trophies, rewarding exploration, combat, and completion.

Overview of Trophies in Ratchet and Clank: Rift Apart

Ratchet and Clank: Rift Apart offers a total of 47 trophies, including 1 Platinum, 3 Gold, 7 Silver, and 36 Bronze. These achievements reward players for completing the story, exploring planets, defeating enemies, and mastering combat; Trophies range from story-related milestones to optional challenges, such as defeating boss-like enemies or collecting hidden Spybots. Some trophies require specific actions, like performing trick jumps or interacting with environmental objects. The game’s trophy list encourages replayability and thorough exploration of its vibrant worlds.

Platinum Trophy Guide

Earning the Platinum Trophy in Ratchet and Clank: Rift Apart is straightforward but requires careful attention to specific trophies like Extinction Event on Sargasso.

How to Achieve the Platinum Trophy in Ratchet and Clank: Rift Apart

Earning the Platinum Trophy in Ratchet and Clank: Rift Apart requires obtaining all 47 trophies, including 1 Platinum, 3 Gold, 7 Silver, and 36 Bronze. This involves completing the main story, gathering all collectibles like Spybots, and mastering specific challenges such as defeating the Seekerpede and completing Battleplex challenges. The Extinction Event trophy, which tasks players with killing 5 Grunthors on Sargasso, is particularly notable and requires careful attention. While the journey is straightforward, it demands dedication and a thorough exploration of the game’s content.

Gold, Silver, and Bronze Trophies

Ratchet and Clank: Rift Apart offers 3 Gold, 7 Silver, and 36 Bronze trophies, each rewarding specific achievements, challenges, and milestones in gameplay and exploration.

Breakdown of Trophy Types and Their Requirements

Ratchet and Clank: Rift Apart features a variety of trophies, each with unique requirements. The Platinum trophy is awarded for completing all others, while Gold trophies require significant achievements, such as defeating tough enemies or mastering challenges. Silver trophies are earned through specific in-game accomplishments, like completing levels or finding collectibles. Bronze trophies are the most common, rewarding smaller milestones, such as purchasing weapons or defeating bosses. Hidden trophies are unlocked by discovering secret objectives or completing particular tasks, adding an extra layer of challenge and replayability to the game.

Complete Trophy List

Ratchet and Clank: Rift Apart features 47 trophies in total, including 1 Platinum, 3 Gold, 7 Silver, and 36 Bronze, each with unique unlock requirements.

Full List of 47 Trophies in Ratchet and Clank: Rift Apart

Ratchet and Clank: Rift Apart boasts a total of 47 trophies, divided into 1 Platinum, 3 Gold, 7 Silver, and 36 Bronze. These range from story completion to specific challenges like defeating the Seekerpede or collecting all Spybots. Notable trophies include “Get Separated in Nefarious City” and “Hide N Seekerpede: Defeat the Seekerpede.” Each trophy has unique requirements, such as completing challenges, exploring levels, or mastering weapons. This diverse list ensures players have plenty of goals to strive for, enhancing the game’s replayability and fun factor. Use this list to track your progress and aim for 100% completion.

Notable Trophies

Notable trophies include Get Separated in Nefarious City and Hide N Seekerpede: Defeat the Seekerpede, offering unique challenges and memorable experiences within the game’s trophy set.

Get Separated in Nefarious City

To unlock the Get Separated in Nefarious City trophy, players must wander away from Clank in the chaotic environment of Nefarious City. This trophy is relatively straightforward, with a high completion rate of 76.5%. It encourages exploration and interaction with the game’s dynamic world. The trophy is a fun nod to the teamwork between Ratchet and Clank, highlighting their bond as they navigate challenges. Completing this achievement is a breeze for most players, making it a great early milestone in the trophy hunt.

Hide N Seekerpede: Defeat the Seekerpede

The Hide N Seekerpede trophy requires defeating the Seekerpede, a challenging boss encountered in the game. This trophy has a completion rate of 57.8%, making it moderately difficult. Players must utilize strategic weapon choices, such as the Enforcer or the Negatron Collider, to whittle down the Seekerpede’s health. Dodging its attacks and maintaining distance are crucial to success. Once defeated, the trophy unlocks, rewarding your mastery of this intense battle. This achievement is a standout moment in the game, showcasing the depth of Ratchet and Clank’s combat mechanics.

Missable Trophies

Certain trophies, like the Extinction Event on Sargasso, require specific actions during the story, such as defeating 5 Grunthors, and cannot be revisited post-game.

Trophies That Can Be Missed in the Main Story

Certain trophies, such as Extinction Event on Sargasso, are tied to specific in-game events and cannot be unlocked after completing the main story. These often involve defeating boss-like enemies or completing unique side quests. For example, Feeding Friendsy requires interacting with a character during a limited window in the story. Players must be vigilant to avoid missing these opportunities, as they are not available in post-game playthroughs. Ensure to complete all side content carefully to prevent missing out on key achievements.

Trophy Strategy and Roadmap

Complete the story first on any difficulty, then focus on collecting missables and mop-up activities like Spybots and weapon upgrades to unlock all trophies efficiently.

Step-by-Step Guide to Earning All Trophies

To earn all trophies in Ratchet & Clank: Rift Apart, start by completing the story on any difficulty, ensuring you collect missable trophies along the way. Next, focus on gathering all Spybots and other collectibles, as these are tied to specific achievements. After the story, mop up remaining trophies by completing Battleplex challenges, upgrading weapons, and defeating enemies like the Seekerpede. Use the in-game tracker to monitor your progress and tackle any missed objectives systematically. This structured approach ensures a smooth path to unlocking all 47 trophies, including the Platinum.

Collectibles and Their Role in Trophies

Collectibles like Spybots are essential for unlocking specific trophies. Finding all Spybots across dimensions rewards achievements, making them a key part of your trophy hunt strategy.

How to Find Spybots and Other Collectibles

To locate Spybots and other collectibles in Ratchet & Clank: Rift Apart, thoroughly explore each planet, as they are hidden in various locations. Use weapons like the Tranquillizer to reveal hidden areas. Some Spybots are in plain sight, while others require solving puzzles or completing specific actions. Check your map for collectible indicators, and revisit planets post-story to ensure you’ve found everything. Consistency is key, as missing even one Spybot can prevent unlocking the platinum trophy.

Tips and Tricks for Unlocking Trophies

Complete Battleplex challenges, explore dimensions thoroughly for Spybots, and master weapon upgrades. Use the RYNO for efficient combat and revisit planets post-story for missed collectibles.

Best Practices for Combat, Exploration, and Weapon Usage

Mastering combat, exploration, and weapon usage is key to unlocking trophies. Use the RYNO for high-damage efficiency, and explore dimensions thoroughly to find hidden Spybots. Complete Battleplex challenges to earn rewards and trophies. Upgrade weapons regularly to enhance combat effectiveness. Utilize traversal abilities like the Rift Tether to access hidden areas. Revisit planets post-story to collect missed items and defeat tougher enemies. Experiment with weapon combos to optimize damage output and progress smoothly through the game.

Platinum Trophy Requirements

Earning the Platinum Trophy requires obtaining all 47 trophies, including 1 Platinum, 3 Gold, 7 Silver, and 36 Bronze, showcasing full game completion and mastery.

Detailed Guide to Unlocking the Platinum Trophy

To unlock the Platinum Trophy in Ratchet & Clank: Rift Apart, you must earn all 47 trophies. Start by completing the main story on any difficulty, ensuring you collect missable trophies like “Get Separated in Nefarious City” and “Hide N Seekerpede.” Next, focus on collectibles such as Spybots and completing challenges like Battleplex. Specific trophies like “Extinction Event” require defeating 5 Grunthors on Sargasso. The game is relatively easy, but careful attention is needed for certain achievements. Follow a step-by-step guide to streamline your progress and achieve 100% completion.

Hidden Trophies

Hidden trophies in Ratchet & Clank: Rift Apart include secret achievements like “Planning Some Destruction” and “Aim to Misbehave,” requiring specific actions to unlock without clear instructions.

How to Unlock Secret Trophies in the Game

To unlock hidden trophies in Ratchet & Clank: Rift Apart, players must complete specific, often unconventional tasks. For example, the trophy “Planning Some Destruction” is earned by collecting a Spybot, while “Aim to Misbehave” requires acquiring the RYNO weapon. Some hidden trophies involve interacting with environmental objects, like jukeboxes, or completing unique side quests. These secret achievements are not listed in the main trophy menu, making them challenging to discover without guidance. They add an extra layer of fun and replayability to the game.

Congratulations on completing your trophy journey in Ratchet & Clank: Rift Apart! This game offers a fun and creative path to the Platinum, with its engaging story and humor. Keep exploring and enjoying the galaxy!

Final Tips and Encouragement for Completing the Trophy Set

Stay persistent and enjoy the journey! Trophy hunting in Ratchet & Clank: Rift Apart is a fun challenge. Use guides for tricky trophies like missables or hidden ones. Explore every planet thoroughly and don’t hesitate to replay levels for missed collectibles. The game’s humor and creativity make the grind enjoyable. Remember, the Platinum is a great reward for your dedication. Good luck, and have fun traversing the galaxy with Ratchet and Rivet!

Byvelma

dometic air conditioner manual pdf

Welcome to the Dometic Air Conditioner Manual PDF, your comprehensive guide to understanding, installing, and maintaining your Dometic air conditioning system. This manual provides detailed instructions, key features, and essential troubleshooting tips to ensure optimal performance and comfort.

Installation Guide for Dometic Air Conditioners

This guide provides step-by-step instructions for installing Dometic air conditioners, including pre-installation checks, mounting, and electrical connections. Ensure compliance with safety guidelines and technical specifications for optimal performance.

Pre-Installation Checks and Requirements

Before installing your Dometic air conditioner, ensure the site meets all requirements. Verify the location is level, well-ventilated, and suitable for the unit’s size and weight. Check the power supply matches the conditioner’s specifications and ensure all necessary tools and materials are available. Review the wiring diagram for compatibility and compliance with local regulations. Confirm the unit’s dimensions fit the installation space and that drainage options are considered. Refer to the manual for model-specific prerequisites, such as additional mounting hardware or electrical components. Always follow safety guidelines to avoid hazards during installation.

Step-by-Step Installation Process

Begin by preparing the installation site, ensuring it is level and clear of obstructions. Mount the air conditioner unit securely, following the manufacturer’s instructions for roof or under-bench models. Connect the air outlet unit and ducting system, ensuring proper sealing to prevent air leaks. Install the control panel and wiring, adhering to the provided wiring diagram. Connect the power supply and test the unit to ensure proper operation. For roof models, ensure the installation kit is used correctly, and for under-bench units, secure the mounting brackets firmly. Refer to the manual for model-specific installation steps and safety precautions to ensure a successful setup.

Key Features of Dometic Air Conditioners

Dometic air conditioners offer multi-zone ventilation, energy-efficient cooling, and quiet operation. They feature smart controls, advanced airflow systems, and compact designs for space-saving installation in RVs and vehicles.

Cooling and Heating Modes

Dometic air conditioners are designed to provide both cooling and heating modes, ensuring year-round comfort. The cooling mode efficiently lowers the temperature, while the heating mode maintains warmth during colder months. These modes are seamlessly integrated into the system, allowing users to switch between them effortlessly. The manual provides clear instructions on how to operate these modes, ensuring optimal performance and energy efficiency. By understanding these features, users can customize their climate control to suit their needs, whether it’s cooling during summer or heating during winter, making Dometic systems a versatile solution for various environments.

Advanced Airflow Management System

The Dometic air conditioner features an advanced airflow management system designed to distribute air evenly and efficiently across all zones. This system ensures consistent cooling and heating, eliminating hot or cold spots. With multiple ventilation outlets, users can direct airflow precisely, enhancing comfort in every area. The manual details how to configure and optimize this system, ensuring maximum performance and energy savings. By leveraging this technology, Dometic air conditioners provide a superior climate control experience, making them ideal for RVs, boats, and other spaces where airflow management is crucial for comfort and efficiency.

Smart Control and Automation Features

Dometic air conditioners come equipped with cutting-edge smart control and automation features, enhancing user convenience and efficiency. The system integrates with smart sensors to monitor temperature, humidity, and airflow, automatically adjusting settings for optimal comfort. The manual highlights the ability to control the unit remotely via a dedicated app, allowing users to pre-cool or heat their space before arrival. Additionally, programmable timers and energy-saving modes ensure tailored operation, reducing energy consumption without compromising comfort. These advanced features make Dometic air conditioners a modern, user-friendly solution for climate control in RVs, boats, and other applications, ensuring a seamless and intelligent cooling experience.

Maintenance and Troubleshooting Tips

Regular maintenance and troubleshooting tips ensure your Dometic air conditioner operates efficiently. The manual guides on cleaning filters, checking refrigerant levels, and resolving common issues promptly.

Regular Maintenance Tasks

Regular maintenance is essential to ensure your Dometic air conditioner operates efficiently and prolongs its lifespan. Clean or replace air filters monthly to maintain airflow and energy efficiency. Inspect and clean the condenser coils regularly to prevent dust buildup, which can reduce performance. Check the refrigerant lines for leaks or damage and ensure all connections are secure. Drain the condensate water tray to prevent mold growth; Lubricate moving parts, such as fan motors, annually. Refer to the manual for specific maintenance schedules and guidelines tailored to your model. Proper upkeep ensures optimal cooling, heating, and overall system reliability.

Common Issues and Solutions

Common issues with Dometic air conditioners include reduced airflow, which may be resolved by cleaning or replacing the air filters. If the unit does not cool properly, check for refrigerant leaks or blocked condenser coils. Address error codes by consulting the manual or resetting the system. Water leakage issues often arise from a clogged drain tray; ensure it is clear and functioning. For noise problems, inspect fan blades for damage or misalignment. Always refer to the troubleshooting section in the manual for specific solutions and ensure all repairs are performed by qualified technicians if necessary. Regular maintenance can prevent many of these issues.

Safety Precautions and Warnings

Always read the manual carefully before installation or operation. Ensure proper installation by a qualified technician to avoid electrical hazards. Keep the unit out of reach of children and avoid exposing it to extreme weather conditions. Never modify or tamper with safety features. Follow all guidelines to prevent accidents and ensure safe operation of your Dometic air conditioner.

Important Safety Guidelines

Always read and follow the safety guidelines in the Dometic Air Conditioner Manual PDF to ensure safe installation, operation, and maintenance. The unit must be installed by a qualified technician to comply with electrical and safety standards. Regularly inspect the electrical connections and ensure proper ventilation to prevent hazards. Keep flammable materials away from the air conditioner. Never operate the unit if it is damaged or malfunctioning. Follow the manual’s instructions for emergency shutdown procedures. Properly ground the system to avoid electrical shocks. Ensure all safety features are intact and functional. By adhering to these guidelines, you can operate your Dometic air conditioner safely and efficiently.

Emergency Shutdown Procedures

In case of an emergency, follow the shutdown procedures outlined in the Dometic Air Conditioner Manual PDF to ensure safety. Immediately turn off the power supply to the unit at the electrical panel. Switch off the thermostat or control panel to halt operation. If the system is malfunctioning or leaking, ventilate the area and avoid direct contact with refrigerants. Do not attempt to restart the unit until a qualified technician has inspected and approved it. Emergency shutdown procedures are crucial to prevent accidents and ensure proper system maintenance. Always refer to the manual for specific instructions tailored to your Dometic air conditioner model.

Wiring Diagrams and Technical Specifications

The Dometic Air Conditioner Manual PDF provides detailed wiring diagrams and technical specifications to ensure proper installation and operation. Refer to these resources for precise electrical connections and compatibility details.

Understanding the Wiring Diagram

The wiring diagram in the Dometic Air Conditioner Manual PDF is a visual guide that illustrates the electrical connections required for proper installation. It shows how components like the compressor, fan motor, and control unit are linked. By following the diagram, users can ensure all wires are connected correctly, avoiding potential electrical issues. The diagram also highlights color-coded wires, making it easier to identify and connect them properly. Always refer to the diagram before starting any installation or repair work. It is essential to understand the symbols and labels used in the diagram to avoid mistakes. This ensures safe and efficient operation of the air conditioner.

Technical Details for Proper Installation

The Dometic Air Conditioner Manual PDF provides essential technical details to ensure a successful installation. It outlines power requirements, voltage specifications, and recommended wiring configurations. Understanding these details is crucial for compatibility and safety. The manual specifies the correct amperage and circuit breakers needed, preventing electrical overload. It also covers the proper sizing of ductwork and ventilation systems for optimal airflow. Additionally, the PDF includes guidelines for mounting the unit securely and leveling it to ensure efficient operation. Adhering to these technical specifications guarantees reliable performance and longevity of the air conditioner. Always consult the manual for model-specific instructions to avoid installation errors.

Model-Specific Information

The Dometic Air Conditioner Manual PDF offers detailed insights into specific models like the FreshJet 2000, highlighting unique features, installation requirements, and operational guidelines tailored to each unit.

Dometic FreshJet 2000 Overview

The Dometic FreshJet 2000 is a high-performance, under-bench air conditioner designed for caravans and motorhomes. It offers efficient cooling and heating modes, ensuring a comfortable environment in all seasons. With its advanced airflow system, it distributes air evenly through multiple ventilation outlets, covering various zones within the vehicle. The unit is compact, making it ideal for installation in tight spaces without compromising on power. The FreshJet 2000 also features smart control options, allowing users to adjust settings effortlessly. Its energy-efficient design and robust construction ensure reliable performance, making it a popular choice among outdoor enthusiasts. This model is well-suited for small to medium-sized vehicles.

Unique Features of the FreshJet Series

The FreshJet Series stands out with its innovative under-bench design, allowing for discreet installation while maximizing interior space. Its advanced three-ventilation-outlet system ensures even air distribution across multiple zones. The series also features smart control technology, enabling seamless adjustments via remote or smartphone app. Designed for energy efficiency, FreshJet models adapt to varying conditions, optimizing performance and reducing power consumption. Their compact size and robust build make them ideal for caravans, motorhomes, and boats. The series is also known for its quiet operation and user-friendly interface, enhancing comfort and convenience for all users. These features make the FreshJet Series a top choice for modern outdoor living solutions.

Byvelma

nikon f6 manual

Welcome to the Nikon F6 manual guide‚ designed to help you master this professional-grade film SLR camera. This comprehensive resource covers everything from basic operations to advanced features‚ ensuring you maximize your camera’s potential. Whether you’re a seasoned photographer or a new user‚ this manual provides essential insights to enhance your shooting experience.

Overview of the Nikon F6 Camera

The Nikon F6 is a professional-grade 35mm film SLR camera designed for precision and durability. It features Nikons advanced 11-area autofocus system (Multi-CAM2000) with 9 cross-type sensors‚ ensuring fast and accurate focusing. The camera supports multiple exposure modes‚ including program‚ aperture priority‚ shutter priority‚ and manual control. With its robust build quality and weather-sealing‚ the F6 is ideal for demanding environments. It also offers versatile metering modes‚ including 3D Color Matrix Metering‚ and compatibility with a wide range of Nikkor lenses and accessories‚ such as the MB-40 battery grip. This camera balances tradition with innovation‚ making it a favorite among film photographers seeking reliability and creative control.

Importance of Reading the Manual

Reading the Nikon F6 manual is essential to fully understanding and utilizing the camera’s advanced features. The F6 is a sophisticated film SLR with complex functions‚ and the manual provides detailed explanations to help users navigate its operation. It covers key aspects like autofocus‚ metering modes‚ and custom settings‚ ensuring you avoid errors and optimize performance. By thoroughly reviewing the manual‚ photographers can explore advanced techniques‚ troubleshoot common issues‚ and maintain the camera’s longevity. This guide is indispensable for both novice and experienced users‚ serving as a comprehensive reference to unlock the F6’s full potential and enhance your photographic experience.

Key Features of the Nikon F6

The Nikon F6 boasts exceptional performance with its advanced 11-area autofocus system‚ featuring 9 cross-type sensors for precise focusing. It offers versatile exposure metering modes‚ including 3D Color Matrix Metering‚ ensuring accurate light readings. The camera supports multiple shooting modes‚ such as aperture priority and manual‚ providing creative control. Additionally‚ it is compatible with a wide range of Nikon lenses and accessories‚ including the MB-40 battery grip for extended functionality. These features make the F6 a powerful tool for professional photographers‚ delivering reliability and high-quality results in various shooting conditions.

Nikon F6 Camera Design and Build Quality

The Nikon F6 features a robust titanium alloy body‚ ensuring exceptional durability and weather sealing‚ making it a reliable choice for professional photographers in harsh conditions.

External Controls and Layout

The Nikon F6 features an intuitive and ergonomic design with a titanium alloy body‚ ensuring durability and weather sealing. The camera’s external controls are logically arranged for easy access‚ with a focus on functionality. The top LCD panel displays essential shooting information‚ while the rear LCD provides menu navigation and shooting data. Dual command dials allow for quick adjustments of aperture and shutter speed. The mode button simplifies switching between shooting modes‚ and the focus selector enables precise control over autofocus areas. The optional MB-40 battery grip enhances handling and extends shooting capabilities. This layout ensures efficient operation‚ catering to both professionals and enthusiasts.

Material and Durability

The Nikon F6 is crafted with premium materials‚ featuring a robust titanium alloy body that ensures exceptional durability and lightweight performance. The weather-sealed design protects against moisture and dust‚ making it ideal for challenging environments. The camera’s build quality is meticulous‚ with precise engineering and attention to detail for long-term reliability. The optional MB-40 battery grip further enhances handling and extends shooting capabilities. These features collectively make the F6 a resilient and dependable tool for professionals and enthusiasts alike‚ capable of withstanding rigorous use while maintaining optimal performance in diverse shooting conditions.

Focusing and Metering Systems

The Nikon F6 features the advanced Multi-CAM2000 autofocus system and precise exposure metering modes‚ ensuring sharp focus and accurate light measurement for exceptional image quality consistently.

Autofocus System (Multi-CAM2000)

The Nikon F6 is equipped with the Multi-CAM2000 autofocus system‚ featuring 11 focus areas‚ including 9 cross-type sensors for enhanced accuracy. This advanced system excels in continuous high-speed shooting‚ delivering rapid and precise subject tracking. The cross-type sensors improve performance in various lighting conditions‚ ensuring sharp focus even in challenging situations. The Multi-CAM2000 system is particularly effective for dynamic subjects‚ capturing fleeting moments with ease; With its refined algorithms‚ the F6 autofocus minimizes focus hunting‚ providing smooth and reliable operation. This robust system is a cornerstone of the F6’s professional-grade performance‚ making it ideal for photographers who demand speed and precision in their work.

Manual Focus Operation

The Nikon F6 offers precise manual focus control‚ ideal for photographers who prefer or require exacting focus accuracy. The camera features a high-visibility optical viewing screen with interchangeable focusing screens‚ including type A (plain) and type E (grid lines)‚ to suit various shooting needs. Manual focus is achieved using the lens focus ring‚ with optional electronic focus confirmation available. The system supports smooth‚ intuitive operation‚ allowing photographers to fine-tune focus with ease. Additionally‚ the F6’s ergonomic design‚ including the optional MB-40 battery grip‚ enhances stability for manual focus shooting. This feature is particularly beneficial for genres like macro photography‚ portraiture‚ or when precise control over focus is critical for creative expression.

Exposure Metering Modes

The Nikon F6 offers advanced exposure metering modes‚ including 3D Color Matrix Metering‚ Center-Weighted Metering‚ and Spot Metering. The 3D Color Matrix Metering system uses 11-area sensors and color information for precise exposure calculation‚ adapting to scenes with complex lighting. Center-Weighted Metering prioritizes the central area‚ ideal for portraits‚ while Spot Metering measures a small section for accurate control in challenging conditions. Customization options‚ such as exposure compensation and bracketing‚ allow photographers to fine-tune results. These modes‚ combined with the camera’s intuitive controls‚ provide flexibility and reliability for achieving optimal exposures in various shooting scenarios.

Shooting Modes and Customization

The Nikon F6 offers Program‚ Aperture Priority‚ Shutter Priority‚ and Manual modes‚ providing versatility for photographers. Custom settings enable personalization for enhanced control and tailored shooting experiences.

Program‚ Aperture Priority‚ Shutter Priority‚ and Manual Modes

The Nikon F6 offers four primary shooting modes‚ each tailored for different photography needs. Program Mode (P) automatically adjusts aperture and shutter speed for quick‚ balanced results. Aperture Priority (A) allows users to set the aperture‚ with the camera adjusting the shutter speed accordingly‚ ideal for controlling depth of field. Shutter Priority (S) lets photographers set the shutter speed to freeze or blur motion‚ with the camera adjusting the aperture. Manual Mode (M) provides full control over both aperture and shutter speed‚ offering creative freedom for precise exposures. These modes cater to both novice and advanced photographers‚ ensuring flexibility and adaptability in various shooting scenarios.

Custom Settings and Personalization

The Nikon F6 allows for extensive customization‚ enabling photographers to tailor the camera to their preferences. Custom settings include options for autofocus behavior‚ exposure compensation‚ and flash control‚ providing precise control over shooting parameters. Users can personalize controls such as button assignments and dial operations‚ enhancing workflow efficiency. The camera also supports optional accessories like the MB-40 battery grip‚ which adds extended functionality and ergonomic advantages. These customization options ensure the F6 adapts seamlessly to individual shooting styles‚ making it a versatile tool for both professionals and enthusiasts. By personalizing settings‚ photographers can optimize their workflow and achieve consistent‚ high-quality results in various shooting conditions.

Accessories and Compatibility

The Nikon F6 is compatible with a wide range of accessories‚ including Speedlights‚ Nikkor lenses‚ and the MB-40 battery grip‚ enhancing functionality and flexibility for photographers.

Compatible Lenses and Accessories

The Nikon F6 supports a broad range of Nikkor lenses‚ including AF‚ AF-D‚ and AF-S models‚ ensuring compatibility with Nikon’s legacy and modern optics. Accessories like the MB-40 battery grip enhance handling and extend shooting capabilities‚ while Speedlights and remote controls add versatility. The camera is also compatible with various focusing screens‚ catering to different photographic needs. This extensive compatibility ensures the F6 remains a versatile tool for photographers‚ allowing seamless integration with a wide array of Nikon accessories to meet specific shooting requirements and enhance overall performance.

Optional Components (e.g.‚ MB-40 Battery Grip)

The Nikon F6 can be enhanced with optional components like the MB-40 Battery Grip‚ which improves ergonomics and extends shooting sessions. This grip supports AA batteries as a backup power source‚ ensuring uninterrupted use. Additional accessories include remote shutter releases‚ wireless controllers‚ and Speedlights‚ which expand the camera’s functionality. These components are designed to integrate seamlessly with the F6‚ offering photographers greater flexibility and convenience. Whether for extended shoots or specialized techniques‚ these optional extras allow users to customize their setup to meet specific needs‚ enhancing the overall photography experience with the Nikon F6.

Troubleshooting and Maintenance

Address common issues like exposure errors or focusing problems with detailed solutions. Regularly clean the camera and lenses to maintain performance. Refer to the manual for specific maintenance tips to ensure optimal functionality and longevity of your Nikon F6.

Common Issues and Solutions

Users of the Nikon F6 often encounter issues such as inaccurate exposure metering‚ mirror lock-up errors‚ or viewfinder condensation. For metering inaccuracies‚ ensure the lens is clean and properly attached. If the mirror locks up‚ check the battery level and ensure the camera is in the correct shooting mode. Condensation in the viewfinder can be resolved by allowing the camera to acclimate to ambient temperature. Additionally‚ regular cleaning of the camera and lenses prevents dust buildup‚ which can interfere with autofocus and image quality. Refer to the manual for detailed solutions to these and other common issues.

Cleaning and Maintenance Tips

Regular cleaning and maintenance are essential to ensure the Nikon F6 operates at its best. Use a soft‚ dry cloth to wipe the camera body and external controls‚ avoiding harsh chemicals. For the viewfinder and mirror chamber‚ employ a microfiber cloth or an anti-static brush to remove dust. Clean lenses with a specialized lens tissue or brush‚ avoiding direct contact with the glass. Check for fungi or mold in the mirror chamber and viewfinder regularly‚ especially in humid environments. Store the camera in a dry‚ cool place to prevent condensation. Refer to the manual for detailed instructions on disassembling and cleaning internal components safely.

The Nikon F6 manual serves as an indispensable guide for unlocking the full potential of this exceptional film SLR camera. By following the instructions and tips outlined‚ you can master its advanced features‚ ensuring optimal performance in various shooting conditions. Whether you’re a professional or an enthusiast‚ the F6’s durability‚ precision‚ and compatibility with Nikon’s extensive accessory range make it a timeless choice. Regular maintenance and proper care will extend the life of your camera‚ allowing you to continue capturing stunning images. Keep this manual handy as a reference‚ and enjoy the creative freedom the Nikon F6 offers in your photographic journey.

Byvelma

thermador ice maker self-test instructions

The Thermador ice maker self-test feature helps identify and diagnose issues efficiently. This guide provides step-by-step instructions to run the test, interpret results, and ensure optimal performance.

1.1 Overview of the Self-Test Feature

The Thermador ice maker self-test feature is a built-in diagnostic tool designed to identify and address potential issues within the appliance. This feature runs a series of automated checks to evaluate the ice maker’s performance, including water flow, temperature settings, and ice production. By initiating the self-test, users can quickly determine if their ice maker is functioning correctly or if maintenance or repairs are needed. The process is user-friendly and provides clear indicators or error codes to guide troubleshooting efforts, ensuring efficient resolution of common problems without requiring advanced technical knowledge.

1.2 Importance of Regular Maintenance

Regular maintenance is crucial for ensuring the longevity and efficiency of your Thermador ice maker. Proper upkeep prevents issues like scale buildup, clogged water lines, and worn-out components, which can disrupt ice production. By performing routine checks and cleaning, you can identify potential problems early, reducing the need for costly repairs. Maintenance also ensures consistent ice quality and hygiene, making it essential for both residential and commercial use. Incorporating the self-test feature into your maintenance routine helps maintain optimal performance and extends the lifespan of your appliance.

Preparing for the Self-Test

Before starting the self-test, ensure the ice maker is turned off, water supply is on, and all components are properly connected for accurate results.

2.1 Gathering Necessary Tools and Information

To prepare for the self-test, gather essential tools like a screwdriver, pen, and notepad. Ensure you have the user manual, as it contains specific instructions. Check for any error codes or symptoms the ice maker has shown. Make a list of the tools and information needed, such as the model number and any recent maintenance history. Having everything ready will ensure a smooth and effective self-test process. This step helps identify potential issues early, saving time during diagnostics.

2.2 Ensuring Proper Installation and Setup

Before initiating the self-test, verify that the Thermador ice maker is correctly installed and set up. Check the water supply lines for leaks and ensure they are securely connected. Confirm that the electrical connections are stable and meet the manufacturer’s specifications. Proper alignment and leveling of the unit are crucial for optimal performance. Refer to the user manual for specific installation requirements. Additionally, ensure the ice maker is turned on and has completed its initial cycle. Any issues in the setup can lead to inaccurate self-test results, so double-checking the installation is essential for reliable diagnostics.

Step-by-Step Self-Test Procedure

The self-test procedure involves initiating the test mode, observing diagnostic indicators, and completing the cycle to identify potential issues. Follow the manufacturer’s instructions carefully for accurate results.

3.1 Initiating the Self-Test Mode

To initiate the self-test mode on your Thermador ice maker, locate the self-test switch, typically found behind the ice maker or near the control panel. Toggle the switch to the “Test” position and wait for the machine to begin the diagnostic cycle. The ice maker will automatically run through a series of tests, including water flow, temperature checks, and ice production monitoring. During this process, observe the indicator lights or display for error codes. Allow the test to complete, ensuring no interruptions, to ensure accurate results and proper diagnosis of any potential issues.

3.2 Observing the Diagnostic Indicators

During the self-test, monitor the ice maker’s diagnostic indicators, such as LED lights or digital displays, to identify potential issues. These indicators will flash or display specific codes to signal errors. Note the sequence or pattern of the lights, as each corresponds to a particular problem, such as low water pressure or faulty sensors. If an error code appears, refer to the user manual or manufacturer’s guide to interpret its meaning. Ensure you record any codes or unusual activity for further troubleshooting or professional assistance. This step is crucial for accurately diagnosing and resolving any malfunctions.

3.3 Completing the Test and Interpreting Results

Once the self-test is complete, the ice maker will exit diagnostic mode and return to normal operation. Review the results displayed on the control panel or indicated by LED sequences. If no issues are detected, the ice maker will resume ice production. If error codes appear, consult the user manual or Thermador’s official documentation to understand their meanings. Address any identified problems by following the recommended troubleshooting steps or contacting a certified technician. Properly interpreting the results ensures your ice maker functions efficiently and reliably, preventing future malfunctions.

Troubleshooting Common Issues

Troubleshooting common issues with your Thermador ice maker involves identifying error codes and addressing them using the user manual or manufacturer guidelines for quick resolution.

4.1 Identifying Error Codes and Their Meanings

Identifying error codes is crucial for diagnosing issues with your Thermador ice maker. Each code, such as E1 or E2, corresponds to specific malfunctions like sensor failures or communication errors. Refer to the user manual for a comprehensive list of codes and their meanings. Understanding these codes allows you to address problems promptly, ensuring your ice maker operates efficiently. If unsure, consult the troubleshooting guide or contact Thermador support for assistance. Regularly checking and resolving error codes helps maintain optimal performance and prevents further complications. Always follow manufacturer guidelines for accurate interpretations and solutions.

4.2 Resolving Common Problems During the Test

During the self-test, common issues like error codes, water supply problems, or sensor malfunctions may arise. If an error code appears, refer to the code list in your manual for specific solutions. Check the water supply line for blockages or leaks and ensure it’s turned on. If the ice maker doesn’t activate, verify the power switch is on. For sensor issues, reset the unit by unplugging it for 30 seconds. Clean sensors gently with a soft cloth if dirty. Addressing these issues promptly ensures the test completes successfully and your ice maker functions properly. If problems persist, contact Thermador support for further assistance.

Post-Test Maintenance and Care

Regular cleaning, sanitizing, and descaling are essential for optimal performance. Check and replace water filters as needed to ensure clean ice production and prevent mineral buildup.

5.1 Cleaning and Sanitizing the Ice Maker

Regular cleaning and sanitizing are crucial for maintaining your Thermador ice maker’s performance and hygiene. Start by turning off and unplugging the unit for safety. Mix a solution of equal parts water and white vinegar, then pour it into the ice maker. Run a cleaning cycle or let it sit for 30 minutes to dissolve mineral buildup. Wipe down all surfaces with a soft cloth, paying attention to the ice bin and dispensers. Rinse thoroughly with clean water to remove any vinegar taste. Check for any remaining mineral deposits and dry the unit completely before restarting. This process ensures fresh, clean ice production and prevents contamination.

5.2 Scheduling Regular Maintenance

Regular maintenance is essential to ensure your Thermador ice maker operates efficiently and consistently produces high-quality ice. Schedule a professional inspection annually to check for wear and tear. Replace water filters every 6-12 months to prevent mineral buildup and impurities. Clean the ice maker every 3-6 months, depending on usage, to remove dust and debris. Mark your calendar to remind yourself of these tasks. Additionally, perform quick checks monthly, such as ensuring proper water flow and inspecting for ice blockages. A well-maintained ice maker will deliver optimal performance and extend its lifespan.

Advanced Diagnostic Techniques

Advanced diagnostics involve using manufacturer guidelines and specialized tools for in-depth analysis. These techniques help identify complex issues, ensuring precise troubleshooting and enhancing overall performance efficiently.

6.1 Using Manufacturer Guidelines for Deep Diagnostics

For advanced troubleshooting, refer to Thermador’s official guidelines, which provide detailed steps for deep diagnostics. These resources often include specific diagnostic modes, error code interpretations, and repair procedures. By following the manufacturer’s instructions, you can identify complex issues such as faulty sensors, malfunctioning valves, or electrical connectivity problems. Ensure to consult the user manual or Thermador’s online support portal for precise guidance. Additionally, these guidelines may recommend specialized tools or techniques to test components like the ice maker’s harvest cycle or water flow systems. Always prioritize safety and manufacturer recommendations when performing advanced diagnostics to avoid further damage or voiding warranties. This approach ensures accurate issue identification and efficient resolution, maintaining your ice maker’s performance and longevity.

6.2 Integrating Additional Diagnostic Tools

Beyond the self-test feature, incorporating additional diagnostic tools can enhance troubleshooting accuracy. Tools like multimeters and water pressure testers help identify issues such as electrical malfunctions or low water flow. Smartphone apps designed for appliance diagnostics can also provide real-time data and guided repair steps. Always consult the Thermador user manual for compatible tools and procedures. These advanced diagnostic methods ensure comprehensive issue detection, enabling precise repairs and maintaining optimal ice maker performance. Regular use of these tools can prevent recurring problems and extend the appliance’s lifespan. Ensure safety and follow manufacturer guidelines to avoid damage or warranty voidance.

When to Call a Professional

If issues persist despite self-testing, contact a certified Thermador technician. Complex problems like electrical faults or internal damage require expert attention to ensure safe and effective repairs.

7.1 Recognizing Symptoms That Require Expert Attention

Certain issues with your Thermador ice maker may indicate the need for professional intervention. These include persistent error codes, complete cessation of ice production, unusual noises, or water leakage. Additionally, if the self-test reveals faults beyond basic troubleshooting, such as electrical malfunctions or internal component failures, it is crucial to seek expert help. Ignoring these symptoms can lead to further damage or safety hazards. Always consult a certified Thermador technician for such advanced problems to ensure proper and safe repairs, maintaining your appliance’s efficiency and longevity.

7.2 Finding Certified Thermador Service Providers

To locate certified Thermador service providers, visit the official Thermador website and use their “Find a Servicer” tool. Enter your location to find nearby authorized technicians. Additionally, check for certifications like AHAM or NASTeC, which ensure expertise in appliance repair. Read online reviews and ask for recommendations to verify credibility. Certified professionals guarantee genuine parts and warranty compliance, ensuring your ice maker is serviced to high standards. This step is crucial for maintaining your appliance’s performance and extending its lifespan.

By following the self-test guide, you ensure your Thermador ice maker operates efficiently. Regular maintenance and timely professional interventions guarantee long-term performance and reliability.

8.1 Summarizing the Self-Test Process

The self-test process for your Thermador ice maker is designed to identify and diagnose issues efficiently; Start by initiating the test mode, typically found in the control panel settings. Observe the diagnostic indicators, such as blinking lights or error codes, which provide insights into potential problems. Once the test concludes, refer to the user manual or manufacturer guidelines to interpret the results. Address any identified issues promptly, whether through troubleshooting or professional assistance. Regular self-testing ensures optimal performance and extends the lifespan of your ice maker. This process is user-friendly and essential for maintaining efficiency.

8.2 Ensuring Optimal Performance Post-Test

After completing the self-test, maintain your Thermador ice maker’s performance by cleaning and sanitizing it regularly. Remove and wash the ice bin, and check for mineral buildup in the water supply lines. Descaling every 3-6 months prevents scaling issues. Schedule routine maintenance to ensure all components function correctly. If the test revealed issues, address them promptly, such as replacing worn parts or adjusting settings. For persistent problems, consult the user manual or contact a certified technician. Proper care ensures consistent ice production and extends the appliance’s lifespan, keeping it running efficiently for years to come.

Byvelma

modine heater manual

Welcome to the Modine Heater Manual; This guide provides essential information for installing‚ operating‚ and maintaining your Modine heater‚ ensuring safety and optimal performance.

1.1 Overview of Modine Heater Products

Modine offers a diverse range of heaters‚ including gas-fired‚ electric‚ and radiant infrared models‚ designed for efficiency and versatility. These products cater to various heating needs‚ from commercial to residential applications. Known for innovative designs‚ Modine heaters provide reliable performance‚ energy efficiency‚ and customizable solutions to suit different spaces and environments.

1.2 Importance of Following the Manual

Following the Modine Heater Manual is crucial for safety‚ compliance‚ and optimal performance. It ensures proper installation‚ operation‚ and maintenance‚ preventing potential hazards and system damage. The manual provides detailed guidelines to meet certifications and standards‚ guaranteeing efficiency and reliability. Adhering to the instructions helps avoid risks‚ prolongs heater lifespan‚ and ensures compliance with environmental and safety regulations.

Installation Guidelines

Proper installation is essential for safe and efficient operation. Follow guidelines for unit location‚ venting‚ and gas connections to ensure compliance with safety standards and optimal performance.

2.1 Key Installation Considerations

Ensure proper installation by following key considerations. Verify unit compatibility with local codes and regulations. Check power supply matches unit requirements. Inspect for damage upon arrival. Ensure correct mounting and leveling. Properly secure the unit to prevent vibration. Follow venting and gas connection guidelines to avoid hazards. Consult local authorities for specific requirements. Adhere to manufacturer’s instructions for safe and efficient operation.

2.2 Unit Location and Mounting Requirements

Mount the Modine heater in a location that ensures optimal performance and safety. Install units at least 7 feet above the floor to prevent damage from moving parts. Ensure the area is well-ventilated and free from flammable materials. Avoid installing near chlorinated or acidic vapors. Secure the unit firmly to prevent vibration. Follow manufacturer guidelines for wall or ceiling mounting to maintain stability and efficiency. Proper placement ensures reliable operation and compliance with safety standards.

2.3 Venting and Gas Connections

Proper venting and gas connections are crucial for safe and efficient operation. Use approved vent materials‚ ensuring correct termination and clearance from combustible materials. Gas connections must be secure‚ with pipe sizes avoiding restrictions. Ensure inlet pressure matches requirements (6-7 W.C. for natural gas‚ 11-14 W.C. for propane). The vent system should allow condensate drainage. Power exhausters‚ if used‚ must be Modine-approved to maintain warranty and safety standards.

Safe Operation and Maintenance

Ensure safe operation by following all safety warnings and performing routine maintenance. Regularly inspect and clean components‚ and address any issues promptly to maintain efficiency and prevent hazards.

3.1 Safety Warnings and Precautions

Always adhere to safety guidelines to prevent accidents. Avoid installing heaters near flammable materials or in areas with corrosive vapors. Ensure proper ventilation to avoid gas leaks and carbon monoxide risks. Keep electrical components dry and avoid overloading circuits. Never touch electrical parts with wet hands or while standing on damp surfaces. Regular inspections are crucial to maintain safety standards and prevent potential hazards. Follow all manufacturer recommendations for safe operation. Proper installation and maintenance by qualified professionals are essential to ensure the heater functions safely and efficiently. Failure to comply with safety precautions can lead to severe injury or property damage. Always refer to the manual for specific safety instructions tailored to your Modine heater model. This will help you identify and mitigate potential risks‚ ensuring a safe and reliable heating experience. By prioritizing safety‚ you can enjoy the benefits of your Modine heater while protecting yourself and your environment. Remember‚ safety should never be compromised when dealing with heating equipment. Stay informed and take all necessary precautions to maintain a safe operating environment.

3.2 Routine Maintenance Tips

Regular maintenance ensures optimal performance and longevity of your Modine heater. Clean or replace air filters monthly to improve airflow and efficiency. Inspect heat exchangers and vents for blockages or damage. Check gas connections for leaks and ensure proper ventilation. Lubricate fan motors annually and replace worn belts. Schedule professional inspections annually to identify and address potential issues early. Keep the unit free from dust and debris to prevent overheating. Always follow the manufacturer’s maintenance schedule to uphold warranty conditions. By maintaining your heater regularly‚ you can enhance its efficiency‚ reduce energy costs‚ and ensure reliable operation during colder months. Proper care also minimizes the risk of unexpected breakdowns‚ providing consistent heating performance. Remember‚ routine maintenance is key to extending the lifespan of your Modine heater. Regular upkeep not only saves money but also ensures your heater operates safely and effectively. Stay proactive with maintenance to enjoy uninterrupted heating comfort. Always refer to your manual for specific maintenance instructions tailored to your model. This will help you perform tasks correctly and safely‚ ensuring your heater continues to perform at its best. Consistent maintenance habits are essential for maximizing the benefits of your Modine heating system. Avoid neglecting routine checks‚ as they are vital for maintaining peak performance and safety standards. Your heater’s longevity and efficiency depend on consistent and thorough maintenance practices. Make it a priority to inspect and service your unit regularly to ensure it runs smoothly throughout the heating season; Regular maintenance also helps in identifying minor issues before they escalate into major repairs‚ saving you time and money in the long run. Always keep your Modine heater well-maintained to enjoy reliable and efficient heating all year round.

Technical Specifications

Explore detailed performance data‚ compatible models‚ and accessories for Modine heaters. Specifications include BTU ratings‚ voltage options‚ and certifications‚ ensuring optimal performance and compliance with safety standards.

4.1 Performance Data and Ratings

Modine heaters offer robust performance with BTU ratings from 30‚000 to 400‚000. They feature high-efficiency designs‚ compatible with natural gas and propane. Ratings include static pressure options‚ motor horsepower‚ and airflow capacities. These specifications ensure optimal heating across various applications‚ from residential to commercial spaces‚ while meeting safety and environmental standards for reliable operation.

4.2 Compatible Models and Accessories

Modine offers a range of compatible models‚ including PD‚ BD‚ and HD series heaters‚ designed for versatility. Accessories like power vented systems‚ controls‚ and nozzles enhance performance. Compatible models cater to diverse heating needs‚ ensuring optimal fit for various spaces. Customizable options and installation kits provide flexibility‚ making Modine heaters adaptable to different environments while maintaining reliability and efficiency.

Troubleshooting Common Issues

Identify and resolve issues like ignition problems or error codes. Check gas supply‚ vent connections‚ and electrical links. Ensure proper maintenance for optimal performance.

5.1 Diagnosing Heater Malfunctions

Identify issues by checking for common problems like ignition failure or error codes. Verify gas supply‚ vent connections‚ and electrical links. Consult the manual’s troubleshooting guide for specific solutions. Ensure proper maintenance and inspect for blockages or damage. Addressing malfunctions promptly prevents further damage and ensures safe‚ efficient operation. Always follow safety guidelines when diagnosing and repairing.

5.2 Resetting and Adjusting Controls

To reset your Modine heater‚ locate the reset button and press it firmly. Adjust controls like gas pressure or ignition settings as needed. Ensure proper ventilation and power supply. Refer to the manual for specific instructions. Always turn off power before making adjustments. Correct settings ensure safe and efficient operation‚ preventing malfunctions and optimizing performance.

Warranty and Customer Support

Modine heaters are backed by a comprehensive warranty. Contact their support at 1-800-828-HEAT (4328) or visit their website for assistance with troubleshooting‚ repairs‚ and warranty claims.

6.1 Understanding Warranty Terms

Modine offers a comprehensive warranty program‚ ensuring coverage for parts and labor. Specific terms vary by product‚ but most include protection against defects in materials and workmanship. The warranty period typically ranges from one to five years‚ depending on the model. Proper installation and maintenance are required to maintain warranty validity. Review the warranty document for detailed terms and conditions.

6.2 Contacting Modine Technical Support

For assistance‚ contact Modine’s dedicated support team at 1-800-828-HEAT (4328). Technical support is available to address installation‚ maintenance‚ and troubleshooting inquiries. Visit their official website for resources‚ manuals‚ and troubleshooting guides. Ensure you have your product model number and serial number ready for efficient service. Modine’s team is committed to providing expert solutions to optimize your heating system’s performance and reliability.

Environmental and Safety Compliance

Modine heaters meet rigorous environmental and safety standards‚ ensuring compliance with certifications like CSA and CEC. They are designed for safe operation in various applications.

7.1 Certifications and Approvals

Modine heaters are certified by the Canadian Standards Association (CSA) and approved by the California Energy Commission (CEC). They comply with environmental and safety standards‚ ensuring operational safety and efficiency in various applications‚ including residential and commercial use.

7.2 Handling Hazardous Materials

When handling hazardous materials related to Modine heaters‚ follow safety guidelines to avoid exposure. Properly dispose of chemicals and wear protective gear. Ensure venting systems are clear of flammable vapors‚ and avoid storing flammable liquids near the unit. Refer to the manual for specific precautions to prevent health risks and environmental contamination.

Downloading the Manual

Access the Modine Heater Manual online by visiting the official Modine website. Digital versions are available for models like PD and HD‚ offering comprehensive guides and troubleshooting tips.

8.1 Accessing Digital Versions

Visit the official Modine website to download digital versions of the manual. Models like PD and HD are available‚ ensuring easy access to installation‚ operation‚ and maintenance instructions. These resources are designed to support optimal use and troubleshooting of your Modine heater‚ providing detailed guides for professionals and users alike.

8.2 Navigating the Manual Online

Navigating the Modine Heater Manual online is straightforward‚ with features like search functions and bookmarks for quick access. Use the table of contents to jump to specific sections‚ such as installation guides or troubleshooting tips. Interactive links and clear menus ensure users can easily find information on models like PD and HD‚ optimizing their experience with the manual.

Specialized Features and Options

Explore Modine’s advanced features‚ including corrosion-resistant models‚ customizable controls‚ and optional accessories. These enhance performance‚ efficiency‚ and adaptability‚ ensuring tailored solutions for diverse heating needs.

9.1 Optional Controls and Upgrades

Modine heaters offer optional controls like ignition controllers and step-down transformers for enhanced functionality. Upgrades such as power vented systems and noise-reducing kits improve efficiency and safety. These upgrades ensure tailored solutions for specific heating needs‚ providing flexibility and reliability.

9.2 Customizing Heater Settings

Modine heaters allow customization of settings for optimal performance. Adjustments include blower speed‚ temperature limits‚ and ignition controls. Refer to the manual for specific instructions on tailoring settings to your space. Customization ensures energy efficiency and comfort while maintaining safety standards. Always follow guidelines to avoid damage or hazards. Proper setup enhances heater reliability and longevity.

This manual provides a comprehensive guide to Modine heaters‚ covering installation‚ operation‚ and maintenance. By following these instructions‚ users can ensure safety‚ efficiency‚ and optimal performance. Always refer to the manual for specific details and troubleshooting tips to maximize heater longevity and functionality.

10.1 Summary of Key Points

This manual provides detailed guidance for Modine heaters‚ emphasizing safety‚ proper installation‚ and routine maintenance. Key points include adhering to safety warnings‚ following installation guidelines‚ and performing regular maintenance to ensure optimal performance. Understanding technical specifications and troubleshooting common issues can enhance heater longevity. Always refer to the manual for specific instructions and contact Modine support for assistance.

10.2 Final Tips for Optimal Heater Performance

  • Always follow Modine’s safety guidelines and installation instructions for reliable operation.
  • Perform routine maintenance‚ such as cleaning filters and checking for wear‚ to ensure efficiency.
  • Ensure proper venting and gas connections to avoid hazards and maintain performance.
  • Monitor heater performance regularly and address issues promptly to prevent malfunctions.
  • Use genuine Modine parts for repairs to guarantee compatibility and longevity.